There’s nothing worse than checking your oil before starting up your generator than having a cocktail of gasoline and oil spilling out from where you just pulled the dipstick. Well, there are certainly worse things, but that’s definitely an inconvenience during a stressful power outage.
But they are two different systems, right? The oil is in the bottom and the gasoline is in a tank that gets combusted and expelled through the exhaust. How do they mix?
I’ve been fixing generators and other small engines for the last 5 years as a side hobby and I enjoy buying cheap engines that people can’t get running and flipping them after I bring them back to life. When it comes to oil that has gasoline in it, I’ve found that there are generally two main reasons and both are relatively easy to fix but one does require buying a new part for probably $25-$50.
As a general rule, a generator will have gas mixed in with the oil in the crankcase if there is a compromised float needle in the carburetor, or if there is a hole in the diaphragm of an external fuel pump.
I’ll quickly guide you through what exactly causes these problems and how to fix them so you can get your lights back on and your family calmed down!
Float Needle Not Seating Properly and Gas Floods the Crankcase
This one is a relatively easy fix if you’ve never done it before and you’ll likely be able to get by without having to purchase any replacement parts. I can’t guarantee it, but there’s a good chance. We will be removing the carburetor for this fix, so bear with me!
Before you get started on any repair, it’s best practice to remove the boot on the spark plug to prevent any accidental starting of the engine while you’re working on it. Also, I have a full step-by-step article here on removing and cleaning your carburetor.
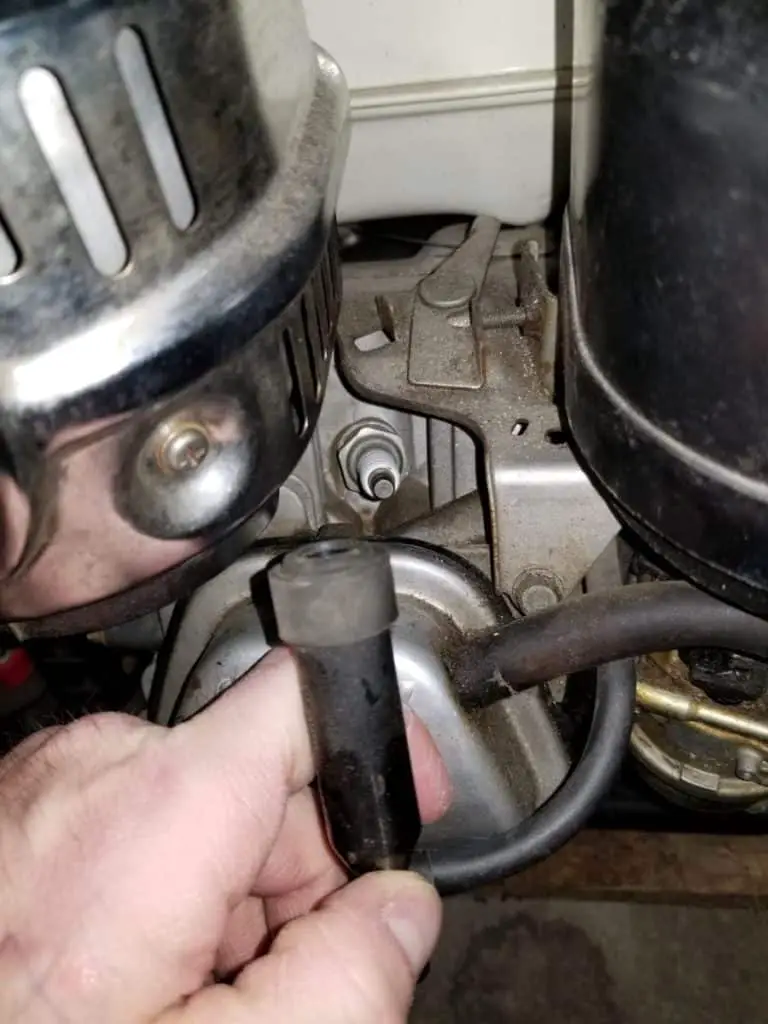
Now, you’re going to want to locate your carburetor which is situated directly behind your air filter. Undo the clasps and remove the filter, and then remove any of the bolts holding the air filter assembly on to the generator. Make sure to inspect and to not lose the gasket between the carburetor and the air filter assembly.
Then, turn off the fuel valve to prevent any further gasoline from reaching the carburetor. Place something below the carburetor to catch the gasoline that is in the carburetor bowl. Using a 10mm wrench or socket (usually 10mm), remove the bottom bolt from the carburetor and let the gasoline pour out.
It shouldn’t be very much, maybe a few ounces. Generally, the bowl will stay attached to the carburetor along the gasket due to friction if you don’t try to remove it.
Place the bolt back and screw it on by hand. You’ll be removing it again shortly.
Next, remove the carburetor from the generator. It will be held on by 2 rods that will either need to be removed, or it will simply slide off the rods because the air filter had a pair of nuts that held everything in place. Disconnect the fuel line.
There will also be a linkage and spring from the governor’s arm that you’ll need to remove. If there are multiple holes where the linkage attaches to your throttle, take a picture with your cell phone so you don’t forget where they go. You may need to gently twist your carburetor in a weird position and move the throttle arm after you slide it off the rods to remove the linkage.
Inspect the gasket between the carburetor and the intake manifold.
Once the carburetor is removed, turn it upside down and remove that bolt from the first steps. Then, remove the bowl. Inspect the rubber gasket to make sure it looks okay. Now, pull the retaining pin out from the float assembly and lift the float out. The float needle will lift out with it.
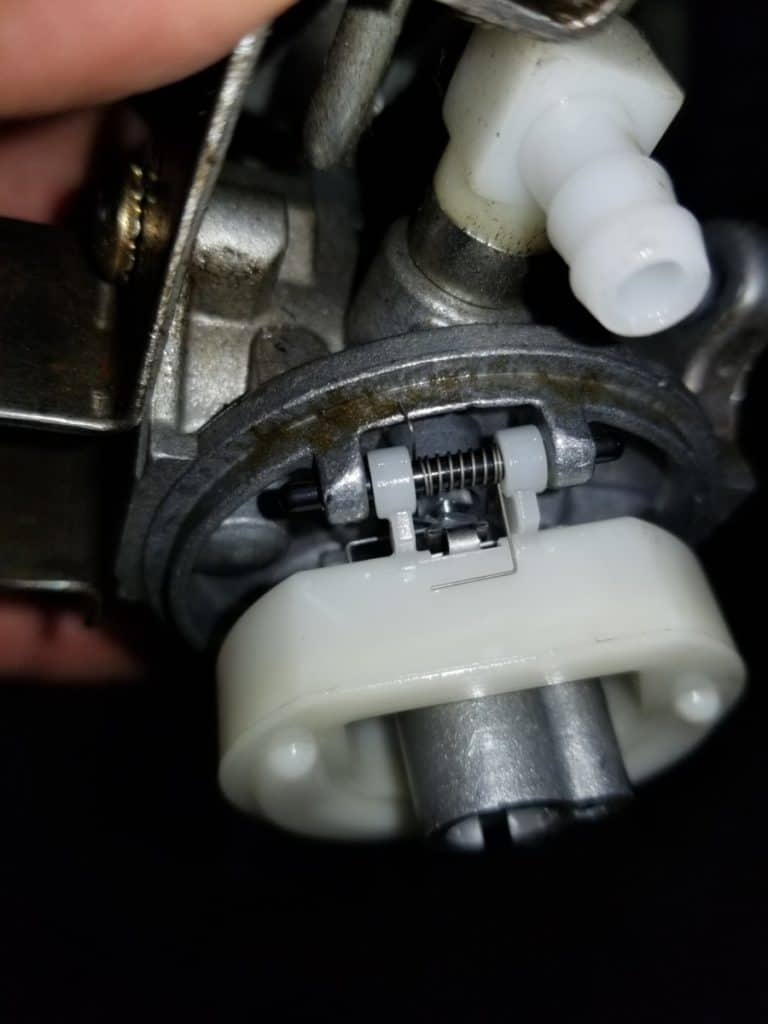
Your problem is going to be with where the float needle connects in the hole that it is supposed to rest in (the seat). Your needle will either be metal-tipped and it will press up against a rubber o-ring, or it will be rubber-tipped (though it will look like metal) and rest against a metal seat.
The issue is that gasoline is leaking by this point that is supposed to make a perfect seal. When gasoline enters the carburetor bowl it lifts the float. When the bowl fills to the desired level, the float pushes the needle to close the hole that the gas is pouring in from.
If there is debris, a deformed rubber tip, a deformed or ripped o-ring, or carbon build-up, then the gasoline will continue to leak by and keep filling the bowl. After the bowl fills, the gas will keep rising until it crests into the main channel that runs horizontally through your carburetor (where the butterfly valves are).
Then, depending on the angle of your generator and how level it is, the gasoline will either flow out your air filter assembly or it will flow towards the engine and through the intake manifold and into the combustion chamber. If it goes to the combustion chamber it will pour onto the piston and work its way down, by the seals, and pour into your crankcase to mix with your oil.
Best practice to remove any debris or carbon build-up is with a q-tip that has been sprayed with a little carb cleaner. Clean out the tube and seat the best that you can. Remove the o-ring if your carburetor has one and avoid getting carb cleaner on it since this will cause it to swell. Make sure it doesn’t look deformed or have any rips. If it does, replace it.
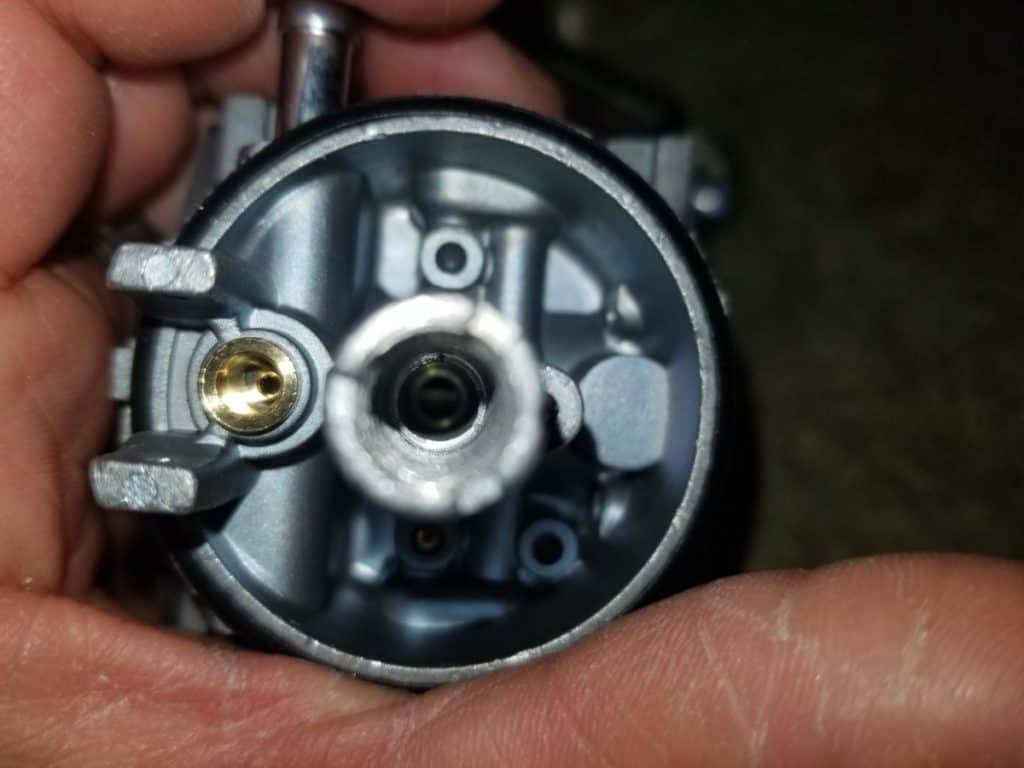
Inspect the needle for any deformities. If it doesn’t have a pyramid shape to it without an indented ring from where it was pressing against the seat, then you’ll need to replace it.
Most of the time it’s just carbon build-up or a piece of debris. You can also use a twist tie wire with the paper/plastic burnt off to dislodge any debris.
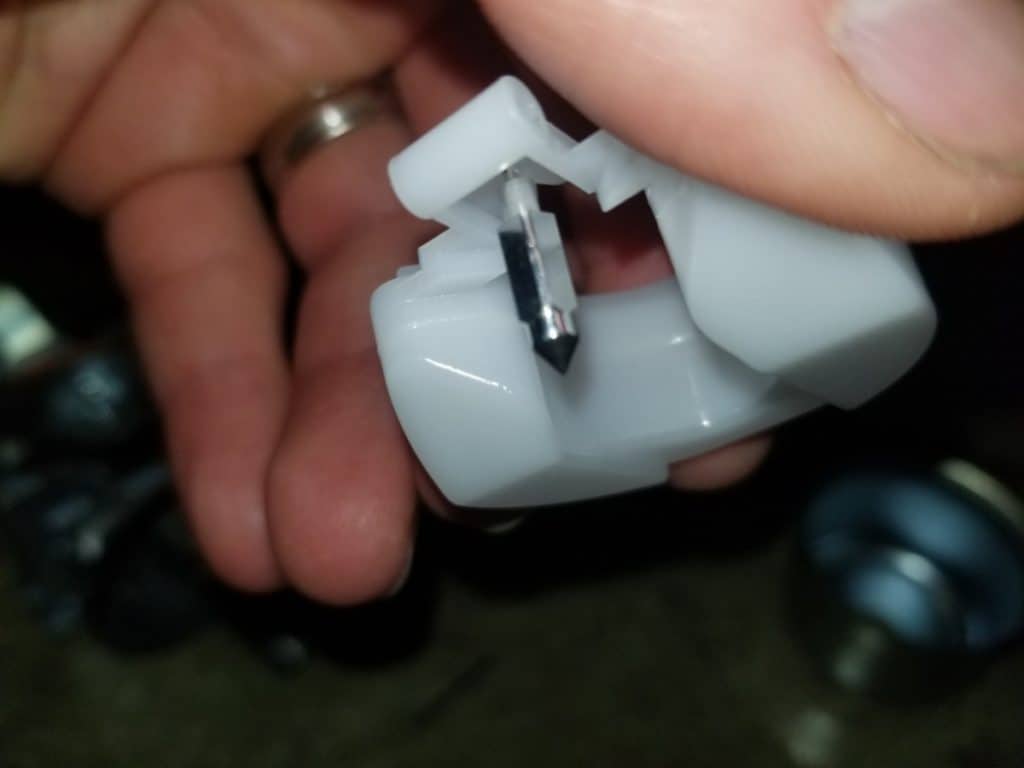
Reassemble the float and needle and with the carburetor upside down, blow into the tube where your fuel line attaches. You should not be able to force any air by the needle and seat. If you hear hissing, then you do not have a proper seat.
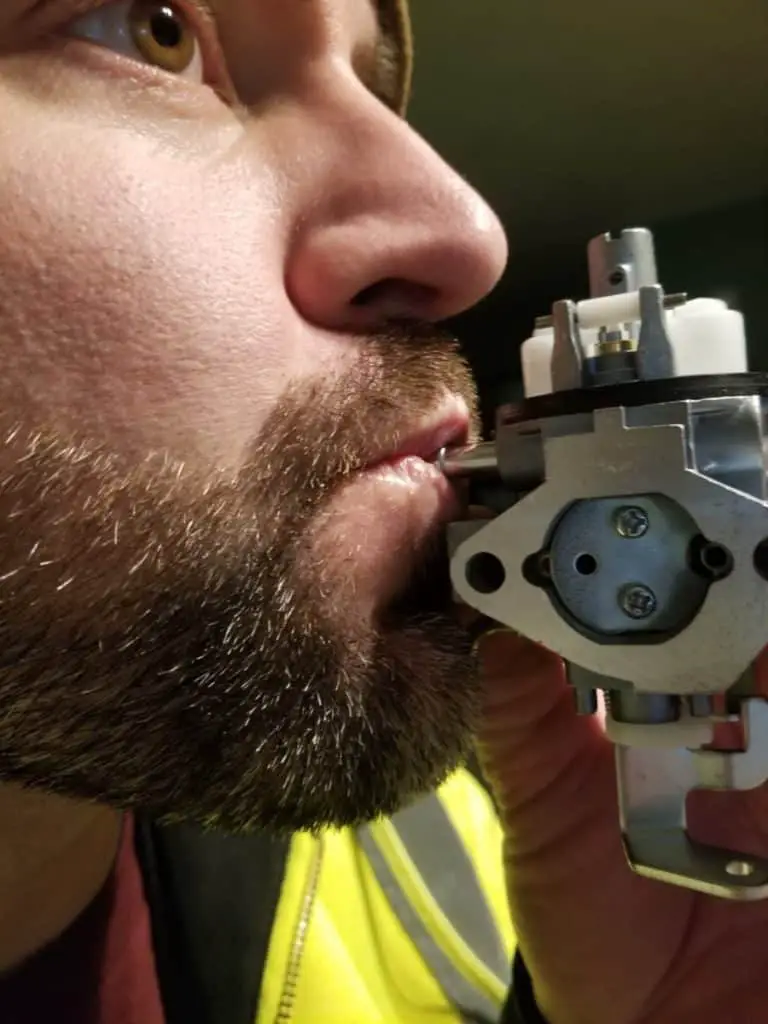
You ideally want no air to go through when the carburetor is upside down, and you want air to pass freely through it when you turn the carburetor right-side up (when the float is hanging down in the “open” position).
Preventing a Compromised Float Needle Seat
Each time you want to put your generator away, turn off the fuel valve when the generator is running (and assuming everything is unplugged from the generator). This will cause the generator to use up the remaining fuel in the carburetor bowl until it eventually stalls after a minute or two.
After it stalls, the float will now be in the open position (calling for more fuel) and the float needle will not be pushing up against the seat which will keep it from becoming deformed from the constant pressure of being in the “closed” position.
Metal pushing on rubber will deform it if you give it enough time. Following the steps above will save you a lot of headaches in the future.
External Fuel Pump Diaphragm is Compromised and Sucks Gas Inadvertently Back Into the Crankcase
This problem won’t be applicable to anyone who doesn’t have an external fuel pump. If you don’t have an external fuel pump, you will only need to worry about the section above.
For those of you with an external fuel pump, you need to first understand how it works. If you look at your generator, you will see a hose running from the crankcase to your pump, a hose running from the gas tank to your pump, and a hose running from your carburetor to your pump.
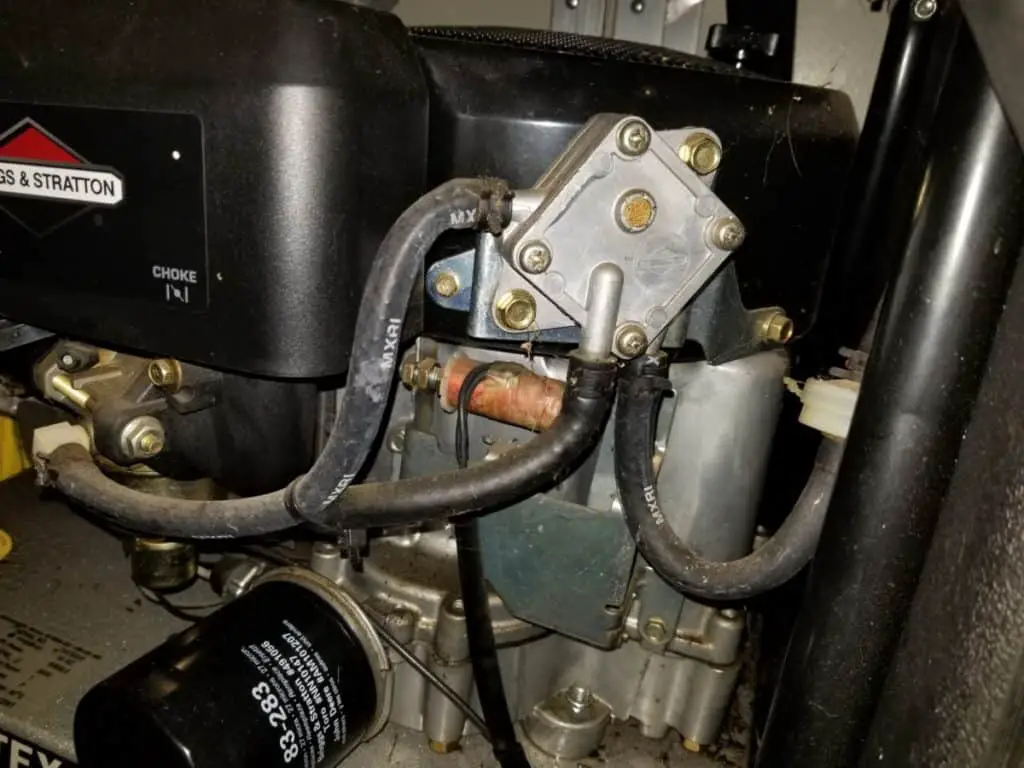
The pump operates with a diaphragm that moves fuel through the lines by capitalizing on the changing pressures in the crankcase.
To keep it simple: when the piston rises up to compress the fuel, it opens up more space in the crankcase for air to fill. This causes the air to be sucked in through the hose that we mentioned earlier that runs from the crankcase to the fuel pump. This causes the diaphragm to get sucked in towards the crankcase.
Then, when the sparkplug ignites the air/gas mix in the combustion chamber, the piston is forced back down into the crankcase and this pushes out excess air which will naturally take the path of least resistance. That path is through the same tube that runs from the crankcase to the fuel pump. The diaphragm is now pushed away from the crankcase pressure.
The engine operates at 3,600 RPMs, so that’s a lot of pushing and pulling for the diaphragm in a single minute. Every time the diaphragm makes a back and forth flex, it moves gasoline to the carburetor.
Now, the problem occurs if you have a hole (usually very small) in your diaphragm. Now, whenever the crankcase sucks air in, it will suck fuel through the hole in the diaphragm and back into the crankcase. That diaphragm was supposed to be the barrier between the oil and the gas but it is now the gateway.
If your float needle in your carburetor is seating properly, and you have a generator with an external fuel pump, then you will need to replace the fuel pump. The models that I’ve repaired typically have pumps between $25 and $50.
