I remember when I was new to fixing small engines and I came across a generator that was leaking gasoline from the air filter assembly. I was a little perplexed back then, but then I realized that the problem isn’t that complicated and either is the solution.
As a general rule, an improper seal between the float needle and the seat in the carburetor will cause the gasoline to keep filling up the carburetor bowl and eventually overflow up into the throat of the carburetor and out the air filter. This can be due to a deformity or tear in the rubber needle or seat, stale gas that has turned to varnish, or any debris that has gotten by the fuel filter.
Thankfully, the solution is generally to clean out the needle seat and make sure that a proper seal is created afterward and the time from diagnosing the problem until you fix it should take less than an hour if you’ve never done it before.
Why is My Generator Leaking Gasoline from the Air Filter Assembly?
As we mentioned above, the carburetor is where your problem is starting. The carburetor’s role in your engine is to properly mix the fuel and air into a mist that the engine can use for combustion and provide you with power.
High speed air travels through your air filter and through the carburetor and sucks up gasoline through tiny jets that lead up from the bowl due to the Venturi effect. The amount of gasoline that is allowed in the bowl is precisely controlled by a simple float and needle valve.
When the gasoline is being used, the float will sink and this will open the needle valve which will allow gas to fill the bowl. As the float rises, the needle valve will close and cut off any further supply of fuel until it is needed again.
Our problem arises when the float is malfunctioning or a proper seal is not being made with the needle valve.

If the float won’t rise up or if a seal isn’t made, gasoline will continue to pour into the bowl without a way to stop it (assuming your gas tank is located on top of your generator unit and is gravity fed into the carburetor).
When the bowl fills up, the gasoline will rise up through the jets and up into the throat of the carburetor (where the bulk of the air passes through and where your choke and throttle butterfly valves are located).
Where the liquid fuel goes after that is entirely dependent upon gravity and how level your generator is. It will either flow out the air filter assembly (if that’s the lowest point), into your combustion chamber, or both.
Generators with this problem, besides visibly seeing gasoline coming from the air filter, will generally not start because they are essentially flooded. If you do get them to start, they will run rough for a few moments to a minute and will stall. If left unchecked, your fuel will run out.
Top 4 Reasons that Cause this Problem and How to Fix:
The following steps may involve taking your carburetor off your generator and performing a complete cleaning. This doesn’t take long, but you might as well do it of you’re having to remove it anyway. I have a step-by-step guide that you can checkout here.
Reason 1: Debris between the Float Needle and the Seat
Any dirt or debris that makes it passed the fuel filter and mesh screens along the way might snag onto the float needle seat or settle in the bottom of your carburetor bowl. If there is dirt, buildup, or stale gasoline that has turned to varnish, then it can make it so a complete seal is not made when the float needle tries to press up into the seat to cut off the flow of gasoline.
Reason 2: Deformed Float Needle
Many float needles are actually rubber-tipped and when they stay pressed against the metal seat, the rubber begins to get a groove pressed into it after a while and an improper seal can be formed. To prevent this during storage, I always turn my fuel valve off while the generator is running as my preferred method of shutting it down.

This will cause the generator to use up the remaining fuel in the bowl of the carburetor and stall. As it runs out of gasoline in the carburetor bowl, the float will drop and the needle will fall away from the seat and keep it from pressing on the metal.
Reason 3: Deformed or Damaged O-Ring
Carburetors that don’t have a rubber-tipped float needle will have a metal one, and it will press on a rubber o-ring inside the seat to make a seal. Ethanol blends of gasoline (like the regular stuff that you put in your car) will eat away at the rubber in storage and can cause them to split or deform. Replace them if this is the case (I’ll explain below).
Reason 4: Pinhole in the Float
Some generators, older ones especially, use brass floats instead of plastic. These are susceptible to forming small pin-holes, especially on the welds, and gasoline can enter the float. Once this happens, the float starts to become more dense and will not sit on top of the gasoline anymore. If this happens, the needle won’t be pressing up to stop the flow of gas and your carburetor will flood.
How to Fix Problems 1-4:
Removing the carburetor is the easiest way to fix this problem. First, remove the air filter assembly by taking out the 3-4 bolts/nuts that hold everything in place. There’s usually one under the filter itself once you remove it.
Gently disconnect the linkages from the throttle assembly. You will need to twist the throttle toward the linkage to accomplish this task.
Then, shut off your fuel valve. Remove the carburetor bowl with a 10mm wrench or socket and unscrew the main bolt/nut at the bottom in the center. Have a container nearby to dump the gasoline into it.
Remove the fuel line, pull the carburetor off and turn it upside-down.
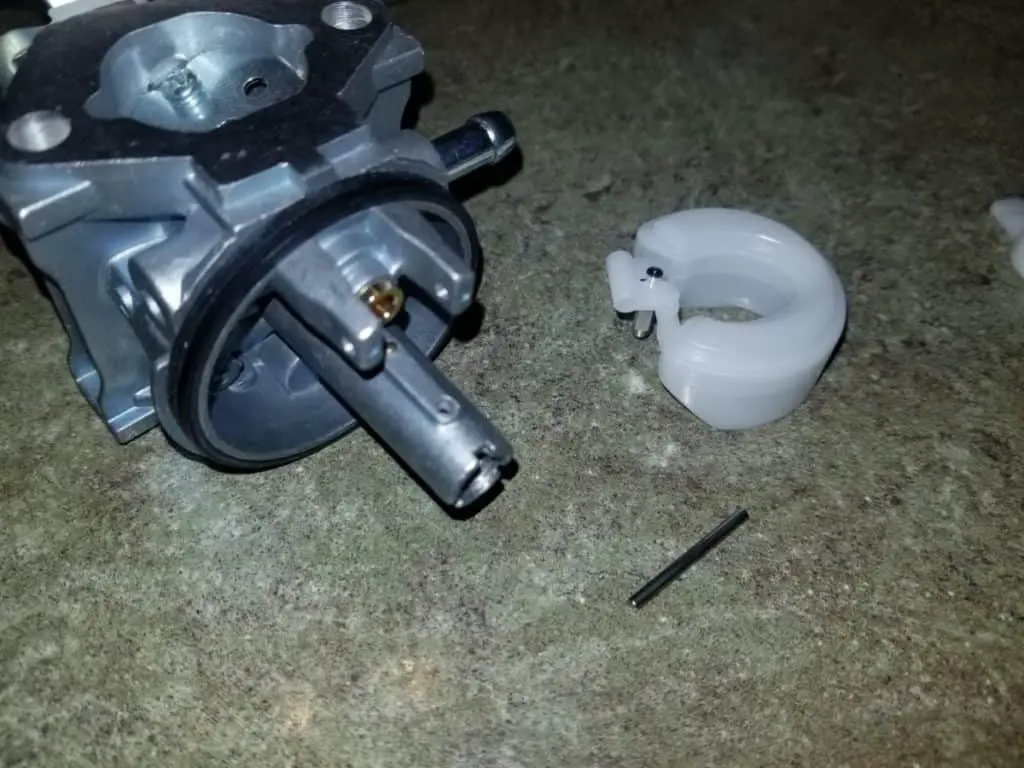
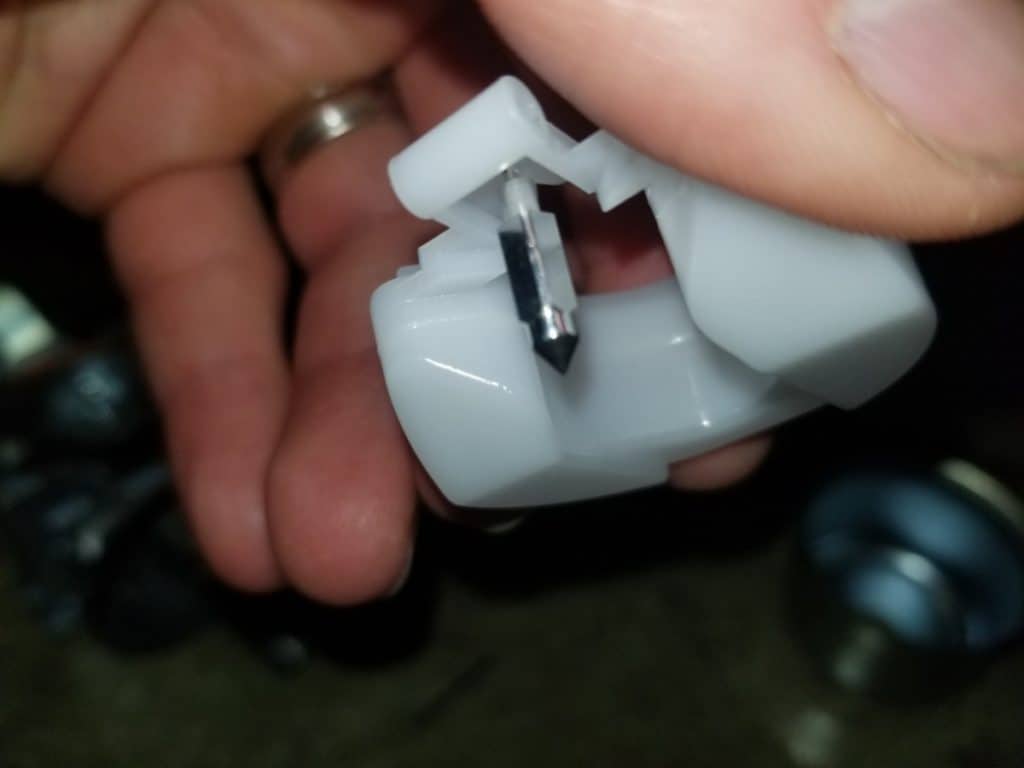
Pull out the retaining pin that holds the float in place and lift the float and needle straight up. Inspect the needle for any debris or deformations. Your carburetor will either have a rubber-tipped needle that presses on a metal seat, or a metal-tipped needle that presses on an o-ring in the seat.
Use a bobby-pin to pull the o-ring out and inspect it if you have one. If you see any debris, clean it off with a q-tip that has been spraying with a shot of carb cleaner. Be careful to not be excessive with carb cleaner on rubber parts since it will cause them to swell.
Cut the q-tip in half and place it in a drill chuck and give the float needle seat a good high-speed polishing if you want to make quick work of it.
If your o-ring is worn or deformed, replace it. If your rubber-tipped needle is deformed, replace it.
If you have a plastic float then you’ll likely not have a pinhole leak as your problem. However, if you have a generator that has a brass float, then you might have one. Shake the float to listen for any gasoline sloshing inside. If you hear some, replace your float.
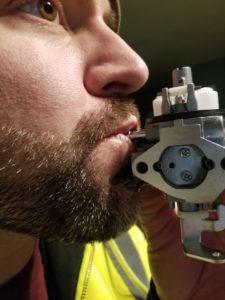
When you think you’ve fixed the problem, reassemble the float and needle with the retaining pin. Now, with the carburetor still upside down (from how it would be installed on the generator), use your mouth to blow air through the fuel intake (where your fuel line connected to the carburetor).

If you can’t blow air through it, then you have created a proper seal. If you hear a hissing sound from your breath, then you have parts to replace or more work to do.
Why You Should Check Your Engine Oil After You Fix the Carburetor
As I alluded to in the first section, your fuel may not have only flooded out your air filter assembly, but into your combustion chamber as well. When liquid gasoline moves from the carburetor to the intake, it will work its way passed the intake valves that open to supply the combustion chamber with the air/fuel mix.
From there, it will fill the combustion chamber on top of the piston. Eventually, it will seep passed the piston rings and down into your crankcase which is where your engine oil resides.
It will dilute your engine oil, improperly lubricate your engine, and build up improper pressures inside your crankcase if you were to get your engine running again.
It is critical that you check your engine oil – not only before starting your generator each and every time – but especially after you fix a carburetor that was leaking gas through the air filter.
Pull out the dipstick and if liquid comes pouring out, that is a tell-tale sign that you have gasoline in your oil. If you’re unsure, look at the oil on the dipstick and smell it for gasoline. Completely drain and change your oil if it has been compromised.

