Power outages are just a part of life in the modern world, and some of us are plagued by it more than others. If caught off guard, they can be huge headache (or worse!).
I assume you’re relatively new to the generator world since you’re wondering what size will fit your needs. Welcome! I sincerely want to give you a virtual “high five” for taking the first steps into blackout preparedness!
As a general rule, the necessities of a house can be powered with a 5k generator if the power is carefully rationed at the breaker box. Using a generator that is 10kW or higher, like a permanently installed whole house generator, will usually power most things without worrying too much about which circuits are being used.
Grab a quick cup of coffee and allow me to guide you through 5 easy steps that you need to take to find the right generator for you. It will be painless, I promise! All you’ll need is a scrap piece of paper and something to write with.
Let’s get started!
Step 1: Determine What Appliances You Want to Power During a Power Outage
Obviously, to select the proper generator size, you’ll first need to know what you plan on powering with it.
Coffee makers, refrigerators, and some lights are usually at the top of everyone’s lists but you should still take a moment to go through your house — room by room — and take note of any of the “must haves” for when the grid takes a nap.
If the power is out for a week, will you need to do laundry? Is your dryer gas or electric? Can you hang dry your clothes?
Is your water heater gas or electric?
Do you get your water from a municipal source (city water), or do you have a well pump? What size is the well pump?
Do you have a sewer connection or a septic tank? Do either require the use of a gravity-assist pump after you flush or run water down the drain?
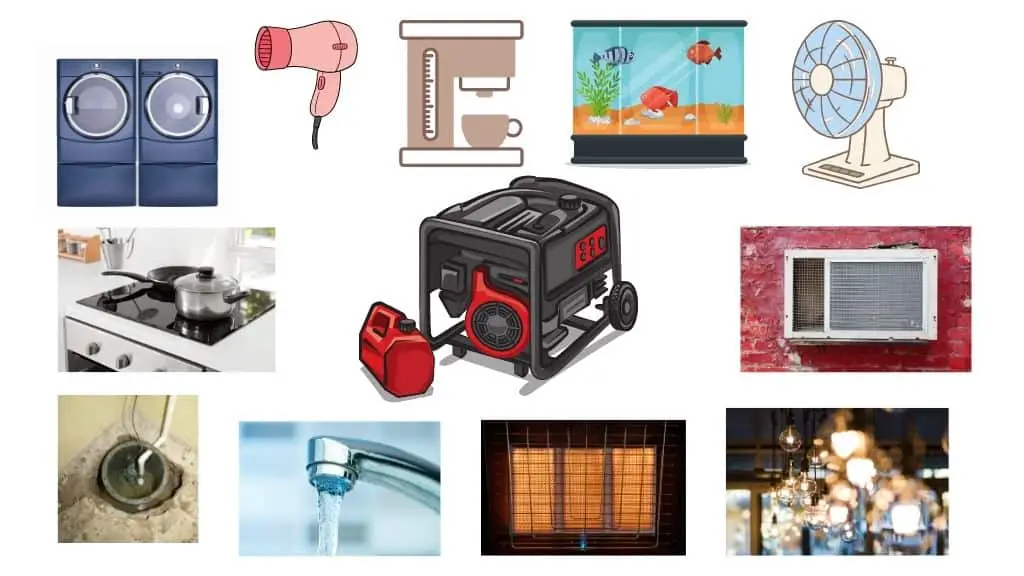
Do you plan on using window AC units? Do you plan on using space heaters? Do you plan on using fans?
Do you have any family members or pets that are reliant on a reliable source of power for their immediate health needs? Any aquariums in the house? Medical machines?
Do you have a sump pump in your basement?
Do you have an electric range or a gas one? Do you need to use the microwave?
As you can see, there’s quite a bit to consider as you walk through your house and perhaps I’ve even got you asking questions that you haven’t considered before.
Go ahead and take a stroll through your house and write down your list of items you plan on powering and let’s move on to the next step.
Step 2: Add up the Power Requirements of Your Appliances
Now for the math. I know, it wasn’t my favorite subject in school either. We’ll keep this simple.
Basically, you need to look at your list and keep in mind that some of the appliances are resistive and some are reactive (inductive) with their loads. Look at the chart below to get a ballpark estimate of the watts used and write them down.
By “resistive” and “reactive”, I mean that some appliances will use the same wattage from start to finish during their operation — like a space heater. Typically, you’ll see one hover right around 1,500 watts without much fluctuation. It is a resistive load.
A refrigerator, on the other hand, uses a compressor that is reactive. It has normal operating watts (running watts) and it also has an additional wattage requirement on top of the running watts for when it starts up (starting watts). This number is typically 3 times as high as the running watts with most appliances but can certainly be a bit higher than that.
A fridge might generally have 400 running watts while the compressor is running, but it will likely take 1,600 watts for a few seconds just to start the compressor.
400 running watts * 3 = 1,200 additional watts needed –> 400 running + 1,200 starting = 1,600 total watts needed from a generator
Go ahead and look at the table below for some ballpark estimates for common household appliances and write down any of the running watts and starting watts on your piece of paper.
Here’s a table with some common items and their ballpark running and starting watts. The third column is the total watts when starting (the running and additional starting watts added up) and is the bare minimum generator size that you would need to start that particular item.
| Appliance or Tool | Running Watts | Additional Starting Watts | Total Watts When Starting (1-3 Seconds) |
|---|---|---|---|
| 32″ TV (LED) | 40 | N/A | 40 |
| 50″ TV (LED) | 60 | N/A | 60 |
| Window AC Unit (5,000BTU) | 500 | 1,500 | 2,000 |
| Window AC Unit (10,000BTU) | 1,200 | 3,600 | 4,800 |
| Well Pump, 1/3 HP | 800 | 1,500 | 2,300 |
| Well Pump 1/2 HP | 1,000 | 2,000 | 3,000 |
| Well Pump 3/4 HP | 1,500 | 3,000 | 4,500 |
| Well Pump 1 HP | 2,000 | 4,000 | 6,000 |
| Toaster (per side) | 800 | N/A | 800 |
| Coffee Maker (Drip Style) | 1,300 | N/A | 1,300 |
| Microwave (See sticker inside your unit) | 1,000 – 1500 | N/A | 1,000 – 1,500 |
| 60W Equivalent LED Light Bulb | 9 | N/A | 9 |
| 60W Incandescent Light Bulb | 60 | N/A | 60 |
| Sump Pump 1/3HP | 800 | 1,200 | 2,000 |
| Sump Pump 1/2HP | 1,100 | 2,100 | 3,200 |
| Water Heater (Electric) | 4,000 – 5,000 | N/A | 4,000 – 5,000 |
| Electric Range 6″ Element | 1,250 | N/A | 1,250 |
| Electric Range 8″ Element | 2,100 | N/A | 2,100 |
| Refrigerator | 400 | 1,200 | 1,650 |
| Hair Dryer (High-heat setting) | 1,800 | N/A | 1,800 |
If you don’t see your item, you can also purchase this handy little tool on Amazon that will measure your appliances’ wattage up to 1,875 watts. I wouldn’t hook it up to a window AC unit, as it will burn up the unit, but for most everyday things around the house you’ll get an idea of what you’re working with.
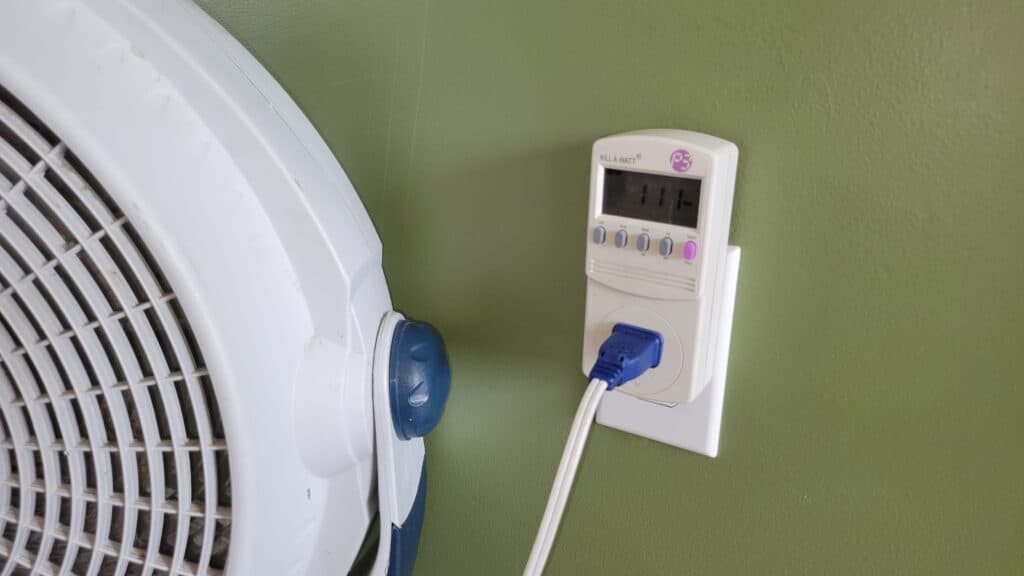
Though it won’t be exactly correct, you can also check the label or tag on some of your appliances for an estimate of the max power consumption.
Remember: volts x amps = watts.
If your tag reads 120VAC (volts alternating current) and 2.5 amps, then you can estimate that the watts might be 300. With many items, if you actually tested them with the tool I mentioned above, you’ll see that the actual number is sometimes only 50-75% of the number on the tag. Still, if it’s all you’ve got, the tag or label is a better estimate than nothing.
With all of your starting watts and running watts written down, let’s go to the next step where you’ll be determining how active you want to be in the process.
Step 3: Determine How Involved You Want to Be With Power Distribution
This is the step where you get to see the trade-off between spending more money but having convenience, or saving a lot of money and playing an active roll in power distribution during a power outage.
If you are looking to just “set it and forget it” when it comes to turning on your generator during a power outage and trying to continue your day as if nothing happened, then you’re going to be looking at a much larger generator purchase.
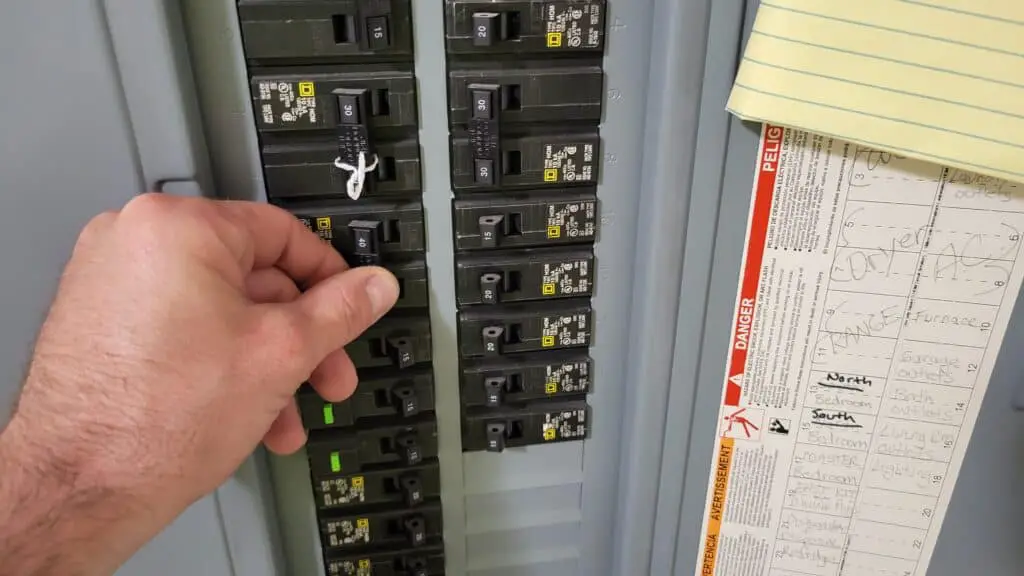
If you’re willing to ration power to particular circuits in your home and turn them off and on as needed (let’s say you turn off the circuit to the well pump while turning on the circuit to the coffee maker, for example, and then turning off the coffee maker circuit when you need to run a blow dryer), then you can get by with a much more affordable generator that is a fraction of the size as far as output (and physical weight).
Let’s go back to our numbers that we’ve written down.
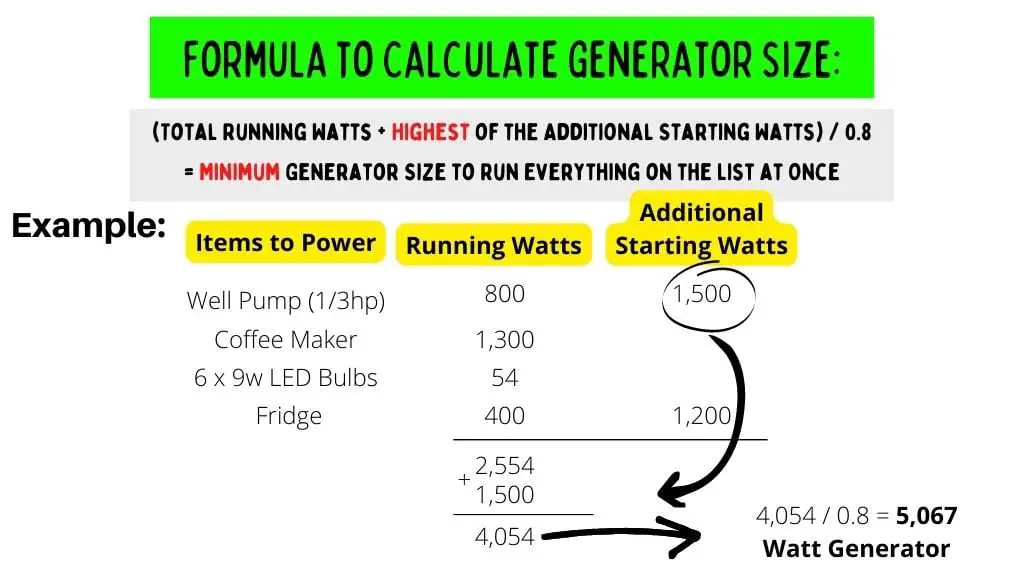
If you’re looking to remain as uninvolved in the process as possible, then you’re essentially going to want to add up all of the running watts for everything, and factor in at least one of the starting watts (the largest one) from the reactive appliances. Once that’s done, you’ll want to divide that number by 0.8 and you’ll see the generator running watts that you’re going to be looking for.
We divide by 0.8 because we want out generator’s running watts to be sized at 20% above what our anticipated usage is so that:
- We don’t burn up the engine by overloading it during normal use
- In case another appliance starts up with additional starting watts, the generator should be able to handle it for a few seconds
Let’s do an example.
Passive Approach
10 LED Lightbulbs ( @ 10w each) + Fridge (300w) + 3/4HP Well Pump (1,500w + 3,000 additional starting watts) + 1/3 HP Sump Pump (800w) + Coffee Maker (1,200w) + Microwave (1,200w) + 2 Fans (@ 100w each) = 8,300 watts!
8,300 watts / 0.8 = 10,375 running watts from a generator needed.
So, in this case, if you didn’t want to mess with anything, you’d be looking at using at least a 10kW generator or higher. That will likely cost you at least $1,000-$1,500 for a decent portable generator (or more for a permanently installed whole house generator – Amazon). If you were looking for a Honda, which is considered to be the industry best, you’d be looking at around $4,000 new.
If some of your appliances with starting watts all kicked on at the exact same time, you might even overload the generator, but that’s why we give ourselves a buffer by dividing our usage by 0.8 and sizing up by about 20% — and we’re also allowing for a marketing trick that the generator industry uses which we’ll cover later.
If you were to add an electric range to the mix, you’ll still probably have to get active with the breaker box depending on how many burners you turn on.
Active Approach:
Now, let’s take those same appliances from above and be more active with our power rationing at the breaker box.
The highest rated item on the list is the 3/4 HP Well Pump with a combined wattage of 4,500 watts. A 5kW generator will be able to start that. So, if you were to take the route of directing power at the breaker box to particular circuits so that you don’t overload the generator, you could very well get by with a generator of that size.
You’d be able to run the well pump and run LED lights. If you wanted coffee, you would turn off the breaker to the well and turn on the breaker to the coffee. If you wanted to run the fridge and the coffee maker at the same time, you’d be just fine with a 5kW generator. If you wanted to run everything at the same time on that list except for the well pump, you’d be maxing out a 5kW generator.
All of this requires that you’re conscious of the power requirements for each and everything that you try to power with the generator. You’ll want to ration out the power (taking into account all starting watts) at the breaker box or transfer switch by only powering the things that the generator can handle at one time.
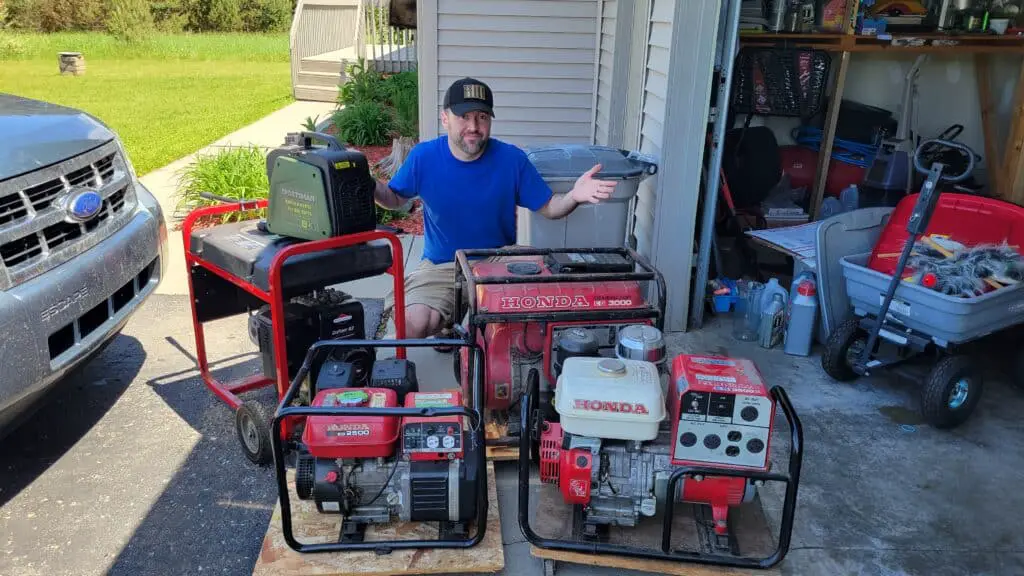
For a decent 5kW generator, you’re probably going to spend $500 -$650 or $2,300 for a new Honda. You can also find great deals on Facebook Marketplace for generators this size for $200-$350 all day long. I’ve picked up three Honda generators for under $150 each over the last couple years by watching for deals where people just need money fast.
Check out my article here on what to look for when purchasing a used generator if that’s the route you want to take. I’ve purchased dozens over the years to fix and flip, and I just decided to write an article that hopefully helps someone out with such a purchase.
Step 4: Select Your Generator Type and Size
By now, you should have an idea of the grand total that you’ll need for a generator and whether or not you will be actively monitoring the breaker box and you transition from one appliance to the next, or whether you will simply turn on the generator and go about your business.
From here, we’ve got a few options for you. I’ve got links below that will take you to Amazon for my recommended products, after having fixed dozens and dozens of generators over the last 7 years.
An inverter generator will work best if you plan on powering items with an extension cord and your total watts will be 4,000 or less (generally speaking). This could be great if you only were worried about running the fridge, powering your devices, and running a couple LED lamps.
Apartment dwellers (if you’re allowed to) could benefit from a generator of this size because they won’t have access to the breaker box wiring like a homeowner. Also, inverter generators are incredibly quiet and are perfect for such close quarters with other neighbors.
Conventional portable generators (not inverter) are typically found from 2,500 all the way up to 12,000 watts. Typically, you’d group them in ranges from 2,500-5,000, 5,000-7,500, and 7,500-10,000+ watts. You’ll generally see distinct step-ups in price as you go from one range to the next.
If you plan on backfeeding your home through through a transfer switch or interlock kit, you’re going to need to make sure that the generator you’re using has a 240v receptacle on it.
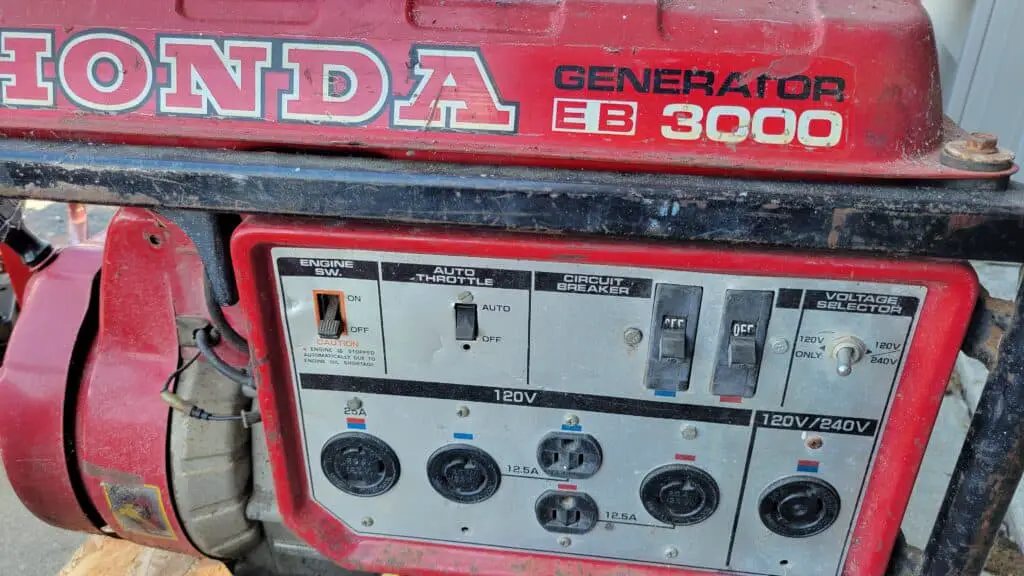
From my experience, most 5kW (5,000w) generators and higher all have dual 120v and 240v outlets to plug things into. Most generators under 5kW do not — but there are certainly exceptions. I have two Honda generators that are 3,000 and 3,500 watts which both have 240v plugs. My 2,500w Honda only has 120v plugs.
Finally, you have the option of having a whole home generator professionally installed. Generac is an industry leader in this field. This type of setup is installed outside of your home and is on standby for when the power goes out. You can get 20kW+ models installed and these all but eliminate the need for you to ration out power at the breaker box.
Don’t be Fooled by the Following Generator Marketing Trick!
Be aware that advertised generator ratings are done to favor the generator when it comes to marketing appearances. The generator you’re interested in might say “5,000 watts (or 5kW)” on the side, but that is generally going to be the maximum rated running watts for a short duration of time (typically 30 minutes or less).
Your 5,000-watt generator will likely have something like a 4,200 rated maximum output for long term use, a 5,000-watt maximum output for 15 minutes, and a peak output of 5,600-watts for a few seconds — for example.
Typically, a generator’s actual rated output for long-duration use is about 80% of the advertised number on the side of the generator.
You will always find a sticker or a metal tag located on a generator that will tell you all of this information. If you see a number followed by “kVA”, just substitute “kilowatts” (or 1,000 watts) when you are trying to understand it. They are different, but for practical purposes this will be fine to do.
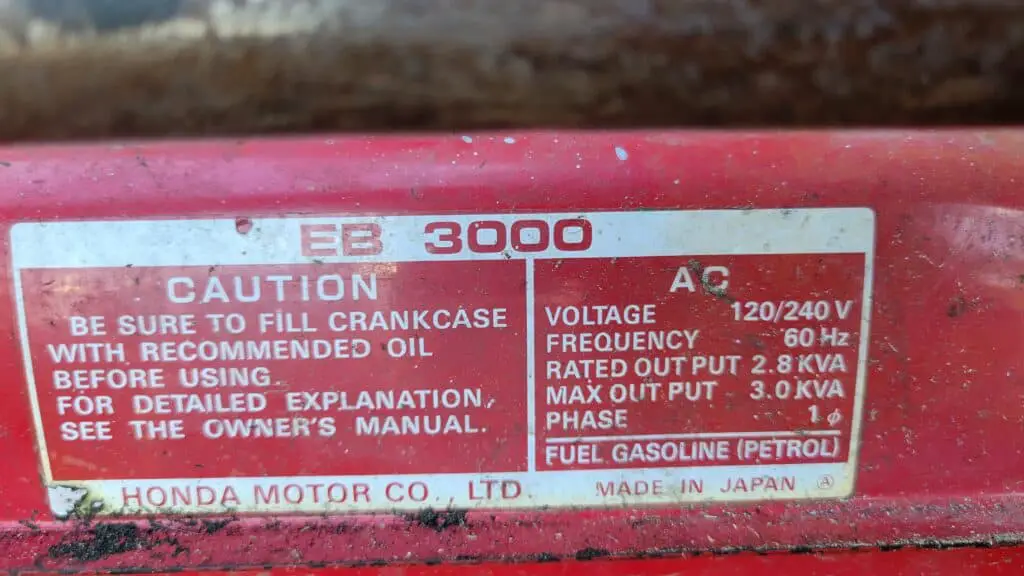
So when you do the math and find that you need a generator that can reliably provide you with 5,000-watts, then you are most likely going to need to size up to a 6,000+ watt generator to actually cover that demand.
Again though, that’s why we divide our total watts needed by 0.8 to get our generator size and we’ll usually be right on the money. We’re already factoring in this marketing trick.
Step 5: Test Your Setup BEFORE You Need it in a Power Outage
Now that you’ve made the purchase, you will want to put everything in order BEFORE you need to use it!
If you plan on backfeeding your home, you will want to have a professionally installed transfer switch or interlock kit at your breaker box so that you do not accidentally kill a line worker who is trying to restore your power. If you’re just running extension cords to specific appliances, then you will not need to have a transfer switch or interlock kit installed.
Click here for my article on grounding a generator.
You will want to purchase the extension cords that you need (120v or 240v, depending on what you’re doing).
Heavy duty 10 gauge 120v extension cords should work fine for most things. Keep the length of the cord as short as you need it, while still giving yourself room to keep the generator a safe distance from the house to avoid carbon monoxide poisoning. If you only need 50′, don’t buy 100′ or you’ll start to experience an unnecessary voltage drop. 240v cords are going to be for backfeeding your house.
Be sure to turn off the power coming into your home from the power company (with your professionally-installed interlock kit or transfer switch) and do a dry run to see if your generator is capable of meeting your needs. If you’re going to rely on this to run your well pump, then definitely make sure to test that for your water needs.
If you’ve never performed a dry run like this, have a professional (or someone qualified) show you and ask if you can record what they do with your phone so that you’ll have step by step instructions for later.
When that’s done, I recommend writing out a step-by-step process and taping it to your breaker box so that you’ll have it when the power does go out. Once that happens, stress levels go up and you don’t want to make a costly mistake!
You will want to have enough oil on hand to do at least 3-4 oil changes (and oil filters if yours requires it). If your generator is new you’ll need to fill it with oil. I recommend doing your first oil change after only a couple hours of use with a test run. This will remove any metal shavings from the oil as your engine’s parts have started to “marry” each other.
Removing these shavings is critical so that they don’t creep up between your piston and the cylinder walls which will result in scratches and gouges in the cylinder wall. This will result in decreased output and can give rise to smoky exhaust and a whole host of other problems.
Once the first oil change has been done, go ahead and follow your manual’s instructions, but it’s not uncommon to see every 20 of use as a typical benchmark.
Make sure to have an extra spark plug on hand, as well as an extra air filter if yours cannot be cleaned.
You’ll also want to purchase at least one gas can (and gasoline) for fuel storage, and make sure to add 1oz of SeaFoam per gallon of gasoline (to your generator’s gas tank and the gasoline in the can) to stop the fuel from going rancid. This will keep your fuel good for at least 2 years — yes, I’ve tested it myself.
I have an article here on leaving gas in a generator during storage.
Tips to Cut Back on Electrical Needs During a Power Outage and Be Comfortable
Before you go out and purchase a generator, I thought I’d add a few things to consider that will help you reduce the electrical demand you might place on it.
Remember that your fridge does not need to be powered 24/7. The compressor generally runs 1/4 of the time during normal use. However, if you were to keep the door shut, you can easily go 6 hours in between powering it. When you do power it, listen for the compressor to kick on and when it turns off the fridge has reached the designated internal temp and you can unplug it again.
Keeping frozen water bottles or gallon jugs in the freezer and transferring them to the fridge when the power goes out will also greatly aid in keeping your food cold (and it will also reduce your electric bill when the grid is up since it will keep your freezer colder).
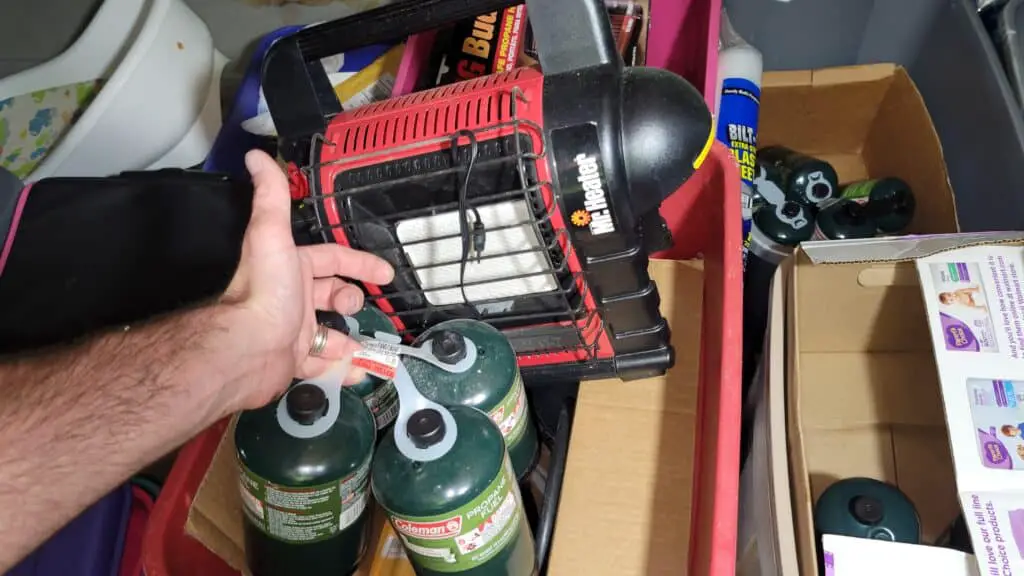
Investing in a Mr. Buddy Heater for under $100 and buying a half dozen bottles of propane will go a long way in providing heat if the power goes out in the winter. These heaters are safe to run indoors and have automatic shutoff safeties if the carbon monoxide level rises or if it gets tipped over. This will also deduct 1,200-1,500 watts from your generator and allow you to power something else.
Having a stockpile of water in empty vinegar containers is a great way to get through the initial outage without needing to power your well pump, or it will at least give you an extension of water if your municipal water runs out.

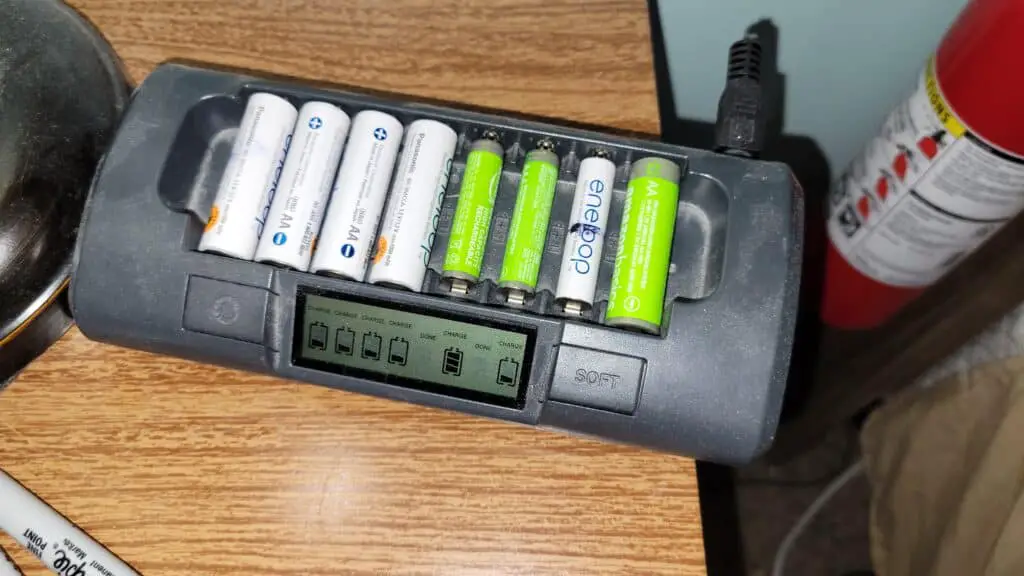
Having some pre-charged and rechargeable Ni-MH batteries on hand along with a solid charger is also a great way to power lanterns and flashlights. These batteries charge quickly and you could easily top them off in no time when you are running your generator. These batteries can be recharged over 2,000 times and, in my opinion, work 90% as well as alkaline batteries. I’ve been using the same exact AA and AAA batteries since 2014 and haven’t bought a single alkaline battery since then.
Running fans that use 50-100 watts while putting a damp rag around your neck is a very effective way to stay cool and will greatly reduce the 500-1000 watts (plus the starting watts) that would come from a small window AC unit being powered by your generator.
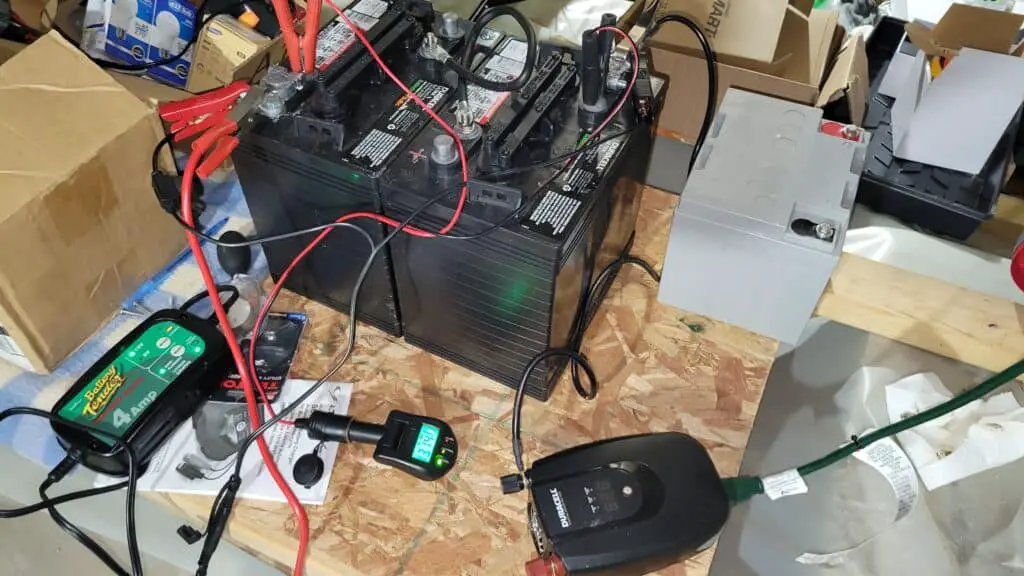
Finally, building a simple battery bank with two 6-volt golf car batteries hooked up in series (or 1 or more marine batteries hooked in parallel) will give you a weeks of power for low draw activities like powering LED lights and charging your devices. You can top off the battery bank while your generator is running during the day, and run completely silent at night so that you don’t advertise your generator to thieves and disturb neighbors who are trying to sleep.
Also, a CPAP machine can be operated with a battery bank.
For a battery bank, you’ll need the batteries (along with a charger), and inverter, and extension cords. That’s pretty much it for the necessities. I have a long video here (from my early days of doing this site) where I show how to build a simple battery bank. When I update that video with something better I promise I’ll check back in!
