Impact drivers sure beat using a drill when it comes to sinking screws, but they are quickly rendered nearly useless when the bit will no longer stay locked in the tool. A Ryobi impact driver is great for light tasks around the house and for the weekend warrior, but if you put it through the ringer you might find yourself with a bit that won’t stay where it should.
A Ryobi brand impact driver will generally fail to hold a bit in place if the 3.5mm steel ball bearings are damaged or missing from the bit holder, or if the spring around the bit holder’s sleeve is broken. Replacing the damaged or missing pieces will fix the problem and is a job that can be done at home.
The Ryobi setup looks a little different than other brands I have seen when it comes to taking apart the bit holder. In this article, I will provide plenty of images, a list of materials that you’ll need, a few time saving tricks, and a video (at the end) as well if you’re more of a visual learner. Don’t stress out! We’ll get this thing fixed soon!
Materials Needed to Fix Ryobi Impact Driver Bit That Won’t Stay in the Tool
Here’s a list of the tools and materials you’ll need to fix your Ryobi Impact Driver:
- Very small flat-head screwdriver… and by small, I mean SMALL! Think of the type that are used to fix eye glasses
- A child’s standard crayola marker (the kind that are just under 5/8″ thick) — color is optional but I prefer pink
- A small magnet
- Safety glasses (so you don’t sue me)
- Latex gloves (optional, but they keep you from getting grease on your fingers)
- We’ll find out if you need to replace anything when you take it apart, so you may need to order a new spring or ball bearing
That’s it. I told you it was going to be simple. Let’s take this thing apart!
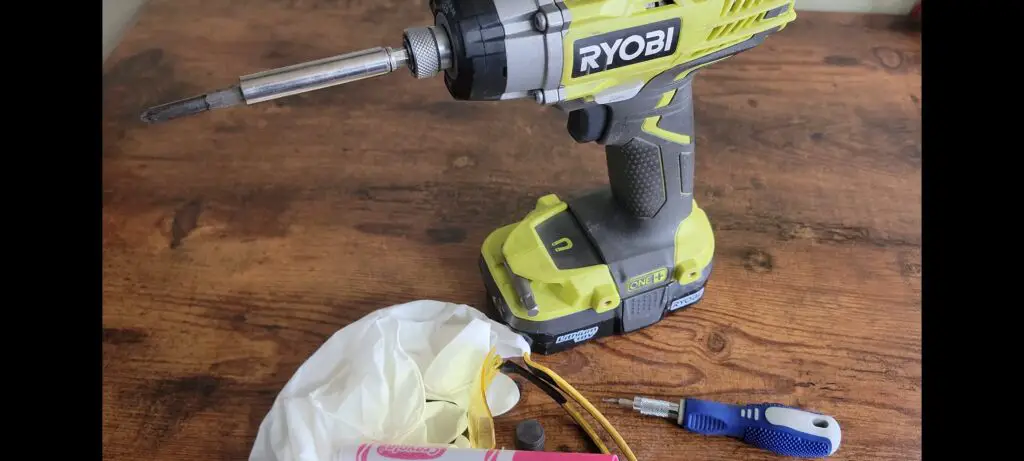
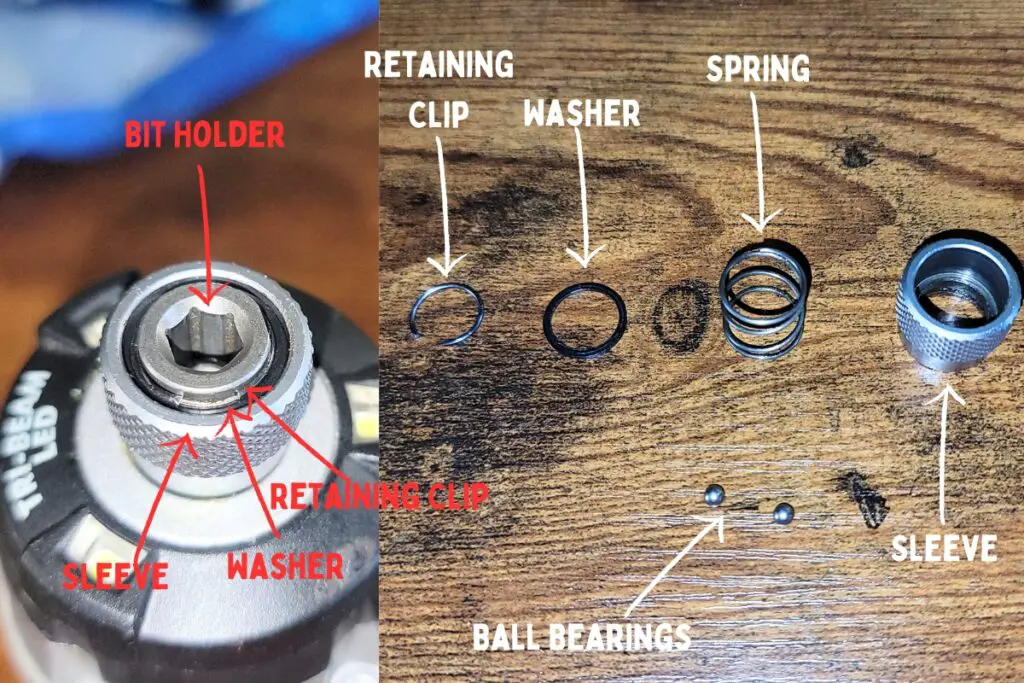
Diagram of the Parts I’ll be Referencing and Their Names:
I’m not the engineer of this product and I don’t know they names exactly, so please have a little grace. I do know how to take it apart and put it back together within a minute, so that counts for something. As I use some technical terms below in the steps to fix it, you’re going to want to see what I mean when I say a particular word. Here’s a helpful diagram below.
How to Fix a Ryobi Impact Driver with a Loose or Falling Out Bit
Step 1: Remove Battery, Bit, Decompress the Spring, and Position Properly:
Remove the battery by depressing the tabs on the sides of the battery and pulling down. Remove the bit (if applicable) by pulling the sleeve out and pulling on the bit. After you pull the sleeve up to remove a bit, it will stay in a “cocked” position.
Decompress this by using a screwdriver to push down into where the bit should go. You’ll hear a click and see the sleeve drop below the horizontal plane of the bit holder.
Set the impact driver on a flat surface with the back of the tool on the ground and the sleeve sticking up on the air. See photo below.
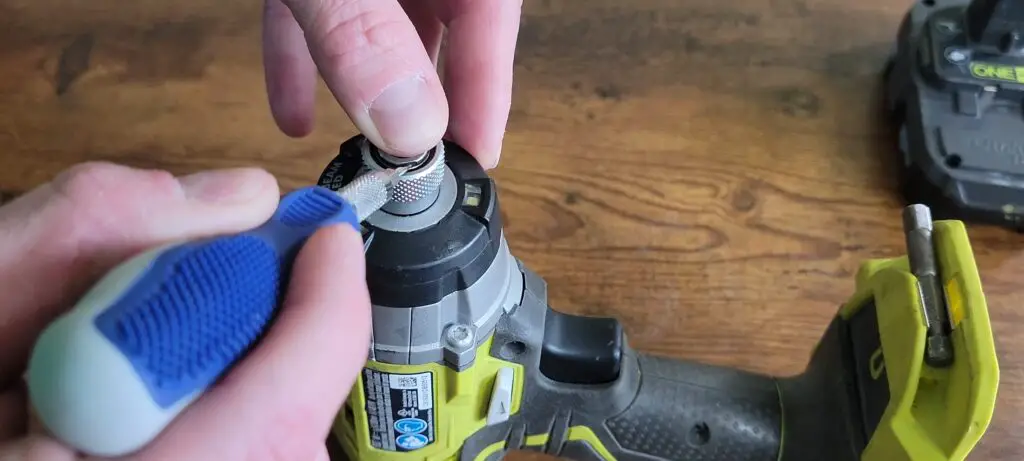
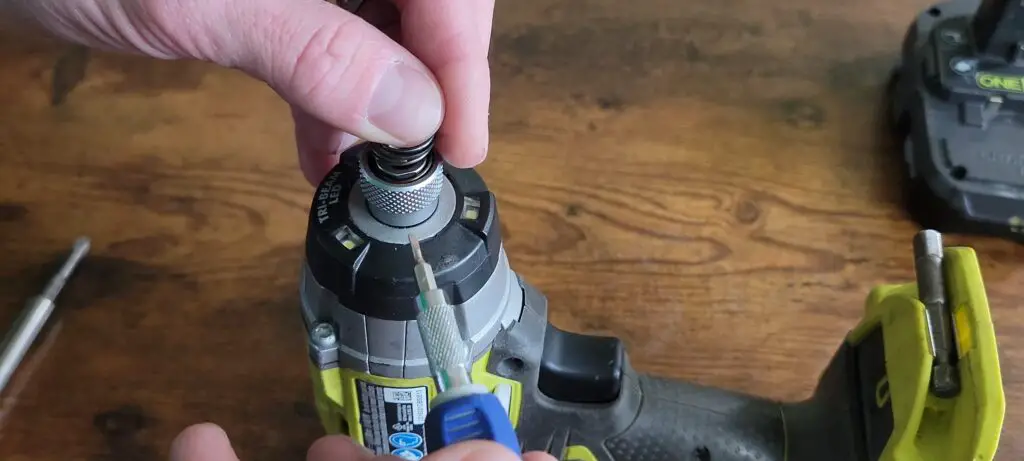
Step 2: Locate Insertion Point and Pry Out Retaining Clip
As you can see from the photo above, there’s a flattened area on the bit holder. The flattened area is where we’re going to insert our screwdriver on a 30 degree angle towards the sleeve, then angle downward, and then pry the retaining clip towards us by pushing the handle of the screwdriver away as the tip of the screwdriver tilts towards us.
Before you do this step, use the screwdriver to spin the retaining clip so that the clip’s opening is on the opposite side of where we’re prying. Also, as you’re prying, keep your other hand’s fingers on top of the retaining clip so it doesn’t fly away when it frees up the spring below it.
Step 3: Remove the Parts from the Sleeve
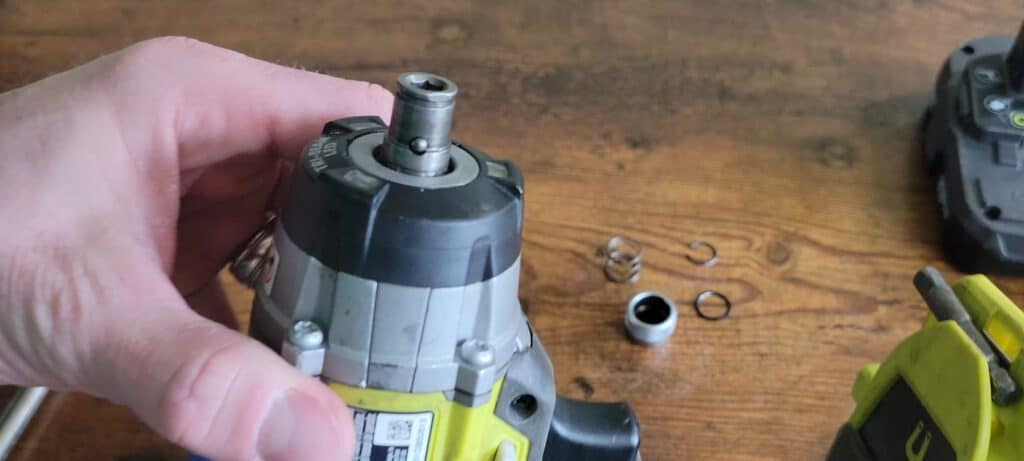
Now that the clip has been freed up, remove it along with the metal washer directly below it, and then lift out the sleeve itself with the spring inside it.
Check to see if the spring is intact without any broken pieces. Also check to see if both ball bearings are present. Everything should look like the picture below.
To remove the ball bearings and see if they are chipped, fractured, or worn out, use the magnet to pull them free.
Step 4: Replace Any Defective Parts
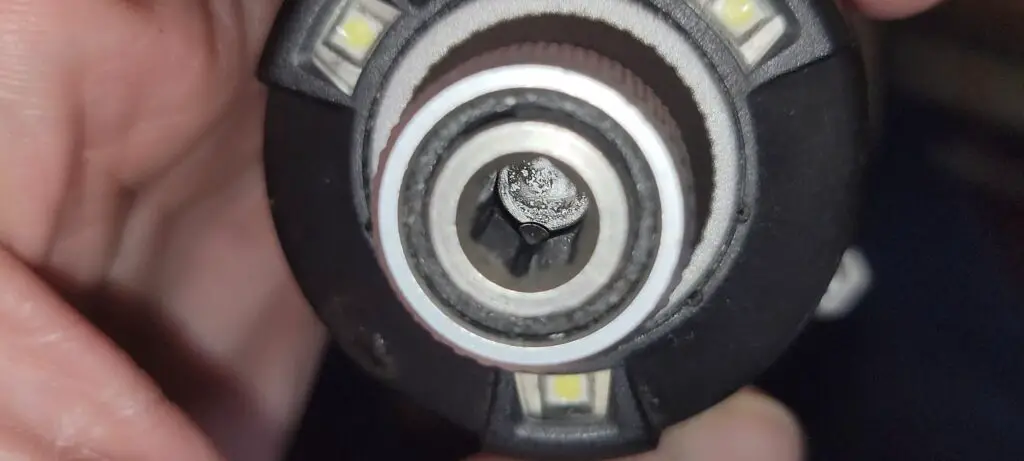
The ball bearings have pressure on them from the spring when the bit holder is trying to lock a bit in place and they protrude inward (see photo below) and rest in the groove around the base of the bit. If the spring is damaged or broken, then the ball bearings won’t have pressure on them to stay locked in place. Likewise, if the ball bearings are worn, fractured, or missing, then they will provide no hold on the bit.
If you need new ball bearings, you’re going to need some with a diameter of 3.5mm. Here’s a link to some stainless steel ones on Amazon. If you need a new spring, you can find that with this link as well.
Step 5: Reassemble in the Proper Order
This is going to be the most difficult part but your inquisitive mind is probably wondering what’s up with the pink marker from earlier (I used a yellow one for this photo op). We’re about to get to that.
Go ahead and replace any of the ball bearings first. Then slide the spring back inside the sleeve and drop it over the bit holder that’s already holding the ball bearings. Once that’s done, lay the metal washer on top of the spring and push the washer and spring down with your non-dominant thumb so that the spring is flush with the sleeve.
Next, place the retaining clip on the metal washers and slide the opening of the clip under your non-dominant thumb. Everything should be close to flush. You may need to “decock” the bit holder by pressing a screwdriver against the bottom of the floor of the bit holder to make the sleeve sink down a bit.
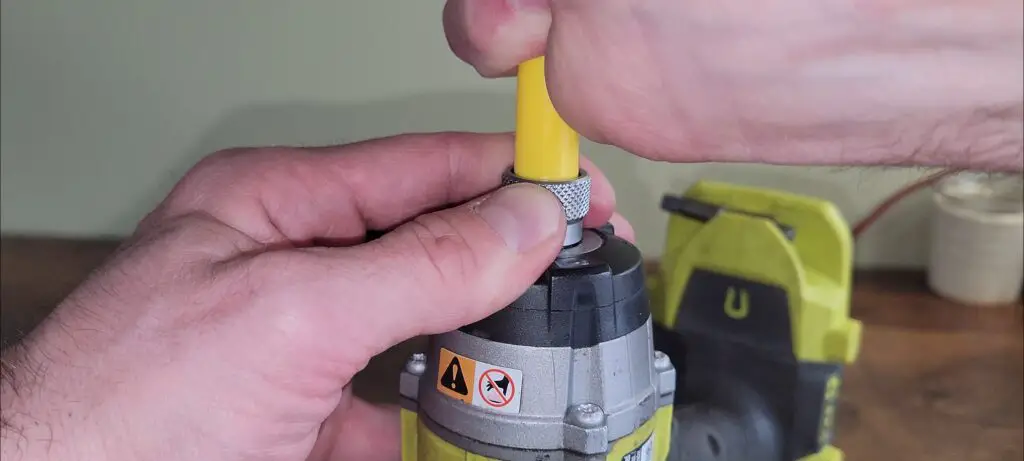
Next, take the marker and remove the cap and place it on the opposite end of the marker with the deepest opening of the cap exposed.
Use that end to carefully slide onto the retaining clip and firmly press down with a slight back and forth spinning motion. The marker cap is a near-perfect fit to push over the sleeve and is just a tad too narrow, which is perfect when it finally expands a bit as you twist and it will push the retaining clip down. Depress the spring, washer, and clip as much as you can and gently lift the marker. If it pops out, try again. If it stays in place but is depressed too low, just pull up on the collet to “cock” the spring and it will lift into place.
Final Thoughts
And that’s it! You’ve successfully taken care of your Ryobi impact driver that won’t hold a bit. If any of these directions were unclear, feel free to check out the video below where I did my best to film everything as best as I could.
