The joys of using Ryobi tools is that they are relatively inexpensive, have interchangeable batteries between the tools, and are durable enough for a weekend warrior. Every once in a while though, these tools will give us headaches with malfunctions that stop our work that we planned on tackling.
My Ryobi P320 Airstrike Brad Nailer (Amazon) did this exact thing. It was working just fine on rebuilding a bed’s box spring, and when I went to use it the next day, I got the loud “thud” when pulling the trigger but there was no nail to show for it. In total, I had owned this nailer for over two years, and maybe had 30 minutes of actual use out of it.
I absolutely loved this tool, but needless to say, I was not impressed with my $100 investment.
Now, this article (and the embedded video I made⬇⬇⬇) is going to deal with the problem I described above where you see the light turn on, the safety tab pushes in, the trigger cycles, a loud “thud” is heard, but no nail is shot into the wood.
As a general rule, a Ryobi brad nailer will fail to shoot nails due to a lack of lubrication on the rubber seals of the driver assembly within the drive cylinder. Removing the magazine assembly and part of the depth adjustment assembly will expose the drive assembly. Spray lubricant down the cylinder and carefully pull the drive assembly forward several times with a pair of pliers to lubricate the seals and then reassemble.
Sounds easy, right?
Don’t worry. Even if you’ve never fixed anything in your life you should be able to tackle this project and succeed in under 15 minutes! I will cover the tools you need, have photos to accompany each step, and there is an embedded video below as well that will give you an “over the shoulder” look at exactly what I did.
Let’s get started!
Tools You will Need to Repair the Ryobi P320 Nailer
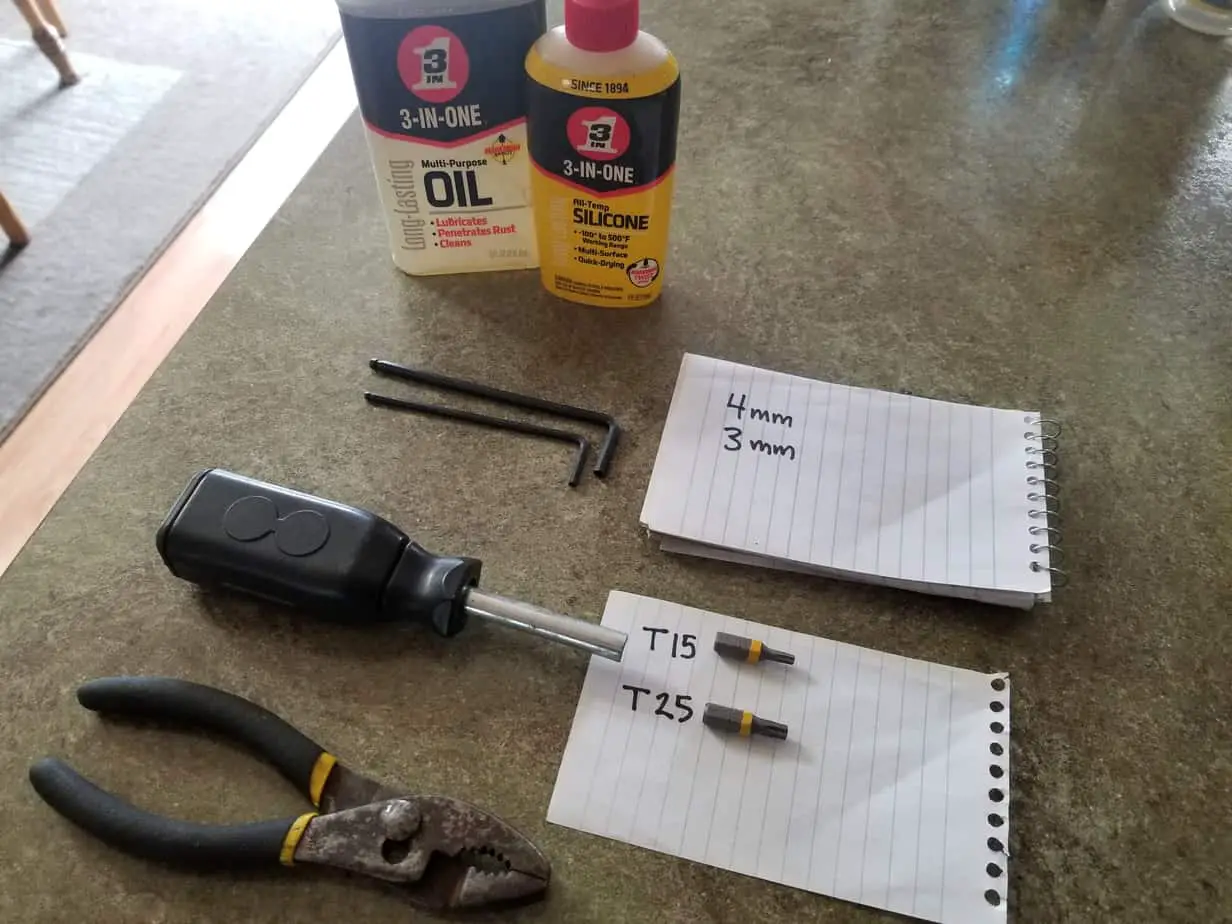
Here are a list of the basic tools you will need. I will provide Amazon Links to them as well if you don’t want to make a trip to the hardware store.
- Safety Glasses (Optional, but Recommended)
- Set of Metric Allen Keys (Hex Keys) — you will need a 4mm and a 3mm, OR a set of Torx Bits (you will need a T15 and a T25 bit) and a Driver (the “Torx bits” link comes with both of those bits and a driver)
- Pliers
- Lubricating Oil (I used 3-in-One Silicone, and I have had no problems in the 2 years following the repair, but I’m assuming any of the 3-in-One Oils would work well if you have them on hand already)
⬇⬇⬇ Step-by-step video on how to fix your Ryobi P320! ⬇⬇⬇
Step 1: Remove the Battery and Nails from the Magazine
Do yourself a favor and be safe by removing the battery from the bottom of the tool first. When that is done, you will need to remove any nails that are in the magazine assembly because we will removing that soon. If you fail to do so, they will fly out at your face when you remove the locking clasp in the next step.
Step 2: Undo the Locking Clasp and Remove the Two Retaining Screws
At the top of the magazine there is the black locking clasp. When the nails are removed from the magazine, go ahead and undo the clasp and then use a 4mm hex key or T25 torx bit to remove the two retaining screws at the top of the tool that hold the locking clasp in place. Set them aside so they won’t get lost.
Step 3: Remove the Nut and Bolt from Bottom of the Magazine and One on the Side
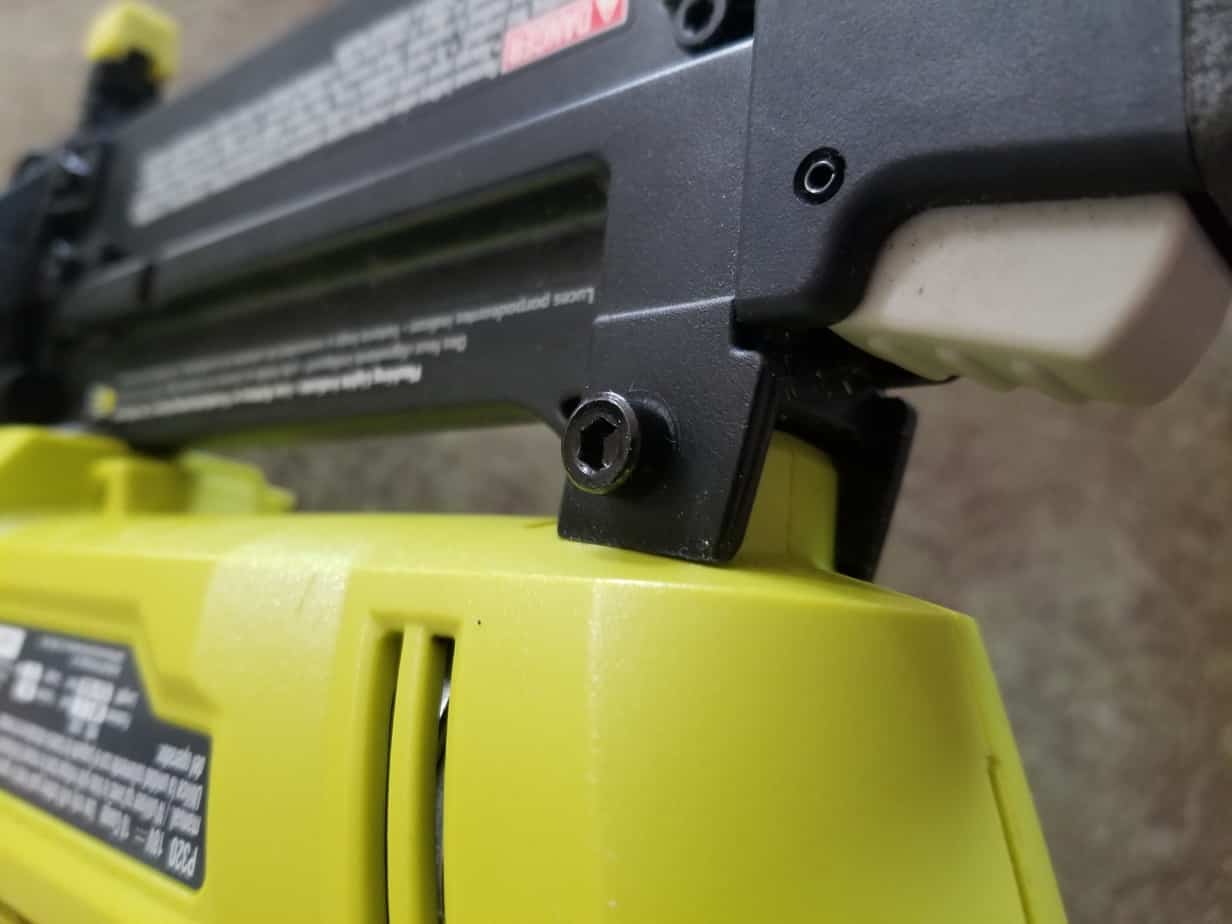
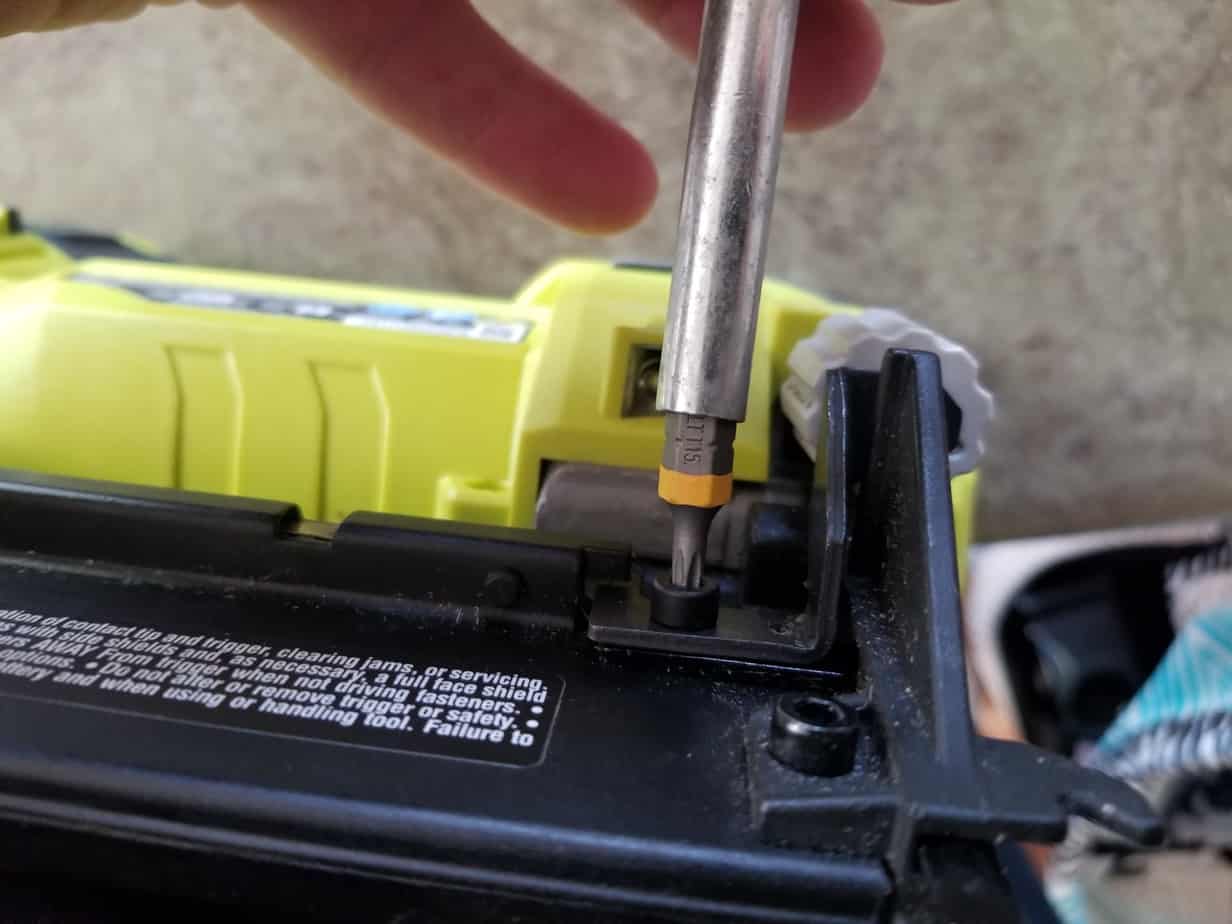
Using a pair of pliers to keep the nut from spinning, use a T25 torx bit or 4mm hex key to remove the bolt at the bottom of the magazine assembly. Put the nut back on the bolt when it is removed and set them aside so they won’t get lost. About 7/8 of the way up on the right hand side of the magazine is another screw holding the magazine on the tool. Go ahead and remove that as well with a T15 torx bit or a 3mm hex key and set it aside.
Step 4: Wiggle the Magazine Free from the Tool
Pretty much what the title says. Don’t get too rough with it, but the magazine should now separate from the tool. The only thing holding it in place now is the depth adjustment assembly by friction (I refer to this assembly as the “safety assembly” by mistake in the video).
⬇⬇⬇Below is a condensed video on how to repair the brad nailer, with closer and better footage.⬇⬇⬇
Step 5: Add Oil to the Drive Cylinder
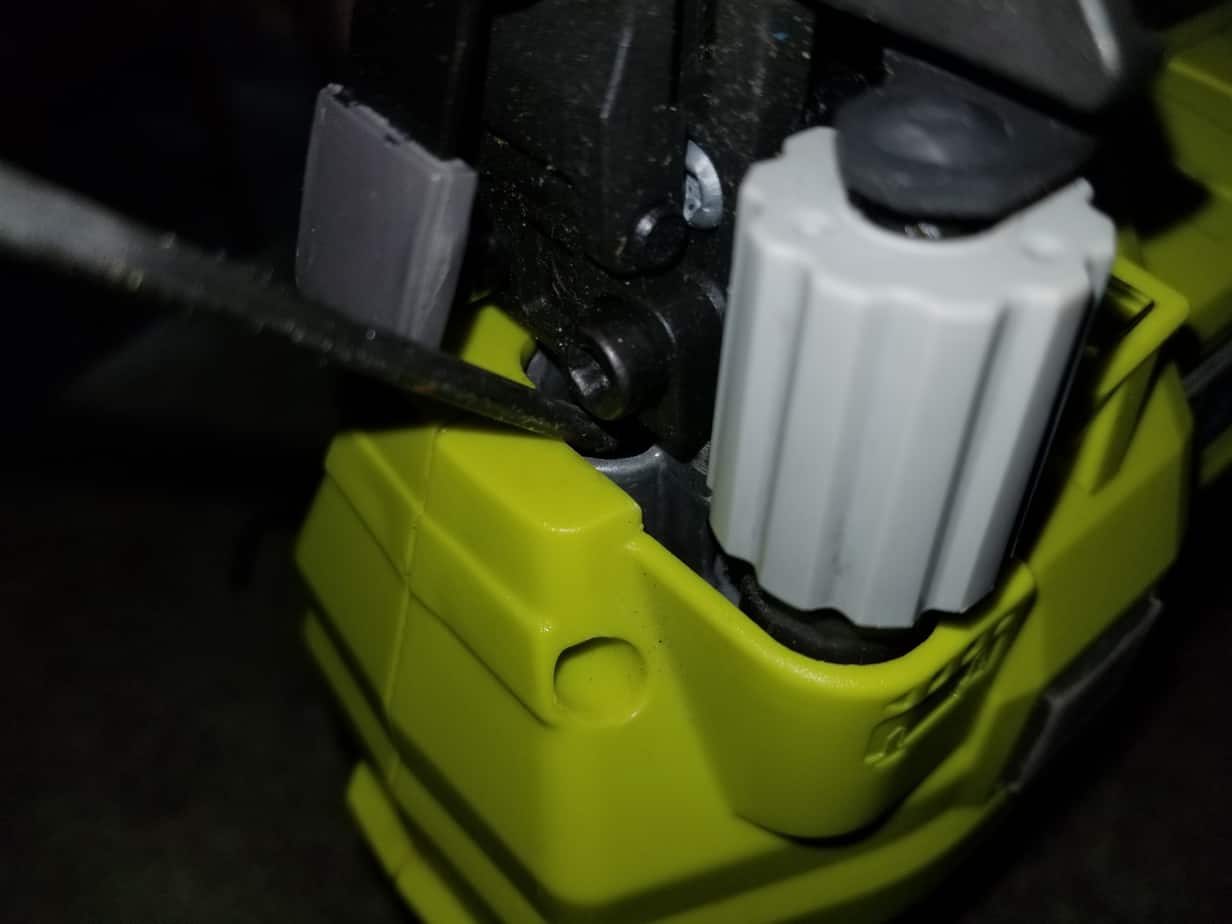
With the magazine removed, you’ll now see what I refer to as the “firing pin” in the video. This is technically called the “drive assembly, and it is a long, flat steel rod that is smooth on top and has grooves on the bottom. It is tapered on the end where it pushes out the brad nails.
Look down the cylinder that the drive assembly is housed in. There are seals between the cylinder and the drive assembly that are no longer lubricated and are bound up.
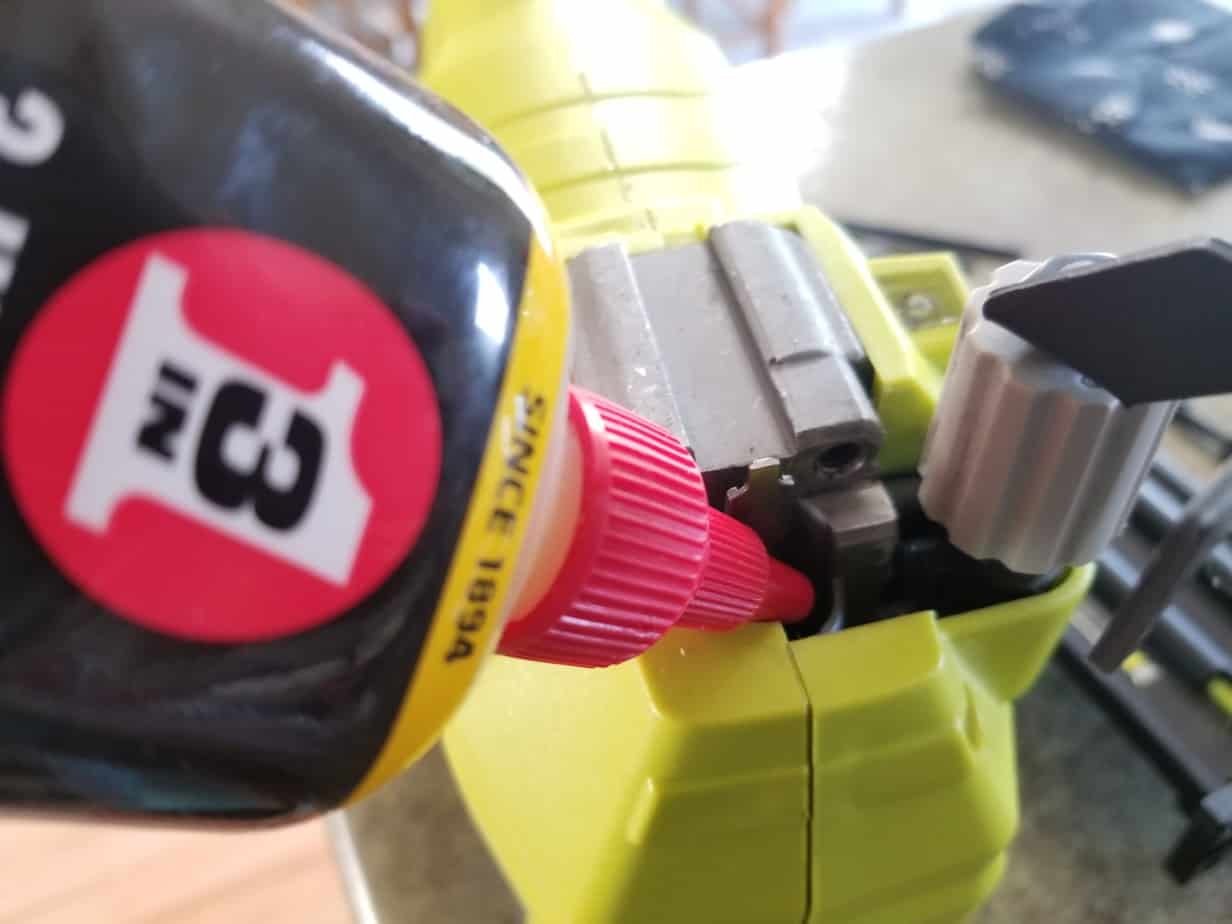
Liberally squirt some oil down all along the cylinder walls and so that it runs down to the bottom of the drive assembly.
Like I said in the “Tools Required” section, I used 3-in-One Silicone Oil and I haven’t had any issues with it binding up again after I fixed it over 2 years ago. I am not saying this is the best oil to use, but it has worked just fine for me and I’ve put a lot of hours on my Ryobi P320 at my current job.
Step 6: Carefully Work Drive Assembly Forward and Back with Pliers to Lubricate Seals
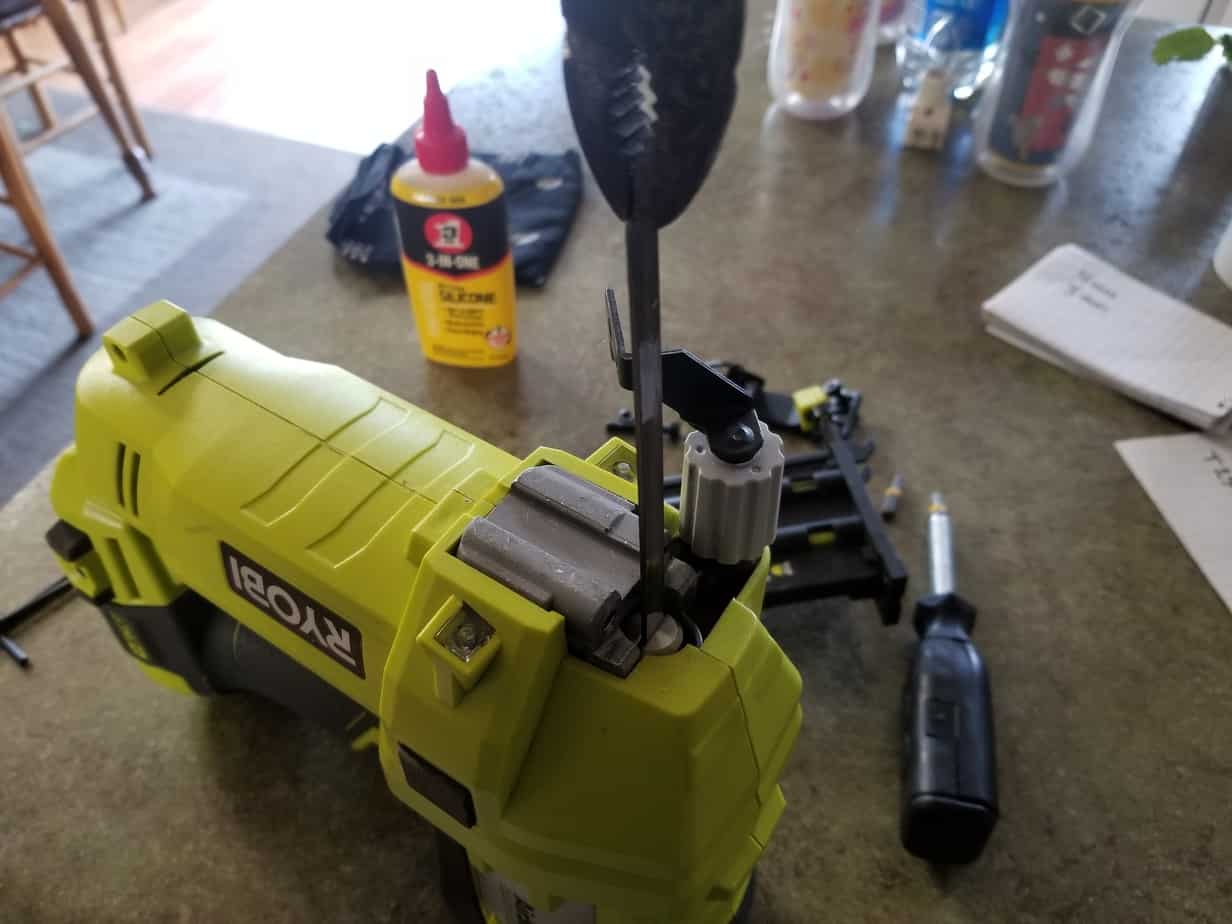
Now that the oil is at the base of the drive assembly within the cylinder, use a pair of pliers to grab onto the end of the drive assembly. Be careful not to bend it or your tool will not work properly!
Once you have gripped it with pliers, gently (but firmly) pull on the drive assembly to bring it forward a couple inches. Pull straight out, not on an angle!
You will feel lots of resistance on your first pull since it is bound up, but even after it is lubricated you will still feel the resistance of the magnet inside the tool.
Work the drive assembly back and forth several times to lubricate the seals between the drive assembly and the cylinder walls.
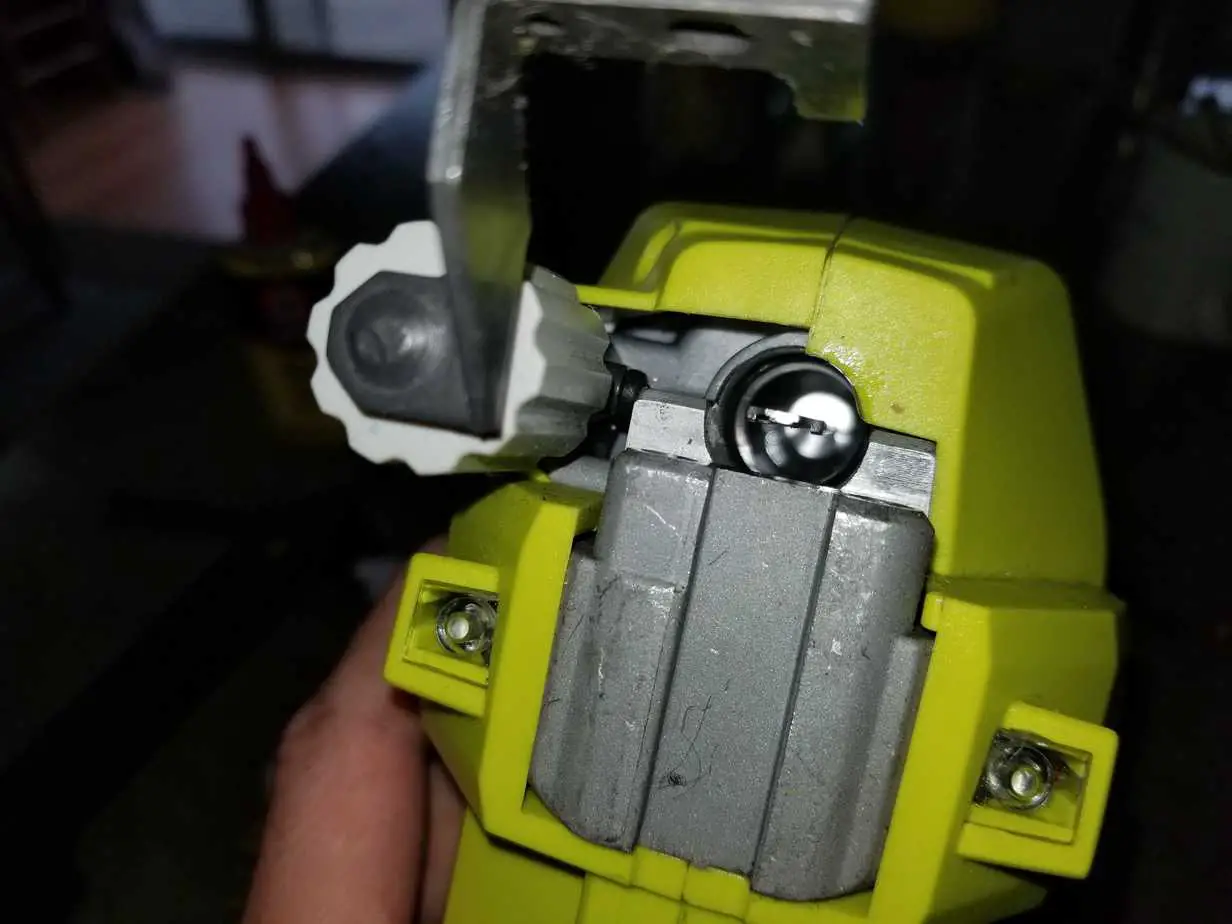
Step 7: Test Fire the Brad Nailer
I recommend wearing safety glasses throughout the whole process, but definitely during this one. Go ahead and place the battery back in the tool. Move the depth adjustment bracket off to the side, pull back on the depth adjustment knob (the gray knob) and keep your hand out of the way of the drive assembly.
Point the tool in a safe direction and pull the trigger. You should see the drive assembly propel forward and return back into the tool. If this works for you, you can now proceed to the final step of reassembling the tool.
CAUTION: Remember that when you test fire the excess oil in the cylinder will spray out for several feet, so you might want to do this part outside.
Step 8: Reassemble
This is the only part that might give you a little headache when fixing your brad nailer. I will do my best to describe what to do, but it might be best to just check out the video above. You can skip to 8:27 if you just want to skip to the reassembly process.
- First of all, you’ll want to remove the battery from your test firing in the previous step.
- Make sure the
- Then, remove the yellow tip and the L-shaped bar that it’s attached to from your magazine.
- Reattach the magazine to the tool and make sure the adjustment bracket that is attached to the gray knob slides into the slot on the right hand side of the magazine and make sure that the driver assembly is sitting on top of the rail on the magazine.
- Place the bolt and the nut back through the bottom of the magazine to retain it. You can tighten it later.
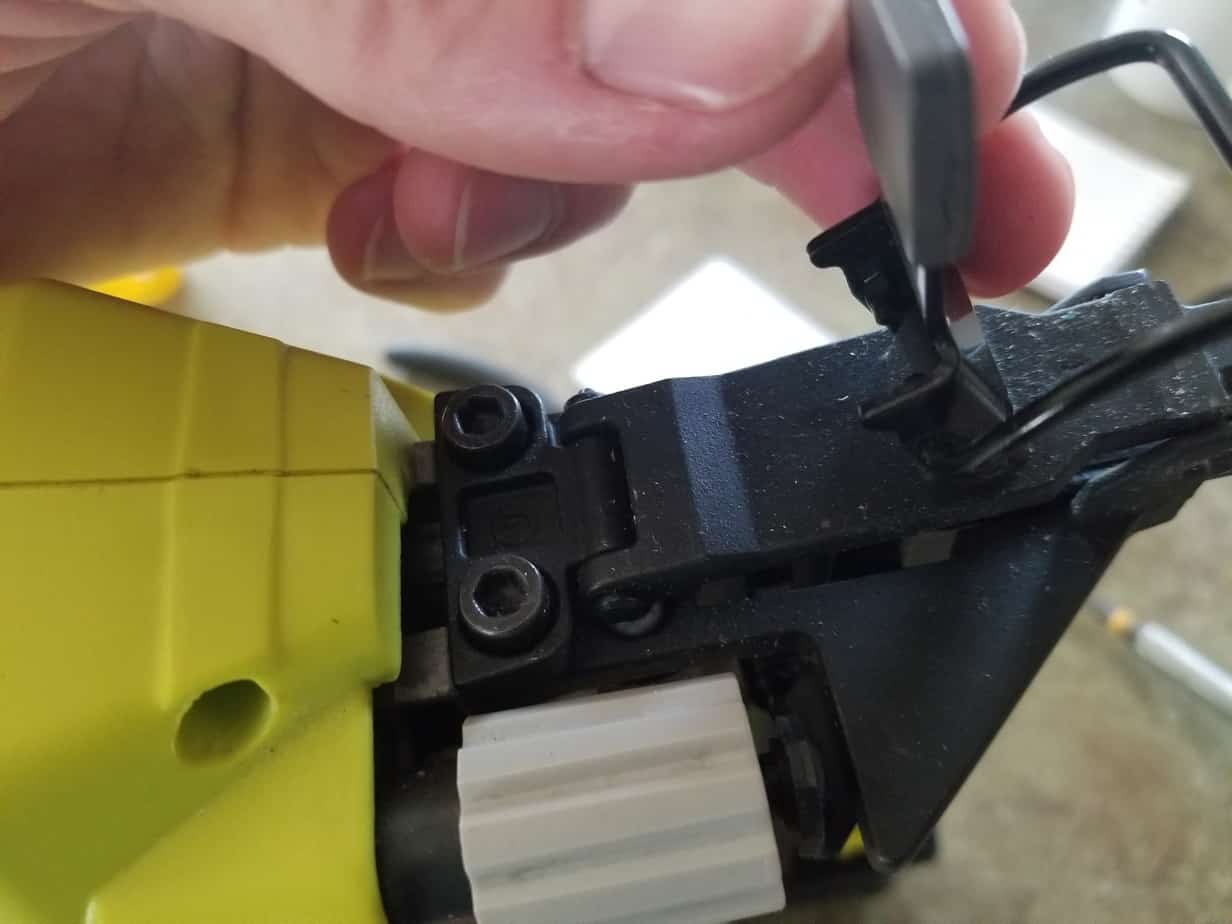
- Replace the yellow-tipped L-bar by coming up from the bottom and dipping it down so that it slides between the depth adjustment bracket and the magazine. (SEE FIRST PHOTO BELOW). It is easiest to do this while the tool is on its left side. Pull up on the depth adjustment bracket and push the depth adjustment in slightly if needed to work the L-shaped bar back in place. They are supposed to mate together (SEE SECOND PHOTO BELOW).
- When the bar is in place, screw in the 3mm screw with a 3mm hex key, or a T15 bit.
- Tighten the nut and 4mm bolt at the bottom of the magazine.
- Screw in the two 4mm screws for the locking clasp and clasp it shut.
- Insert nails into the magazine, and insert the battery.
- Fire several nails into a scrap board to work out any excess oil so that it doesn’t stain any future project and now you’re back in business!
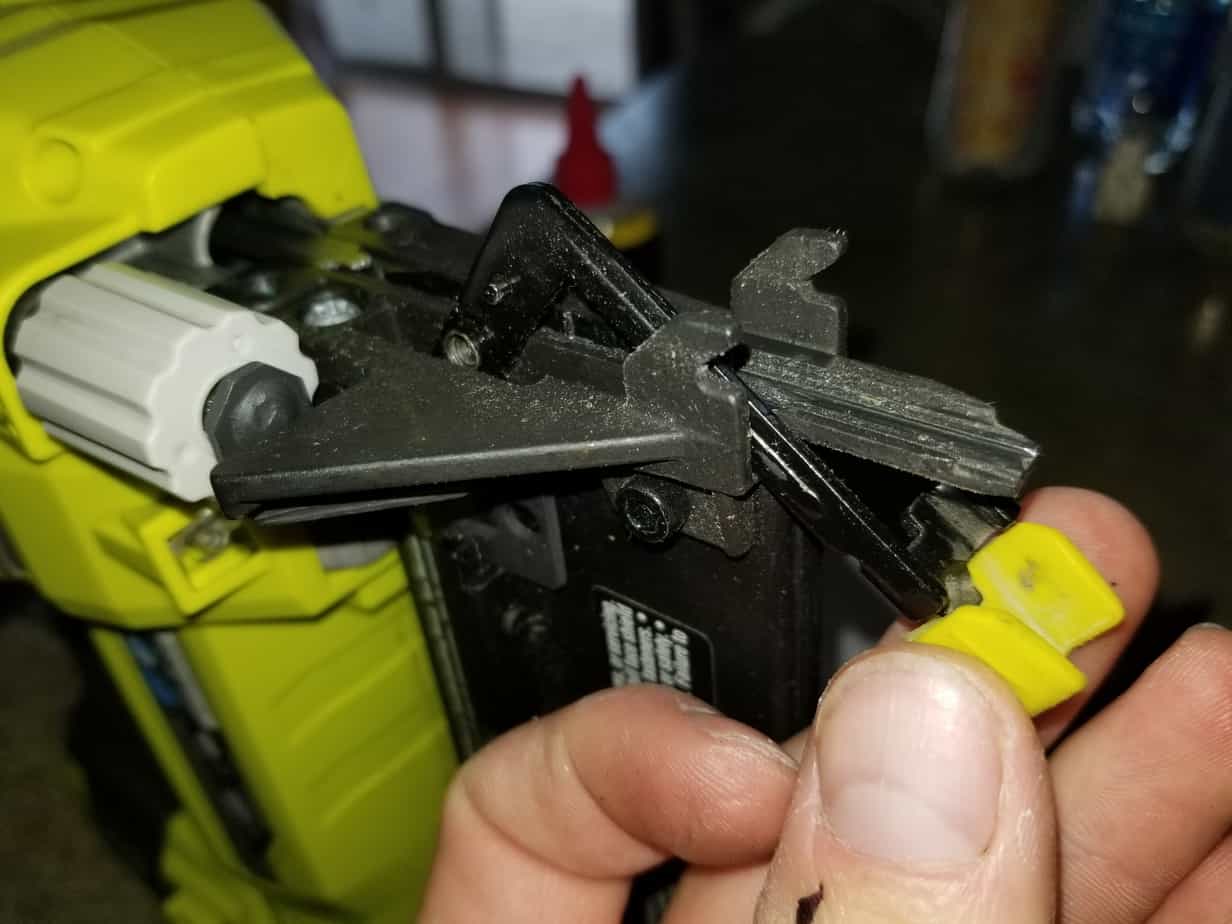
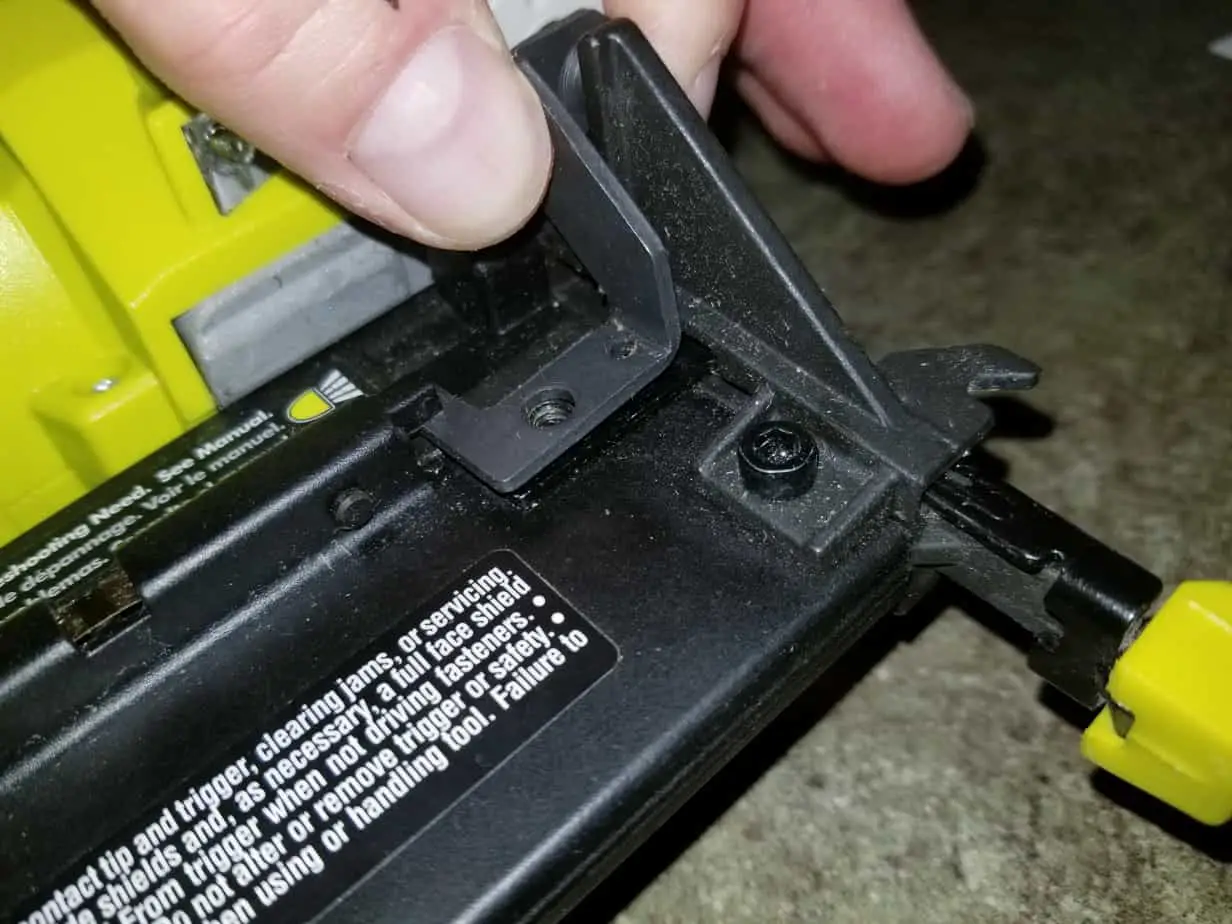
How to Prevent a Ryobi Airstrike Nailer from Malfunctioning?
I love this tool, and besides this one issue it has worked perfectly for me. In fact, I believe wholeheartedly that it was my fault for not maintaining it. I highly recommend picking one up if you’re not a contractor, but just a home-DIY guy or gal. That being said, it is a tool, and tools will malfunction if not maintained properly.
I kept my Ryobi Brad Nailer in my garage which is not temperature controlled. That means it gets down to -10 Fahrenheit in the winter, and 100 degrees in the summer. Even though I didn’t use the tool much over the 2 years I had it, I never lubricated it and the temperature extremes certainly didn’t do me any favors.
It is best to apply a small amount of lubricating oil to the inside of the drive cylinder and cycle the action a few times by driving some nails into a scrap piece of wood. You should be able to do this without removing all the parts like you did in this article. We only removed them because the unit was already seized up.
I try to do this twice a year as general maintenance and I haven’t had a problem since.
