If you’ve just bought a used generator or just haven’t fired yours up in quite a while, you might be asking yourself if it’s normal for your generator to surge at idle. After all, the generator is still producing power and it seems to run great when under load, so everything should be fine, right?
No, a generator that surges at idle is running at higher air to fuel ratio than normal and is starved for gasoline in the combustion process. Though this is relatively harmless, it may lead to permanent engine damage if there is excessively loud “pinging” or “knocking” as this will indicate detonation occurring during the combustion process.
An engine that is surging at idle is also known to be “hunting”. This means that it is searching, or hunting, for gasoline because the air to fuel ratio is too lean. Lean ratios mean that there is too much air relative to the amount of fuel.
This can mean that there is actually too much air being sucked into the combustion chamber through the carburetor (say, through a torn gasket which creates a vacuum) and the appropriate amount of fuel (if that vacuum leak didn’t exist), or it can mean that the amount of air is correct but gasoline is being restricted by a clogged jet and is not enough.
The latter is the usual culprit.
Either way, if you’re left with a lean running engine that is thirsty for more fuel in the final mixture that makes it into the combustion chamber then you will experience surging when idling.
Let’s dive into the main reasons why you’ll experience a lean running engine that surges and what to do about it, as well as what causes excessive “pinging” or “knocking and why it’s bad.
The following are in the order I would recommend checking.
1. Fuel (Quality)
The first thing you should check before you even dig into anything is the quality of your gasoline that’s in your generator. If you have gasoline in the tank that has not been stabilized and has been in there for more than a couple months then fuel quality is likely a major issue in the surging.
Your gasoline at that point has lost most of its combustible light-ends and now has the heavier ends that don’t want to vaporize and combust as quickly. Your engine is basically malnourished with the stale gasoline and no matter how clean the carburetor is it’s likely not going to run properly and you may experience surging as one of the symptoms.
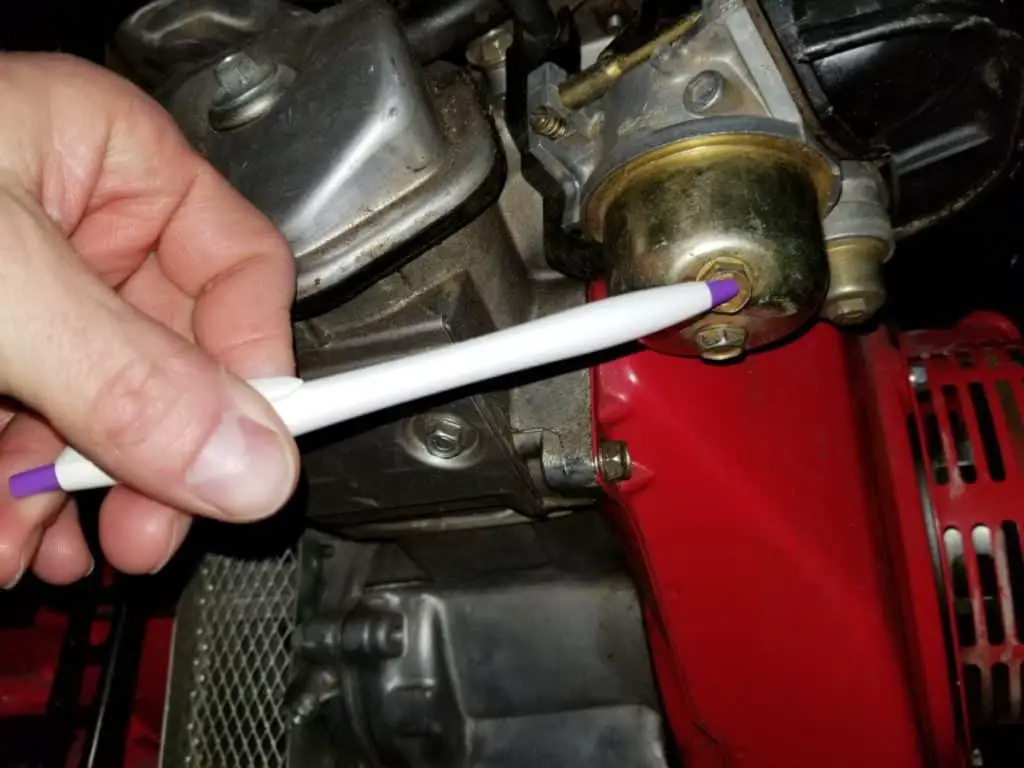
To get an idea of what the fuel looks like in your carburetor, turn off the fuel petcock (shut-off valve) and grab yourself a 10mm wrench or socket. Then, unscrew the drain plug (if you have one) or the main bolt if you don’t. I prefer to have a glass jar to catch the gasoline so I can inspect it for water, discoloration, and debris.
If you open your gas tank and use a flashlight to look inside, give it a little shake. If you see blobs dancing on the bottom, then you have water in there too. You can hold the jar under the carburetor with the drain plug open and turn on the fuel valve. The water should be the first liquid to get sucked out. Allow it to drain into the jar until you don’t see water in the tank and then shut the valve again.
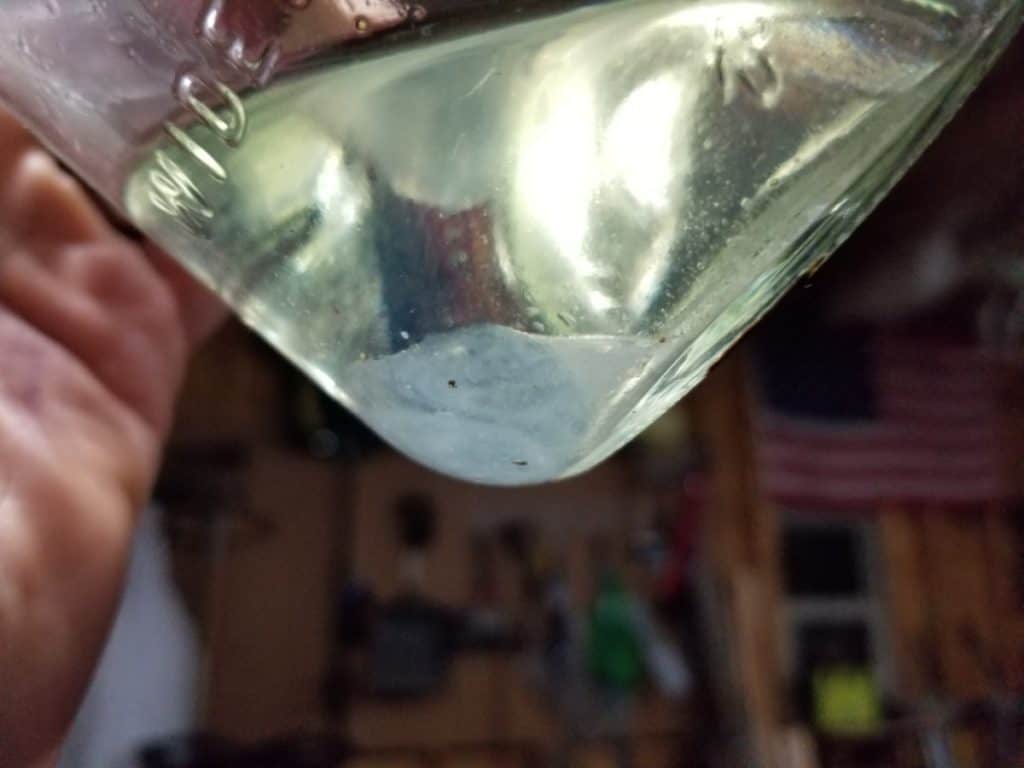
Just doing this might actually solve your problem if you had water in your gas. Fire up the generator and see if you are still experiencing problems.
If you do have old gasoline that was left in the tank which has now started to turn to varnish, then you’d likely have the next problem as well which is a dirty carburetor and especially a clogged or restricted idle jet.
2. Temperature
Cold weather can cause your generator to surge at idle sometimes for 10 minutes or more until things really start warming up. When the temperature is cold, gasoline does not vaporize quickly at all and you may need to leave your unit on half-choke for a long time until it reaches that point.
When you have your generator on choke or half-choke, it causes there to be even less air pressure behind the carburetor (in the intake) and less air pressure creates more of a vacuum that will attempt to suck more gasoline up through the jets.
As the gasoline in the tank above the engine starts to warm up from the engine’s heat, the gas will begin to vaporize more readily in the carburetor and you may be able to go from half-choke to open without experiencing surging.
3. Idle/Pilot Jet Clogged
By far the most common mechanical reason why a generator surges at idle is due to the idle jet being clogged. During the idle cycle, which is just a phrase meaning the components of the carburetor that are functioning while the generator is at idle instead of having a load on it, the idle or pilot jet is responsible for allowing the correct amount of gas into the combustion chamber while the throttle butterfly valve is closed and the generator is running on idle.
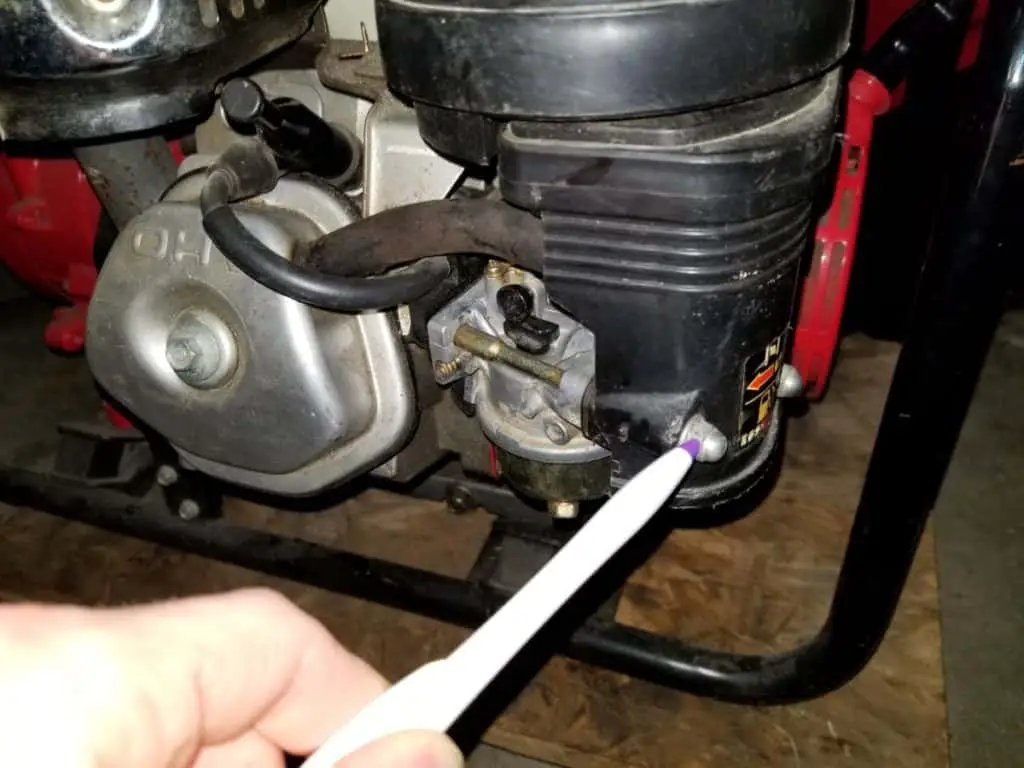
Luckily, the idle jet is generally very easy to get to and you might be able to access it without having to remove the entire carburetor from the generator. If you look at the photo below you can see where the idle jet is located and you’ll likely only need a phillips or flat head screwdriver to access it.
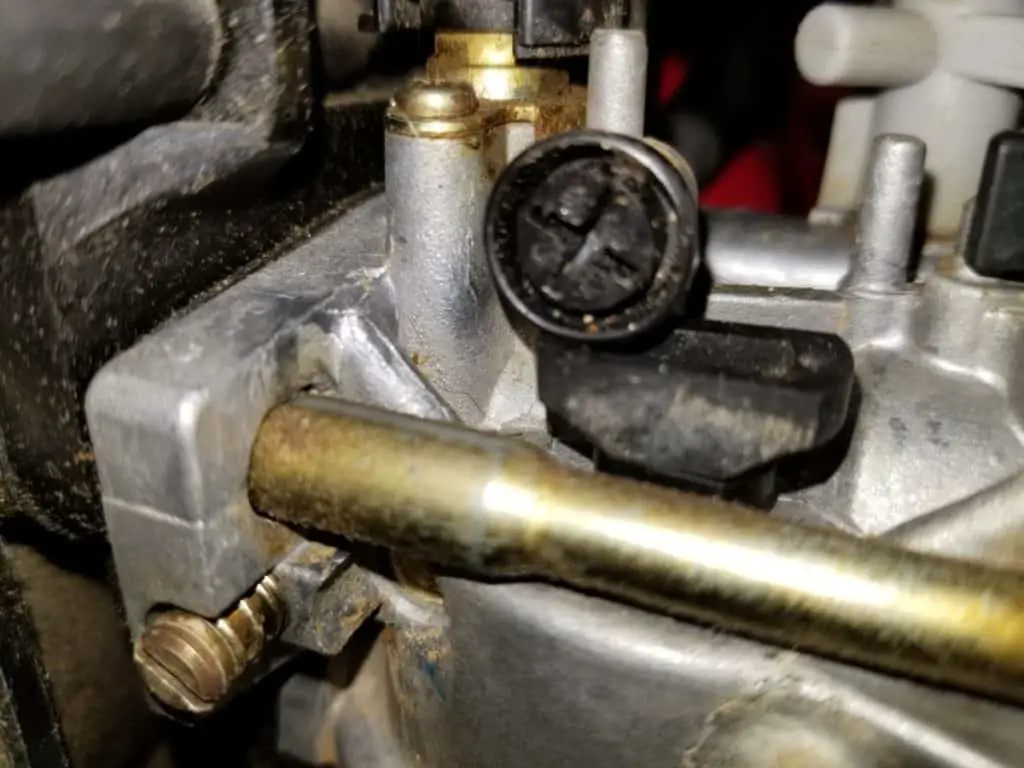
If space is tight, you might have to use an off-set screwdriver set like this one seen on Amazon, or you could also use a flathead screwdriver bit and a ¼” wrench to access it.
You might have to still remove the air filter assembly to make more room, but that is usually only held on by 3 or 4 nuts or bolts.
If you think you can access the idle jet without having to remove the carburetor, then what you’re going to want to do is take whatever screwdriver your throttle adjustment screw requires and screw it all the way in but count the number of turns or half turns, whatever works for you.
Now you know that when you put the adjustment screw back in you’ll need to screw it in all the way and back it out the appropriate amount of turns that you counted.
After you’ve taken note of how many turns, go ahead and remove that adjustment screw. You might now have a plastic piece that was butted up on top of the adjustment screw and if so simply lift it off or pry it up gently with a flat head screwdriver.
Now your idle jet should be exposed. Some idle jets you can simply pry out with a flat head screwdriver or a pair of needle-nose pliers since the head of the idle jet is oblong and goes in only one way. Other idle jets are not just a plastic insert but instead a brass screw and you will likely need a flat-head screwdriver to remove it.
Like I mentioned above, you might have to improvise a short screwdriver with a flat-head bit and a ¼” wrench if you don’t have enough room to use a standard screwdriver.
Once the idle jet is either pulled up or unscrewed, go ahead and remove it and you will see that there is a large hole, relatively speaking, that runs from side to side through the idle jet screw. This is the hole that allows air to travel through.
On the bottom tip of the idle jet is a very small hole which is the jet that the gasoline or fuel travels up through to mix into the air that is running from side to side.
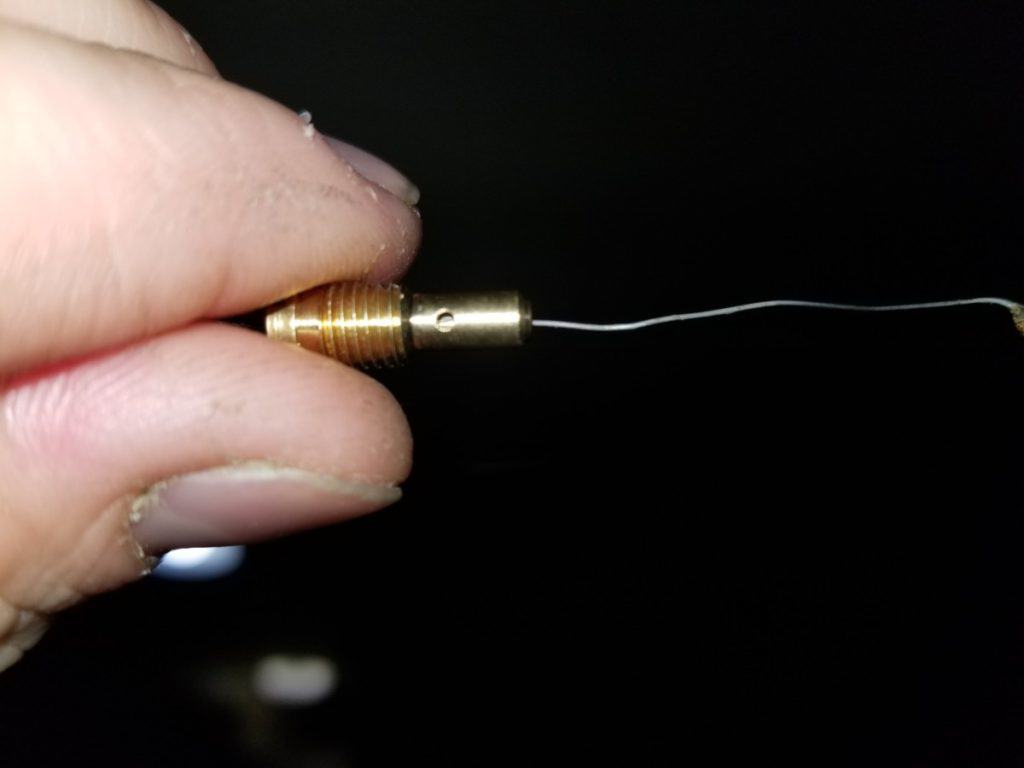
If your generator is surging at idle, then likely this small hole is either completely plugged or very restricted.
To clear out the whole, simply take a single wire from a steel brush or burn the paper or plastic off of a twist tie that you would use for a loaf of bread and use the inner wire to run through this hole several times and remote whatever obstruction is there. Then, while wearing safety glasses, go ahead and take some carburetor cleaner with the straw nozzle attached and give it a squirt or two through that jet.
Now all you have to do is put the jet back in place, place the plastic piece on top of it, and screw in the throttle adjustment screw all the way and back it out the number of turns that you counted.
Fire up your generator and you should notice a huge difference and it will likely sound like a brand new engine.
If that didn’t work for you or you are unable to access the jet because of it being too confined, you can check out my article here which goes into how to remove a carburetor from a generator and how to clean it thoroughly. In my opinion, if you’re removing it, you might as well clean out the entire carburetor while you’re at it.
If it’s your first time doing it, it might take you 30 to 60 minutes, but after you’ve done it a few times you really can clean a carburetor out in about 10 minutes total.
Note that carburetors come in all makes, models, and sizes but generally stay within a few basic setups. Yours might have a screw that is removable but a jet that is fixed under where the screw was seated. In that case, you’ll have to run the wire through the jet on the carburetor and give it a blast or two with some carb cleaner.
4. Adjustable Air-Fuel Mixture Screw Too Tight (If you have one)
If you’ve verified that your gas is good, the generator has had time to warm up if it’s cold, and that the idle jet is clear, then your air-fuel mixture screw might be screwed in too tight which would make it restrict the gasoline (and lead to an idle mixture).
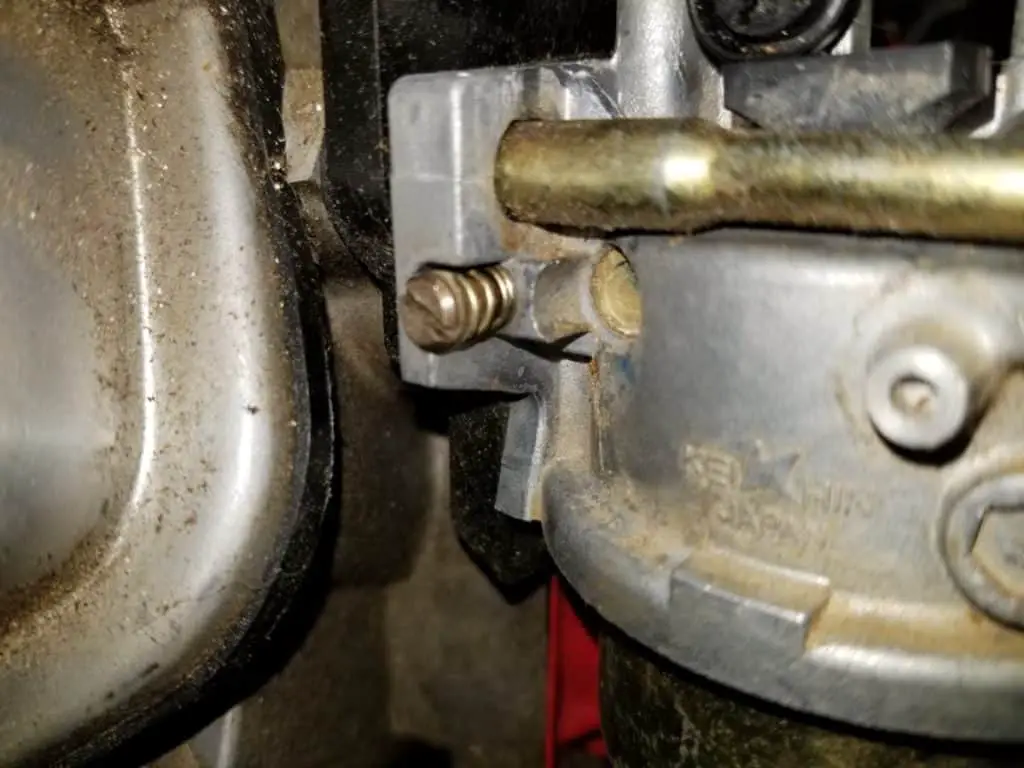
With the generator off, screw the air-fuel mixture screw in all the way and count the number of turns. Now, back it out to where it was. You now know the baseline, or where you started (just in case this was not the problem and you can always go back).
Fire up the generator and then slowly turn the screw out counter-clockwise. If it was screwed in too much, then backing it out might solve your problem if it was restricting your fuel that the idle jet was trying to send through it.
Keep in mind that you may not have an adjustable air-fuel mixture screw. Newer carburetors have a fixed screw that has been set permanently in place due to EPA regulations to cut back on fuel pollution.
Side note: If your air-fuel mixture screw is not adjustable and you’re still having an issue after all of this (and you’ve checked the steps below as well), it is possible to bore out your idle jet in the previous step with a micro drill set (perfect set for the job on Amazon) to increase the amount of gasoline making it to the combustion chamber at idle.
It is advised to do this by hand, in the smallest of size adjustments, and to repeatedly test and retest at operational temperatures until you’ve achieved the desired outcome. You can always bore the hole bigger but you can’t shrink it if you’ve done too much.
Only proceed with this step after you’ve cleaned your carburetor (especially the main jet). If the main jet it restricted, then it won’t be sending enough fuel to the pilot jet so boring out the pilot jet won’t do you any good.
Here’s a video (not mine) with a great demonstration (a snowblower, but the concept is the same):
If you’re still having a problem after adjusting the air-fuel mixture screw, let’s go to the next step.
5. Gasket Damaged Between the Carburetor and the Intake
In this step, you’ll have to remove the air filter assembly and the carburetor. Again, I have basic instructions here if you need a guide.
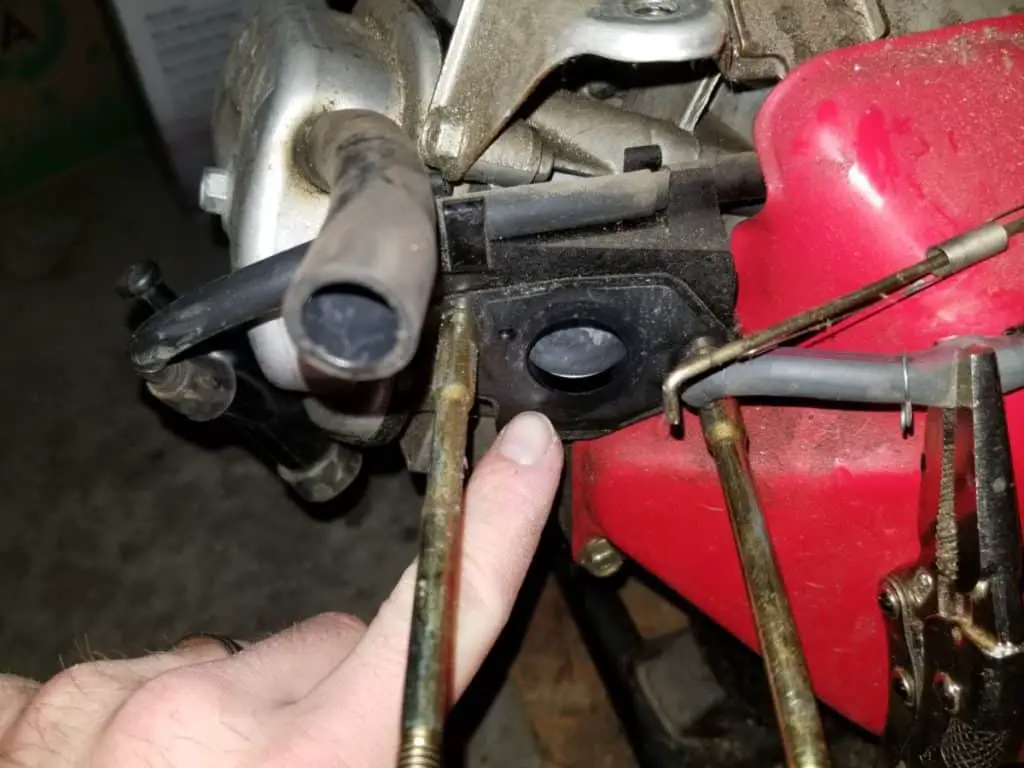
Once that’s done, there is a gasket that sits between the carburetor and the engine (the intake). If this gasket has been compromised (ripped, rotted away), then it will be causing a vacuum and excessive air will be entering your combustion chamber and you’ll never be able to balance out your air to fuel ratio until you replace it.
6. Nuts and Bolts Around the Carburetor and Intake are Loose
A loose nut can cause a gap between the carburetor and the intake which will cause a vacuum for air to fill like in the step above. Make sure everything is tight. Be careful not to over-tighten anything or you may strip threads or crush the carburetor. I’ll leave it to you to gauge how tight things should be.
When is Surging Dangerous For My Engine?
If you’re hearing loud “pinging” or “knocking”, almost like metal is striking your piston in the combustion chamber, then you’re going to be in trouble.
This noise is caused when an engine runs lean (too much air in the air to fuel ratio) and after the engine warms up a little bit. As the engine is running and it goes into the compression cycle (the piston is squeezing the air and fuel towards the spark plug), the excessive air will cause the spark to ignite the mixture more slowly and not as uniformly since there isn’t enough gasoline to burn.
The “pinging” or “knocking” is caused when a separate pocket of gasoline will ignite on its own due to the increased pressure (the compression of the piston) and the heat generated by it. When it ignites, it’s actually detonating (exploding), whereas the spark plug combusts (or burns) the mixture.
The two forces collide within the chamber and push down on the piston with an extreme force that it was not designed to handle.
The piston is designed to handle a controlled burn of vapor which will smoothly push it down and allow it to come back up. A detonation slams down on it like a hammer.
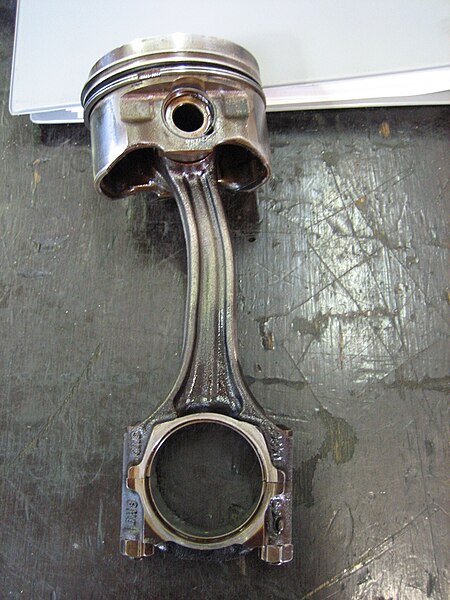
Just imagine that you were running at a fast pace on a smooth road but it was completely dark out so you couldn’t see the road. Based on muscle memory, and knowing ahead of time that the road is smooth will allow you to run and deal with the stress and impact without any issues.
Now, imagine that your feet start landing randomly in 12-inch deep potholes without preparing for it. The stress that of that added and unanticipated drop can cause damage to your ankle or blow out your knee.
It’s the same concept as an engine. It was engineered to handle combustion in the chamber, not detonation.
If you hear this metal-on-metal sound, then you are at risk of blowing out the rings on your piston, blowing out your head gasket, etc. Make sure to look into the possible problems listed above to solve your issue. If nothing seems to work, you may have to have a technician check it out.
