I see that you’ve been noticing that every time you do the dishes or take a hot shower that your water heater sounds like it’s identifying as a popcorn maker.
I wish I could tell you that it’s nothing to be worried about, but that unfortunately isn’t the case. Luckily though, you still have a good chance at reversing some of the problem and even preventing it from worsening in the future.
As a general rule, a water heater will make popping sounds as steam bubbles are pressurized and suddenly released by a thick layer of sediment on the bottom as they try to rise to the top of the tank. This can be corrected by flushing or vacuuming the tank and installing a water softener.
I’ll guide you through what I’ve done to mitigate my issue, some pitfalls to avoid, and hopefully it will get you pointed in the right direction with your unit!
*** This article deals with a gas water heater, but if you have an electric I’m sure you’ll be able to adapt my method to your situation with a little imagination.***
Why a Water Heater Makes Popping Noises
If you’ve got calcium in your water, you will not see it when you are only drawing cold water from the faucet. However, when you heat the water to boiling, then you get to see its crusty goodness in all its glory!
Don’t believe me? Just take a pot and fill it with about a quarter inch of water. Let it boil on the stove for 10 minutes or so (just enough to evaporate a lot of the water but not all of it. You will see a white silt that swirls around on the bottom. That is the calcium (technically, calcium carbonate CaCO3).
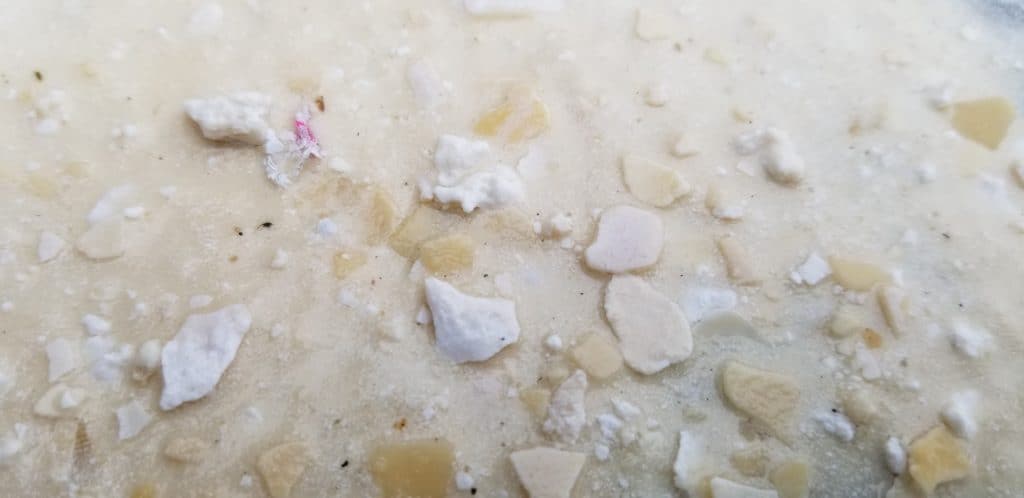
When you do this over and over and over again, like in your water heater, that layer is going to get thicker and thicker. Some of it will remain silty, and some of it will, well, calcify. Yep, you’ll get hard chips and chunks of calcium that start bonding together on the bottom of your water heater’s tank.
The white and yellow sediment that forms on the bottom of a water heater is calcium carbonate (CaCO3). It will be a silt or form into chips and chunks depending on how long it’s been in the tank. Calcium carbonate will cause your water heater to make popping sounds from pressurized steam and can lead to premature failure if not cleaned out.
Now, think of what happens when you bring a pot of water to a boil. We visually know it’s boiling when we see the steam bubbles rising from the bottom of the pot to the surface.
The same thing happens in your water heater.
Except when you have several inches of calcium rock forming on the bottom of your tank, you’ll realize how this changes the dynamics of things. Now the steam bubbles start on the bottom and have to squeeze their way through a labyrinth of tiny slits and cracks in the calcium rock.
When the bubbles (steam) can’t make their way up fast enough, pressures will rise and you will hear the “popping” sound when they are released.
Will Sediment Ruin my Water Heater?
If left untreated, sediment buildup can ruin your water heater if you don’t address it soon enough. It’s a cascading effect as the agitation from the steam bubbles popping around can damage or crack the liner inside your tank. Once this is damaged, the tank can begin to rust. If that goes on long enough, you’ll eventually have a leak or flood.
The byproducts of the process are also not pleasant. The calcium carbonate isn’t harmful to you, and you won’t really be seeing it since it will be at the bottom of the tank, but the rust from the damaged liner will contaminate your water and could start ruining your clothes during washes.
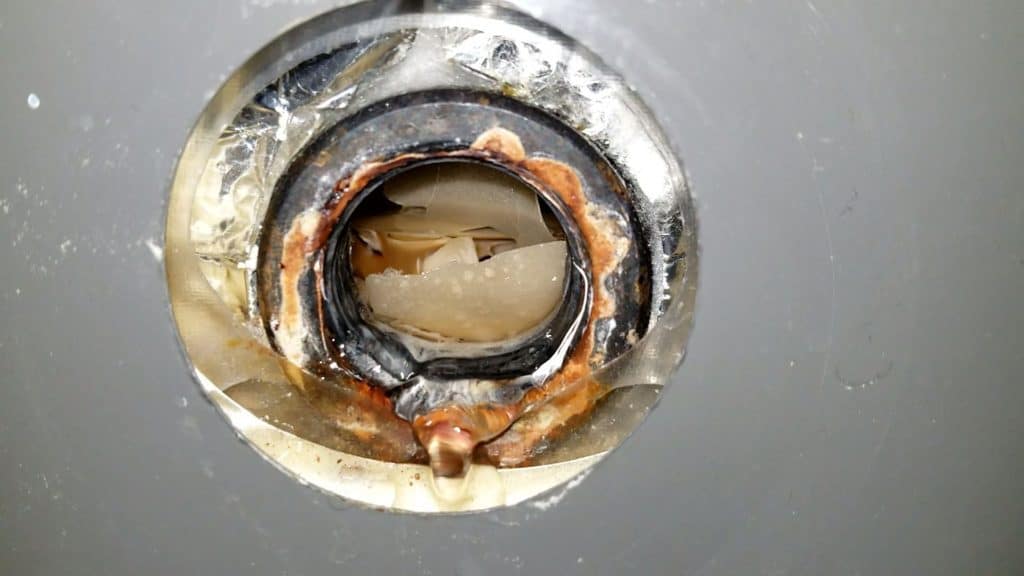
The tank won’t operate efficiently either, since the sediment will be insulating the water from the flame. The water heater will have to work overtime to make your water reach its desired temp, and all the while it will create more damage to the liner by popping more and more.
The igniter or other parts could fail prematurely as well from being over used and overheated.
It’s definitely best to get your tank back in working order.
How to Fix Popping Noises in a Water Heater
I’ve had lots of success flushing and vacuuming out my water heater over the years. It’s typically something that I do twice a year in the early spring and fall, and it takes a full day from start to finish depending on how thorough you want to be.
You’re going to need a fair amount of tools for the job, and you will also need a sacrificial hose. Just buy the cheapest one you can find or use one that needs replacing. Cut it right in half. You also might need a short hose like you’d find on a hose cart. I’ll explain all of this as we go.
To clean out your water heater, you’re going to want to first turn off the cold water valve above the heater, and turn off the heater itself (in my case, I turn the pilot knob to “off” and turn off the gas valve). Turn the hot water faucet in a bathroom on to equalize pressures.
If you have a gas water heater, you’ll next need to likely remove the exhaust chute in order to use a ratchet to remove the anode rod.
Next, I recommend removing the anode rod. You’ll likely need a 1 1/16″ socket and a half-inch ratchet. If you’ve never done it and your water heater is several years old, you might be in for a world of fun! Every curse word you know may play a critical role in this task.
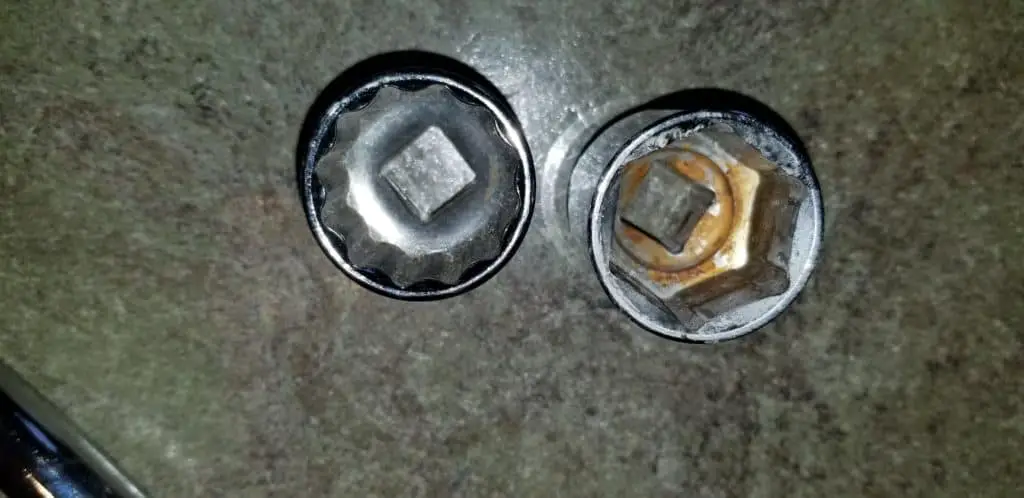
For me, I struggled for hours on my first attempt at cleaning my water heater. I broke a ratchet and stripped out socket as well. When using a cheater pipe to increase leverage on the ratchet, the tank would twist instead.
In the end, I needed to take a ratchet strap and tighten it around the tank and I used a foam stadium pad under the ratchet itself and one 180 degrees on the other side under the strap. The foam acted as a grip on the tank, and the foam also protected the tank from the metal locking ratchet as well.
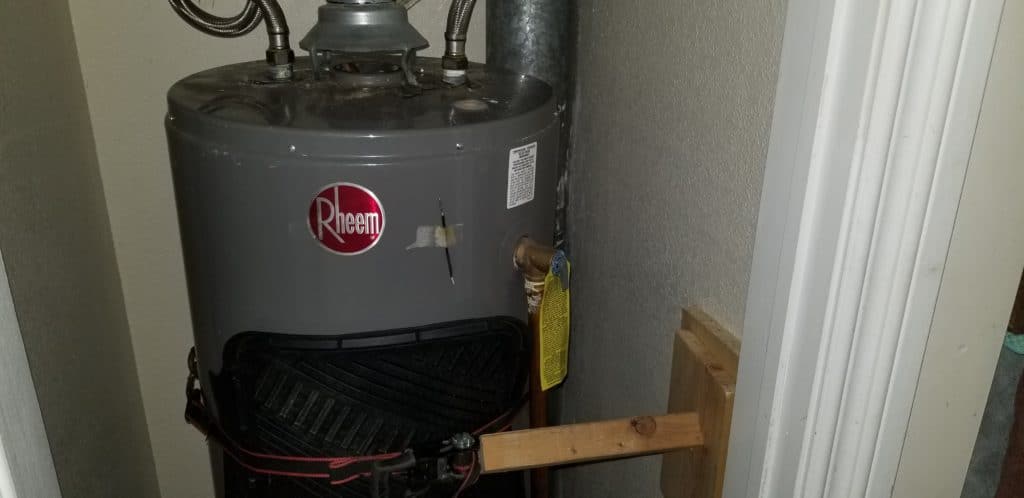
Once in place, I placed a board flat against the wall to the right of the tank and extended another board from that board to the locking ratchet itself. Now, if I tried to turn the anode rod counter clockwise, the tank would meet resistance and wouldn’t turn, allowing all the torque to be concentrated at the anode rod.
Once this was done, I was able to break the threaded bond between the anode rod and the tank.
Remove the rod and you might not even be able to lift it out due to the calcium buildup on it. I had to work mine out for about 15 minutes to remove it. I recommend replacing with a collapsible rod if you have tight quarters. You’ll thank yourself later the next time you go to do this job.
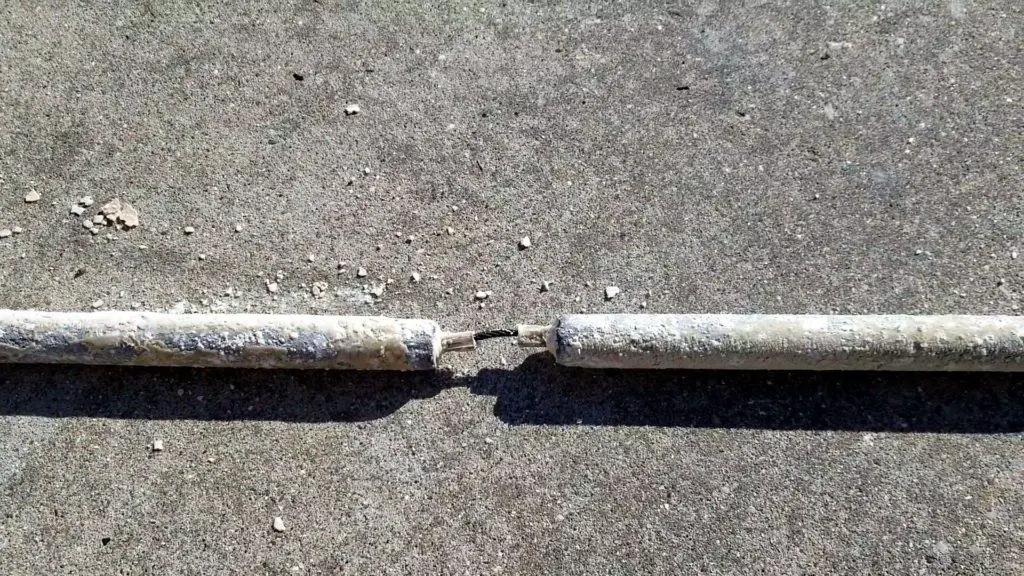
Regardless, chip away the old calcium from the rod with a metal scraper. Anode rods are supposed to be sacrificial rods that deteriorate instead of your tank, but if you have heavy calcium carbonate, you’ll likely see that the calcium just sticks to the rod and the rod is completely intact under the buildup. I’ve had the same collapsible rod for 7 years and once the calcium is removed it’s the same diameter as when I bought it.
Now, place a pot or bucket under the spigot at the bottom of the tank and open it with a screwdriver or whatever tool your water heater requires. You will need to drain the tank of all of its water.
You’ll likely find that your tank is not draining. That’s where I use the short hose from the hose cart to connect to the spigot, and I use my mouth to blow air back through the hose and into the tank. This can dislodge some of the calcium and allow water to flow. You can also use a piece of relatively thick wire to backfeed into the spigot to make a path.
Once water is flowing reliably, go ahead and hook up half of your hose with the male end to the water heater and run it outside to your driveway and allow the water to drain.
Do not drain the water directly on the lawn since the heat will kill the grass.
While it is draining, resist the urge to turn on and off the cold water fill valve to stir up any sediment. You’ll likely clog up your hose at this point with calcium chunks.
When it’s finished, dump a few gallons of white vinegar into the tank with a funnel where the anode rod should be. If you want an even stronger solution, get yourself some citric acid and make a heavy acid to water ratio solution.
Now, you just wait. At least 8 hours if you can manage it. If you don’t have the time, then just skip this step and proceed, but the acid would have definitely started dissolving and softening the calcium deposits.
When it’s been enough time, open the drain spigot again at the bottom of the tank and let the solution drain out in a bucket to pour down the sink. You may have to do this several times. I prefer not to drain acid out into my driveway and lawn since it can ruin the concrete and WILL kill the grass.
Now, remove the spigot with a pipe wrench and be very careful to not ruin the threads on the spigot where the hose was connected. Wrap them with an old t-shirt and tape them up. In fact, leave the hose on there while you break the thread seal so that the threads are protected by the hose. Trust me, I’ve ruined one before.
With the spigot removed, you can now feed your homemade flexible PEX vacuum attachment into the hole and vacuum it out with your shop vac. Remember to remove the cloth filter on your shop vac first.
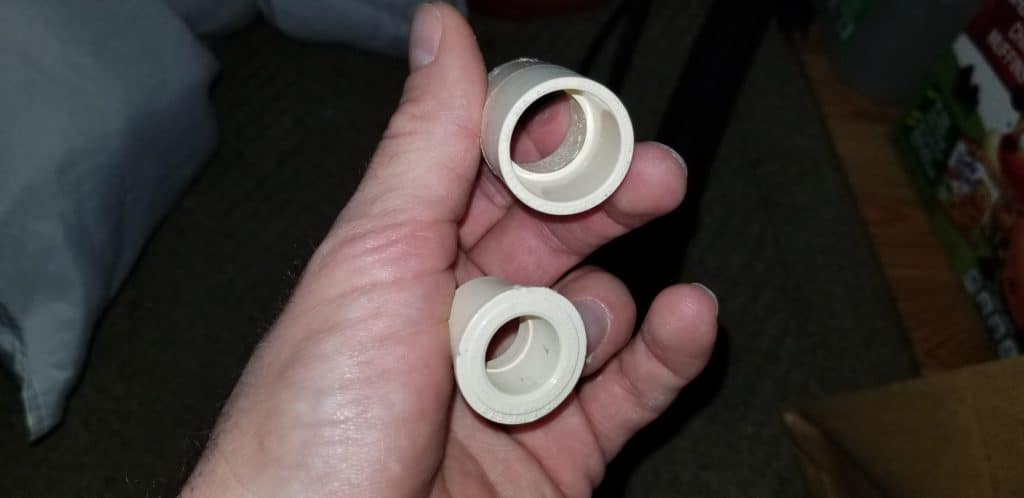
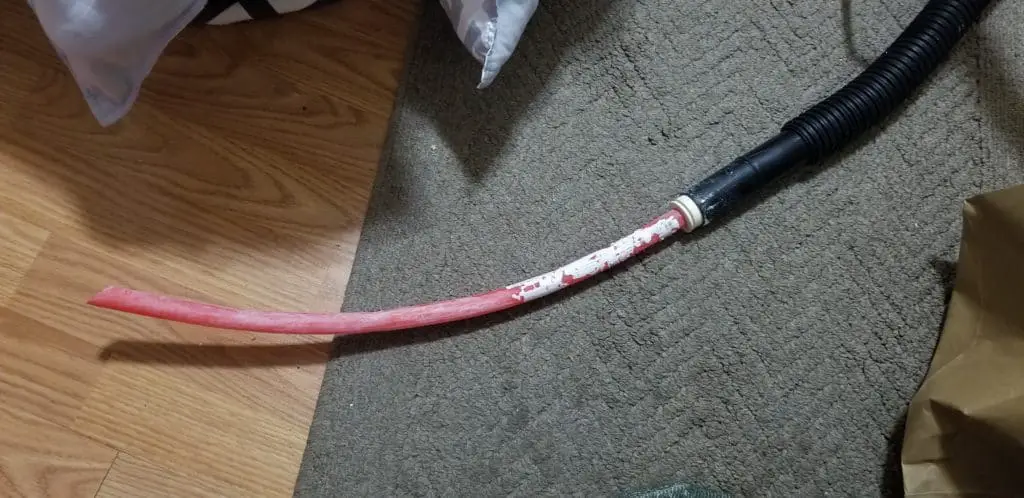
You’re now going to start a series of actions that you take over and over again until you’re satisfied with the amount of calcium that you’ve removed.
After you vacuum the edges of the tank the best you can, you will want to take the male-end hose and hook it back up to where the spigot was. Now, hook the other half of the hose to an outside garden spigot and feed the cut end into the hole for the anode rode up top.
Turn on the water outside to full blast and do your best to direct the water to the edges of the tank to stir up the sediment. After a few minutes, leave the hose to do its thing and go look at the hose outside. You should see a growing pile of white silt and chunks.
Keep hosing the edges of the tank until you see that the pile isn’t growing anymore and no more chunks are coming out. Your hose is now being obstructed at the tank. Turn off the garden hose and wait for the water to drain.
When it is drained, remove the hose and vacuum the threaded area to get the calcium chunks out and free any chunks from the hose end.
Insert your PEX attachment back in and vacuum the edges once again. When you hear the vacuum change pitch, you know your PEX tubing is clogged.
When you’re satisfied, repeat the same steps above where you hook the hose back up and turn on the garden hose.
I typically do this process about 5 or 6 times.
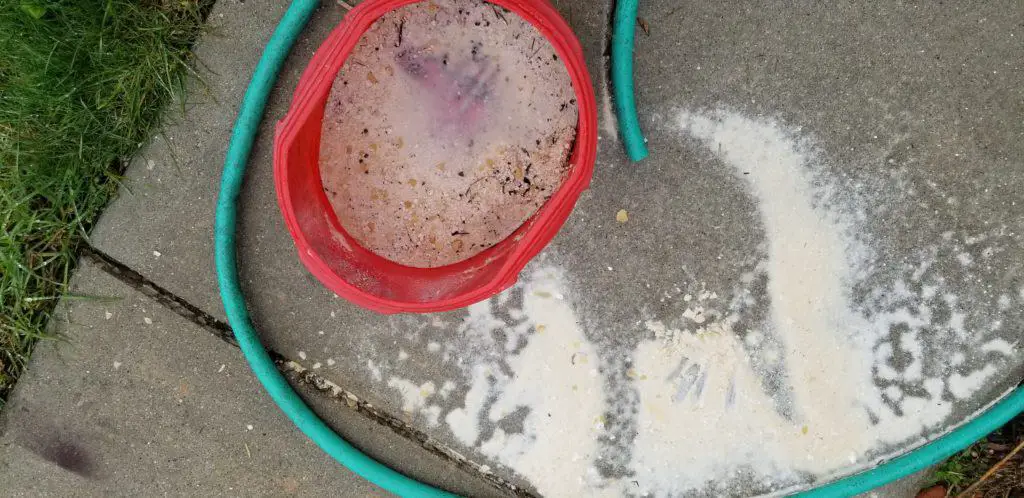
When you are done, put everything back where it belongs and turn your water heater back on. I like to open the hot water on all of my sinks and showers to let the air out of the lines.
You will now have a water heater free from popping noises!
You will need to repeat this process yearly or maybe even twice a year to keep up with the recurring popping sounds unless you follow the advice below.
How You Can Prevent Popping Sounds in Your Water Heater
As a general rule, the easiest way to eliminate popping noises from your water heater is to first vacuum and flush your tank and then install a water softener to your system. Water softeners are designed to remove calcium carbonate (among other things) from your water.
Not only will your tank be clean in the future, but all of your shower heads, faucets, dishwasher, and coffee makers will be free from buildup as well.
Can I use Vinegar to Clean My Water Heater Tank?
I love to use vinegar for softening and breaking up some of the lighter chunks and chips of calcium for about 8 hours prior to vacuuming it out, but I don’t just pour vinegar in there and let it do its thing until everything is dissolved.
Generally, vinegar is not a preferred method to clean out the calcium carbonate deposits in a water heater due to the time constraints involved. In order to be effective, the vinegar would need to be left in the tank for days (if not a week) in order to dissolve all of the calcium. Most people do not want to be without hot water for that long.
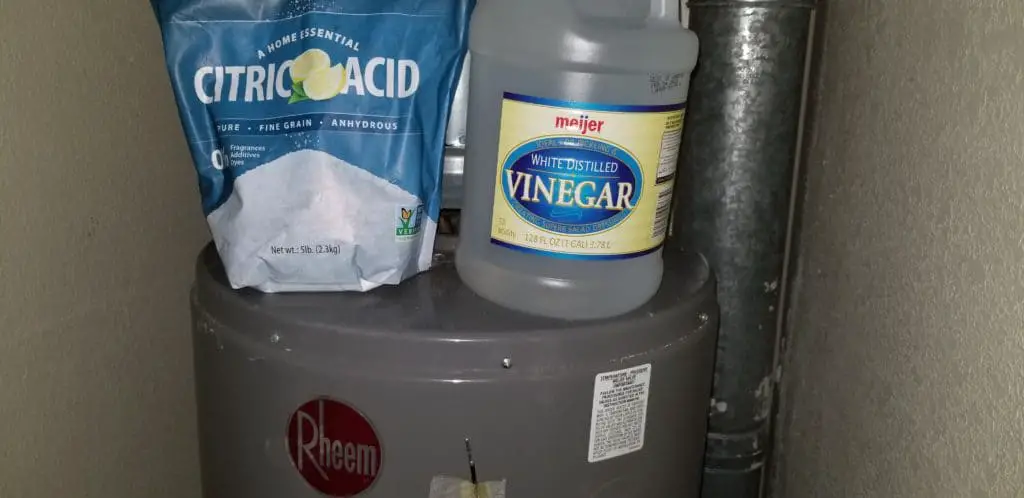
I have tried this before, and unless you have a week to let it work, I would not recommend it. If you are looking to get the job done in a single day then that will not be enough time to let the vinegar dissolve the calcium.
I once was leaving for vacation for 10 days and thought it would be a great idea to do this when I was gone. I removed the anode rod, drained about 3/4 of the water in the tank, and poured in about 10 gallons of vinegar. I had the water heater off and the cold water valve shut off as well.
What I failed to realize is that either my cold water valve failed or it also had some buildup in it as well. It had a steady drip to it that I wasn’t aware of.
When I returned from vacation, I found that my basement had flooded and smelled like vinegar, since that’s where the overflow was directed from upstairs.
If you do have calcium buildup, I wouldn’t blindly trust that your water shut off valve is working.
Also, if you do go with the vinegar route, make sure that when you drain your tank outside that you do not drain it on the grass. It will kill any plants that it touches and you will have a dead spot in your lawn for years.
