When I was taking my first steps at preparing for a power outage for my family, my first step was to find a solid DC/AC power inverter to use with my car battery to power some small lights and electronics.
I’d later get a battery backup system and generator, but it was a baby step in the right direction. Still, just having nothing but the inverter gave me such peace of mind as a parent to know that now I could have a couple lights, run the bottle warmer, and charge our cell phones.
It was my first inverter, and it probably won’t be the last, but I’ve learned some things about these handy tools that should be considered before you make the purchase. I’m going to take you through 7 things beginners should consider before buying and some tips and tricks for your first time using an inverter.
When choosing a power inverter, you’ll want to consider 7 primary factors:
1. Total watts that need to be supplied
2. Peak Watts vs. Running Watts
3. Digital Displays
4. USB Port importance
5. Are cables included?
6. True vs. Modified Sine Wave Requirements of your devices
7. Built-in attachment or mounting options
Before we start, I’ll just briefly explain what a DC/AC power inverter is just in case it is unclear. Car starting batteries, marine batteries and golf cart batteries all supply power with Direct Current (DC). However, the household items that we use every day have their power supplied by Alternating Current (AC).
A power inverter is simply a small box-looking gadget that clamps onto the terminals of a battery and inverts the DC power into AC power. A normal cord is plugged into the inverter and power is supplied to whatever is attached to that cord.
With that being said, it seems pretty straightforward when it comes to buying one, right? Somewhat, but let’s touch on 7 things you’ll want to keep in mind and consider before you make a purchase.
1. Wattage
Before you invest in an inverter for your needs, you’re going to want to know a rough estimate of how much power you’re going to need from it. We will calculate this by adding up watts. I’m not going to get into a math lesson because that doesn’t interest me at all either. I like to keep things simple and practical.
Inverters come in various sizes, ranging from 100 to 800 watts, and 1,000 to over 10,000 watts and everything in between. For most applications, if you’re just getting started and are not looking to make a massive battery setup that consists of dozens of 6 or 12-volt batteries, then anything under 2,000 watts will probably be the norm. I am completely happy with the two inverters that I currently use and they are 800 watts and a 400 watts.
If you aren’t sure how much power you’ll need, you just need to find the stickers that are located behind, underneath or on the plugs of what you plan on powering. If it gives values for input or output, you are calculating the input (what is needed to flow into the plug to make the unit work).
Keep in mind this formula: Volts x Amps = Watts. So, for example, if your charger for your device says “Input 100-240V 0.15A”, then what it is saying is that the plug can function as long as your wall socket gives it anywhere from 100-240 volts and that it will be at .15Amps. Since most wall sockets in the United States are going to supply volts at 120 at your wall socket, our formula would be 120 x .15 = 18 Watts.
So, you will need an inverter that can supply at least 18 watts to power your device. You’re in luck because the smallest one you can readily buy will be able to handle that!
Just add up all of your watts for all of our devices, or get an average amount that you’ll be using at one time and proceed.
Final note: There’s a difference between running watts and starting watts. Some appliances (especially those with their own pumps and motors) have an initial starting wattage that may be anywhere from 2-10x higher than their running watts. So if you were looking to power a 150-watt fan with a 200-watt inverter, but the fan has a start-up load of 600 watts, then your inverter might not be rated to reach that high.
2. Running vs. Peak Watts
It’s a natural inclination to think that if an inverter is advertised as being 800 watts, that it can power your devices without a problem up to that amount. This is actually not the case. Companies advertise their inverters based on their peak outputs, not the output that the inverter is designed to support over the long-haul.
When many appliances startup from the off position, they need a surge of energy that is sometimes 2-3 times what they normally run at when in continuous use. Your inverter should have a running watt rating and some peak wattage ratings for different durations.
What does this mean for your purchase? Consider my 800 watt Duracell inverter. It is not rated to supply 800 watts for any significant amount of time. I’m sure it could be pushed for a minute or so at 800 watts, 1,280 watts for a few second surge or power, but it is only rated to supply a continuous wattage of 640 watts for the long term. This means that I’m actually operating with about 20% less than was advertised at first glance.
If I intend on running 700 watts for a few hours at a time, I am going to need to size up to at least a 1,000 watt inverter.
A good rule of thumb is to get your average watt usage and add another 20-25% to that to get the inverter size that you should purchase.
3. Display
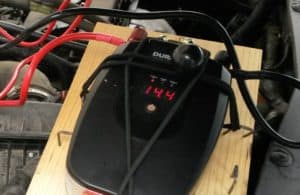
If you can, I recommend buying an inverter with an LCD display that will tell you the current state of the battery as well as the power draw from the cord that’s plugged into the inverter. It just makes like so much easier when you’re already a bit stressed about the power being out. Now you can easily monitor the drain on your battery and know when to call it quits or restart your car to let the alternator give it some juice.
4. USB Outlets
Similar to the one above – if you can get one with USB outlets, why not do it? It’s just one more place to plug your phone, power banks, or other devices into. It’s not a deal breaker to not get one, but it’s handy to have.
5. Cables
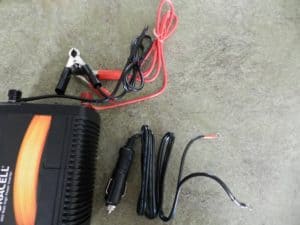
Before you purchase, make sure that the inverter that you decide on has cables included. Some do not. If this is the case you’ll need to buy some separately, make your own, or simply choose another model or brand. I like to keep it as simple as possible and I only buy inverters with supplied cables.
6. True vs. Modified Sine Wave
I’m not going to get deeply involved in this it gets too scientific to keep my interest. However, what I have learned is that True Sine Wave inverters supply current from your battery to your devices in a cleaner and reliable fashion that is similar to what your wall sockets normally provide.
Modified Sine Wave Inverters are less than perfect but still completely functional for most things. I have researched that True Sine Wave Inverters are preferred for items that have a motor and digital LCD displays (a fridge and digital clock, for example) and that a Modified Sine Wave Inverter could damage them or could cause poorer performance with prolonged use.
Modified Sine Wave Inverters will cost significantly less money than their counterpart. My two inverters are modified sine wave. I have not seen a problem when I run a medium size flat screen television off of it. I also don’t attempt to run my refrigerator.
7. Can my inverter be fastened down?
Some inverters like my two Duracell brand ones do not have a means to screw them down to something to keep them from moving. This is unfortunate since it is best practice to screw your inverter down to a scrap board that is a little wider in both dimensions as your inverter to keep a safe barrier between the inverter and your car engine (if that’s where you intend to use your inverter).
If I make another purchase, I will be getting one that can be screwed down. The contraptions I’ve made in the past to temporarily fasten my inverter to a board have been tedious in the past and I won’t make the same mistake again. It’s a shame though since I’ve been very pleased with the Duracell performance.
I’ve recently discovered the joy of using Velcro to secure my power inverters to surfaces. My love for my Duracell inverters remains intact!
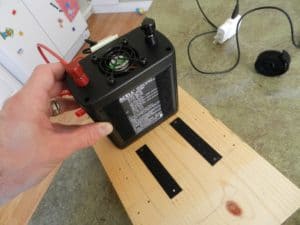
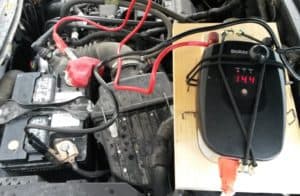
Then again, if you’re only going to be using your inverter indoors with a dedicated battery backup system, then this might not be a big deal for you.
Bonus Tips and Tricks for First-time Users:
- When using the inverter with your car and it comes with a cigarette lighter plug, remember that it maxes out at 150 watts. If you try to draw more you’ll likely blow a fuse. It doesn’t matter that your inverter is rated for 400 watts, the plug can only supply 150 watts. Anything more than 150 watts and you’ll want to hook the inverter directly to the battery.
- Fasten the inverter down to a board when using under the hood of a car. This protects it from the heat from the engine, gives it something more stable to sit on, and most importantly it makes it harder for the inverter to fall into the engine area and touch something with the wires – causing a short and frying your inverter!
- Tighten everything! Loose cables cause less power to be sent downstream to what you’re trying to power and cause excess heat on the inverter unit. If the unit gets too hot it can fry it.
- Don’t use the alligator clamps if it’s a permanent setup. If you’re just using it to hook up to your car in a power outage, the alligator clamps should be just fine. Ideally, if you’re going to be using your inverter on a battery bank and leave it there full time, you’ll want to fasten the cords permanently using the cords that have flat, washer style fittings that you ring around the battery terminal bolts.
- Don’t get exposed wires near each other – make sure the ends of your cords are in good order. Nothing loose. I do not let the positive and negative cords near each other when in use at all!
- Rain – you’ll want to pull the car hood under the garage door if you have heavy precipitation and let the exhaust pump outside. An inverter is an electronic, and electronics get sad and make you curse when they get wet.
My Recommendation
Buying an inverter isn’t the most stressful purchase in the world, but there are a lot of small factors to consider for making sure the model you choose will meet your needs and applications.
My biggest recommendation is to choose something between 800-1,500 watts and to purchase a smaller backup one as well – preferably a 400 watt. Many 400-watt inverters have different cords and can hook directly to your battery or plug directly into a cigarette lighter, so its applications when traveling give it an advantage. Having two inverters ensures that you should always have some form of power since you never know if one is going to fail on you when you need it most.
