Let’s get straight to the point! You’ve got a leaking spigot or hose connection and want it fixed. Let’s narrow down what type of spigot you have, where it’s leaking from, and the most common fix for it.
As a general rule, an outdoor spigot will leak due to fittings that aren’t tightened properly, a worn out bonnet packing, a worn out anti-siphon plunger, or worn out valve seats and check valves. The location of the leak on the bib and the type of spigot you have (anti-siphon vs. inline) will determine the correct repair.
I’ve got a table below to help you identify what you will need to do, a video tutorial with time stamps a few sections down that will take you right to your fix, and a step-by-step written explanation below that as well. Enjoy!
| Type of Spigot | Problem | Repair |
|---|---|---|
| Anti-Siphon | *Leak at nozzle when off | Replace valve seat rubber and check valve rubber (handle must be removed and the long rod that extends into the house removed as well) |
| Anti-Siphon | Leak from the top | Replace anti-siphon plunger and its plastic housing |
| Anti-Siphon | *Leak from valve stem | Tighten packing nut under the handle, or replace rubber packing washer if problem persists |
| Anti-Siphon | Won’t turn on in the spring after winter | Tighten screw holding the handle to the spigot |
| Inline | *Leak at faucet when off | Replace rubber washer above the seat at the base of the stem (handle must be removed, use caution with screw at the base of the valve stem) |
| Inline | *Leak from below the handle | Tighten bonnet under the handle, and replace rubber packing under bonnet if it still leaks |
| Anti-Siphon or Inline | Leaking from threads at hose connection while hose is turned on | Replace rubber or nylon washer in the hose end |
What Type of Spigot Do I have?
Generally, you will have one of two types of spigots:
- Anti-siphon
- Inline


What is an Anti-Siphon Spigot and How to Identify
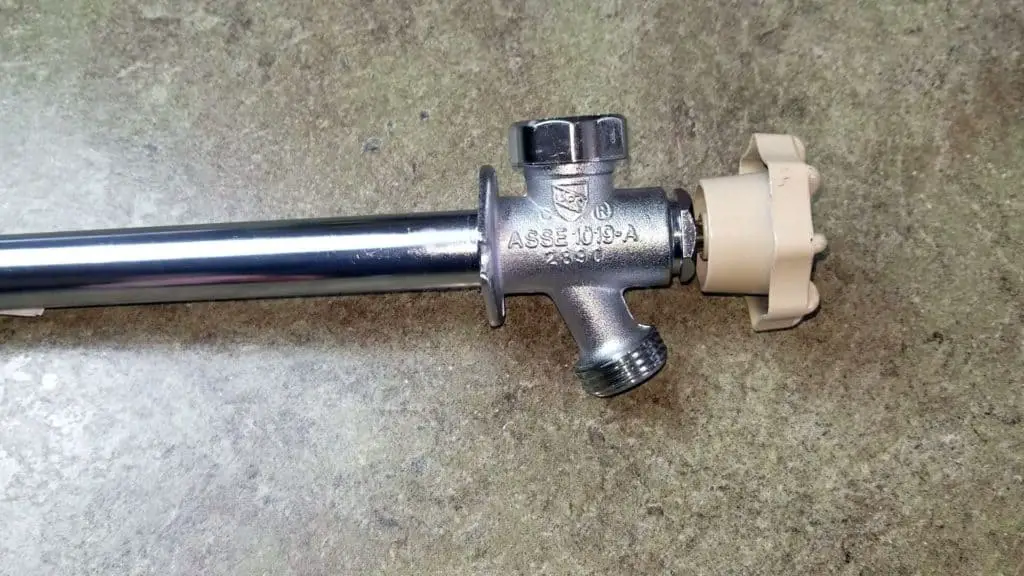
Anti siphon spigots are commonly used in locations where temperatures stay below freezing during the winter months. They are more than just the spigot that you see from the exterior of the home and actually have a tube with a rod inside that goes into your house and extends beyond the insulation. At the end of the rod (inside your home) is where the water actually turns on and off when you operate the handle outside.
Because the water in the pipes is inside the house, it isn’t exposed to freezing temperatures and your pipes are safe from freezing (assuming you didn’t leave the hose hooked up and pressurized) during the winter.
These spigots can be identified by having a handle that is usually perpendicular to the ground (it faces straight out instead of being on top or at a 45 degree), and it will have a hump on the top of the spigot where there is usually a plastic cap.
This is the anti-siphon valve that keeps water from getting sucked back into your home’s plumbing. Not a huge deal if it were to happen with hose water, but if you had a fertilizer dispense hooked up to your hose it could be disastrous!
You can also go in your crawlspace or basement and trace the line connecting to the spigot. If you see a connection point a few inches into your home, then you know it’s an anti-siphon spigot.

What is an Inline Spigot and How to Identify
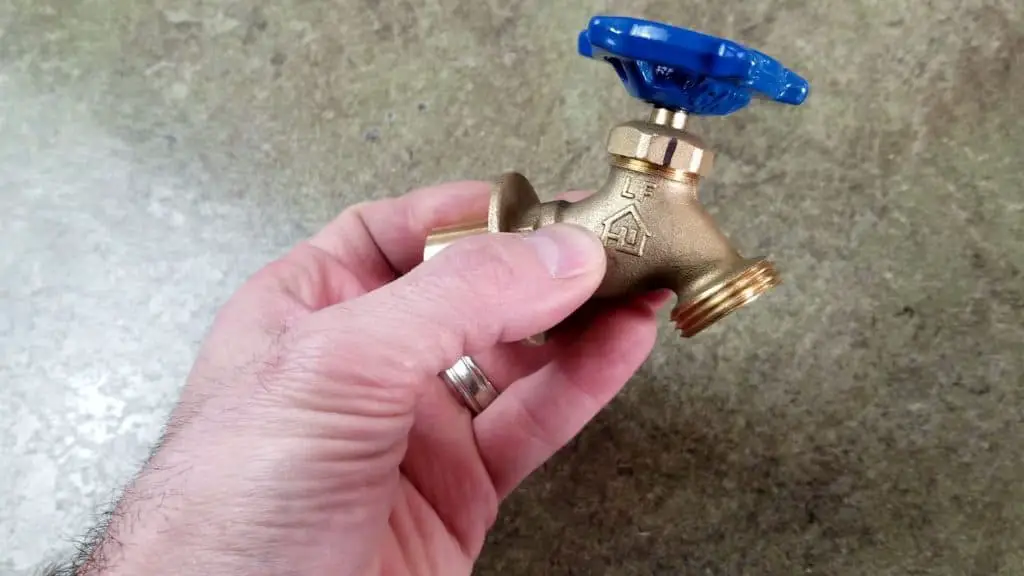
Inline spigots have water that flows right to the handle itself and and can freeze and crack your pipes in the winter if you don’t winterize your lines.
They generally have a handle on the top or on a 45 degree and are as basic as you can get for a spigot setup. Repairs are much simpler and less involved with these models, but they do not provide the protection that an anti-siphon spigot provides with contaminated water or freezing temperatures.
How to Fix Spigot Leaks
Below is a video I made that covers the following repair methods. I have the the timestamps below the video for your convenience.
Time stamps to your particular repair in the video tutorial:
- 00:05 Inline Spigot leaking from valve stem (handle) — Turn off water supply to spigot beforehand!
- 02:43 Inline Spigot leaking from spout when off — Turn off water supply to spigot beforehand!
- 03:43 Anti-Siphon bib leaking from valve stem (handle) — Turn off water supply to spigot beforehand!
- 05:33 Anti-Siphon bib leaking from top (vacuum break)
- 6:35 Anti-Siphon leaking from spout when off — Turn off water supply to spigot beforehand!
- 09:36 Inline or Anti-Siphon leaking from hose connection
1.) Anti Siphon Spigot Leaks at Nozzle When Turned Off
This is the most involved fix of all of the ones in this article, so let’s get it out of the way first.
Turn off the water line in your basement that leads to the spigot. Remove the screw that holds the handle on and twist off the packing nut with some pliers or channel locks.
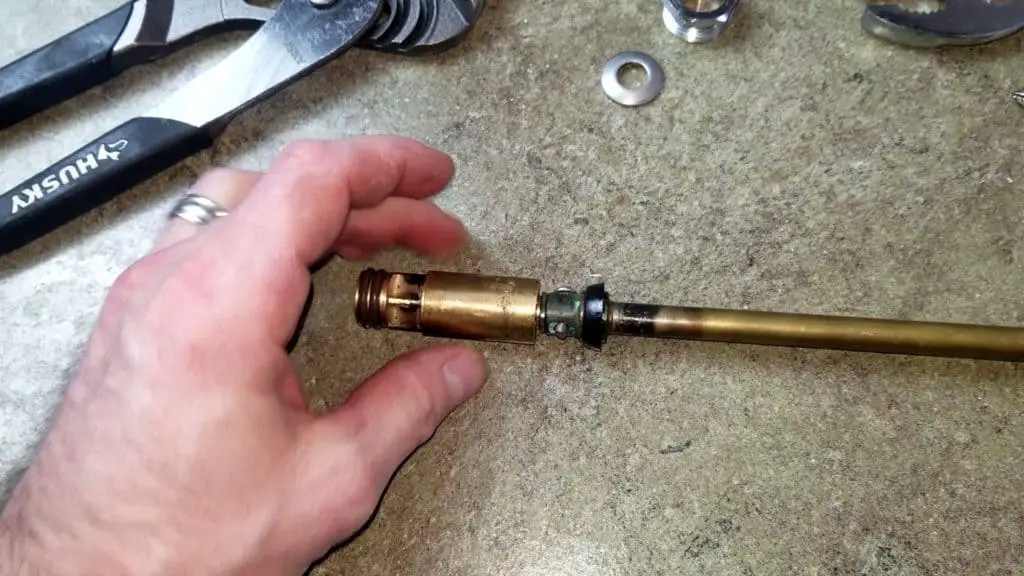
Put the handle back onto the stem to turn counter clockwise and this will draw out the packing washer. Remove the packing washer and the brass washer as well as you pull out the entire rod assembly — it will be a foot in length, or longer depending on your model.
At the end of the rod will be two rubber pieces that need to be replaced. The first is the rubber seat at the very tip. Use caution so you don’t strip the screw, but the screw must be removed at the end to replace the rubber seat.
Slide down and replace the check valve rubber as well.
Put everything back in reverse order, turn on your water, and you’ll be ready to rock!
Before we wrap this up, I feel like I should mention that there are various types of valve stems for anti-siphon hose bibs.
There are very common “quarter turn” styles that have a cartridge attached to the end. This can be removed and replaced by simply removing a single screw.
If yours has a cartridge and is leaking at the nozzle when turned off, go ahead and check for any missing or damaged o-rings on the cartridge, and replace the check valve rubber as well. If it still leaks after doing that, you are welcome to take the cartridge apart and try to fix it, or you can simply replace it.
They’re not complicated, but they do have a lot of small pieces and springs. They’re made of plastic and if it gets brittle, damage could occur.
I recommend just looking up your make and model and replacing.
2.) Anti Siphon Spigot Leaks from the Top
For this repair, you don’t have to turn off the water line. Just make sure the spigot is turned off.
Use a screwdriver to pry off the anti-siphon cap at the top of the spigot. There will be a clear or white plastic housing in there with a rubber plunger inside. Both should be replaced. Just unscrew it with a pair of channel locks and be careful since it is plastic.
Here are some universal repair kits on Amazon that works for most anti-siphon spigots.
3.) Anti Siphon Spigot Leaks from the Handle
You can often fix this issue by simply tightening the packing nut that sits beneath the handle with a pair of channel locks. If this doesn’t fix the problem, then you will need to replace the rubber packing nut inside.
Turn off the waterline in your basement that leads to the spigot.
Remove the screw holding the handle on, remove the handle, and remove the packing nut with channel locks. Place the handle back on the stem and turn counter clockwise to draw out the packing nut. Remove and replace.
Again, this kit from Amazon should work for most anti-siphon spigots and will have all the parts you need for various repairs.
4.) Anti Siphon Spigot Won’t Turn on in the Spring
I have this happen every year it seems and the fix for me has been incredibly easy. Simply tighten the screw that holds the handle onto the spigot. It loosens up just enough to not engage the rod assembly inside even though it feels like its twisting it. Hopefully you’ll have the same easy fix!
5.) Inline Spigot Leaking from the Handle
If your spigot is leaking beneath the handle around the valve stem, try to first tighten the bonnet or packing nut below the handle with a pair of channel locks. This will solve the problem half of the time.
If this does not work, you will need to replace the rubber bonnet packing material beneath the bonnet. Make sure you turn your water off first that leads the the spigot!
Use a pair of channel locks to loosen the bonnet. It is what holds your handle and valve stem onto the spigot. Remove the handle/stem assembly.
Remove the nut or screw that holds the handle onto the stem and remove the handle. Lift off the bonnet and you can now replace the rubber bonnet packing material.
This 45 piece kit from Amazon is sure to have something that will fit spigot and will be handy to have around for other repairs in the future.
6.) Inline Spigot Leaking from the Nozzle
If your spigot is leaking from the nozzle when off, then the rubber seat is not sealing properly when the handle is tightened down.
Again, you’ll need to turn off the water in your basement that leads to the spigot. Loosen the bonnet under the handle and lift out the handle and valve stem assembly.
At the bottom of the valve stem is a screw that holds on a rubber seat that’s shaped like a donut.
Be VERY careful when removing the screw, since it is already soft (brass) and is likely being held in place by corrosion.
Replace the rubber seat and perform everything in the reverse order.
This same 45 piece kit from Amazon should have a rubber seat that will fit your spigot’s needs.
7.) Anti Siphon OR Inline Leaking from Threads at Hose Connection
This is a very simple fix as well. If you turn on your hose and it is spraying water where it connects to the spigot (or at the other end where you attach something), then all you need to do it turn off the spigot. Then spray the hose to relieve any pressure in the line.
Unscrew the hose where it’s leaking and replace the nylon or rubber washer that is in there. If you don’t see one, then that is definitely your problem because there needs to be one there to make it watertight.
You can find an inexpensive big bag here on Amazon that should last a lifetime!
