Let’s face it, most of us love our coffee. Some of us NEED our coffee. If the world were to plunge into darkness and chaos tomorrow, many of us wouldn’t have time for it until we got our fix.
I fall into the “love” category since I do not drink caffeine, but I still love a hot cup of decaf in the morning — or as I call it: Murky Sadness Water.
What are we to do to “get our bean on” if a drunk driver plays slalom with the telephone poles and loses, or if a winter ice storm knocks out power and keeps us inside for a few days?
If you’re willing to think outside the box a little bit and have a few preparations on hand, you won’t have to go without your precious cup o’ Joe, and you’ll probably have a little fun making your coffee in a “MacGyver like” fashion.
Let’s quickly talk about heating water without an outlet to plug into and we’ll get the list started with the list!
Heating water
Face it, if you can’t heat up water to a sufficient temperature, you will not achieve a proper cup of coffee. We are looking at reaching 205 degrees Fahrenheit since that is the ideal temp for brewing, and keep in mind that boiling water (212 degrees) ruins coffee grounds. A food thermometer is handy when you’re at home and making coffee on the fly.
For practical purposes, in order to heat water, you will need an open flame or an alternate source of electricity.
The power is out, right? That’s where a DC/AC power inverter and your car battery can come into play and we’ll get to that in the first method.
Open flame? If you are blessed with a propane or natural gas stove you just need a match to start them. If not, you can use a propane camp stove, a portable butane stove, or you can really tap into your outdoor persona by lighting up an alcohol camp stove or a wood burning collapsible stove outside.
Keep these methods in mind when I casually say later on to “add the hot water”. I don’t know which step will work best for you on any given application.
With any and all applications where you choose to use open-flame in your home, please use extreme caution and know that there is a real risk of carbon monoxide poisoning, noxious fumes, or house fires which can all be very deadly. Pay attention to all warning labels and instructions and use devices and tools accordingly. Of all of the open-flame methods, I discourage using alcohol-based stoves inside the most due to the soot and additives that are in many of the fuel sources that are readily available! However, all open flame methods can all be dangerous, especially if you’re in the habit of cooking with an electric stove!
To see a list of my recommended cooking devices during a power outage, you can check out the recommended resources tab up top.
1.) The baby bottle warmer method (Safest in my opinion if you don’t have a gas/propane stove in your home)
This is my method and I have not seen talked about anywhere, so I’ll let you in on a little secret! I used it one time, not during a power outage, but when traveling in the Upper Peninsula of Michigan and we stopped at a roadside park. The first time I did it was pretty crude, but I’ve refined it to make a delicious cup of coffee at home as well!
Travel (borrowing the method from #5 in the list below): What you’ll need to do this on the go for a quick and easy cup: an 18oz stainless steel Klean Kanteen; a baby bottle warmer (mine is “First Years” brand and uses 300 watts, seen here on Amazon); an 800-watt DC/AC power inverter (some 400-watt inverters will work as well); your car and its battery; extension cord; some water and coffee grounds (of course); a food thermometer (optional but awesome); a coffee filter and twist-tie; gloves.
Home: What you’ll need to do this at home for a better and more flavorful cup: an 18oz stainless steel Klean Kanteen; a baby bottle warmer; an 800 watt DC/AC power inverter; your car; extension cord; some water and coffee grounds; a small, fine-mesh strainer, a small ladle; a coffee mug; a food thermometer; and some oven mitts.
I know the lists seem exhaustive, but it will be well worth it for the final product. When you see how I explain this, I’m sure you’ll figure out ways to cut corners and make due with what you have on hand, AND you’ll be able to do this method when traveling as well!
I’ll describe the home method first. Afterward, I’ll touch on the quick and easy travel method.
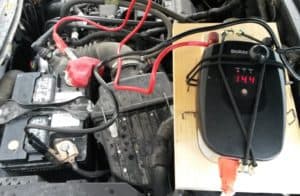
With your car running, simply hook up your 800-watt inverter to your car battery (not the cigarette lighter plug, it doesn’t have enough power!), power it on, plug an extension cord into it and run the cord to your baby bottle warmer.
Put in about 1/2” of water in the bottle warmer and put your Klean Kanteen in the bottle warmer. With the plastic rim removed, it is the PERFECT FIT for a bottle warmer. I put about 8-9 oz (halfway full) in the Klean Kanteen.
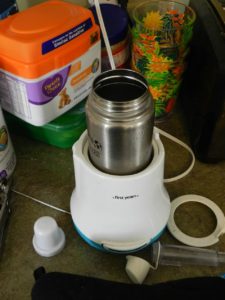
Start the warming process. This will take about 9-10 minutes total. Cover the water bottle with the lid to speed things up (but don’t twist it on!). You may need to add a little more water if it all evaporates. Use the gloves to lift the water bottle to add additional water.
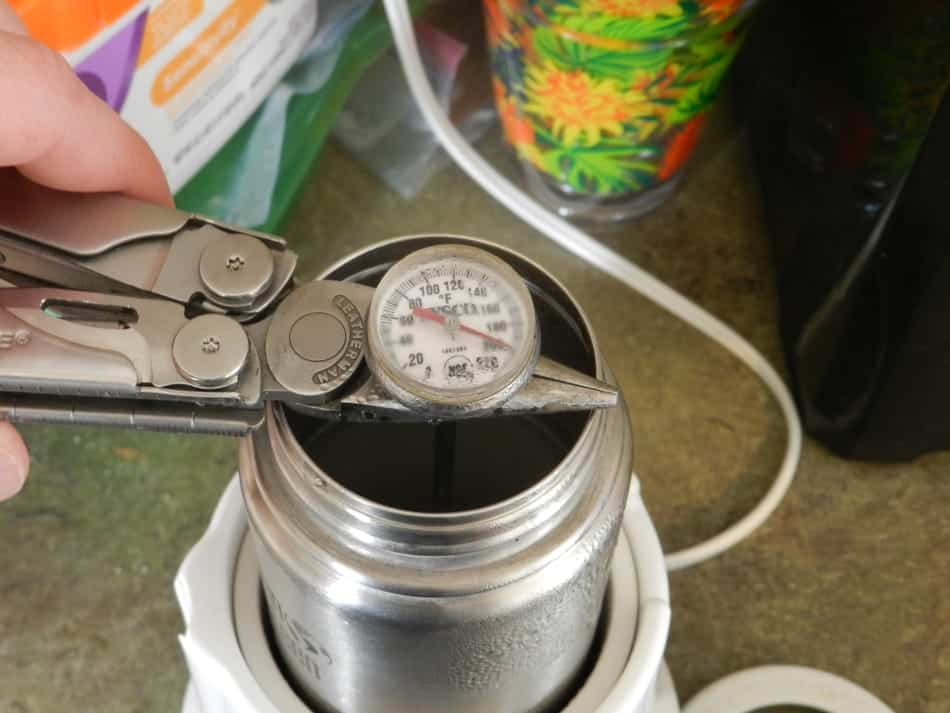
Use the cooking thermometer to check the temp. You’re trying to get 195-205 degrees Fahrenheit, which is the ideal temperature for coffee brewing. You can use a pair of pliers like I did in the picture to reduce the hot steam on your hand when checking the temperature.
You’re in luck with this method though because I conducted many tests and could not get water to boil from steaming the bottle. The hottest I could get it was about 207 degrees Fahrenheit, 5 degrees shy of boiling. Boiling water will ruin coffee, so you don’t have to worry about that!
When the desired temp is achieved, use the gloves to pick up the water bottle and pour the water in a slow trickle over the grounds that you have in the strainer resting above the coffee cup. Become that inner coffee maker you know you were meant to be!
Pour in enough water so that the grounds rise, and you’ll know the cup is full. Let it sit for the desired amount of time depending on how strong you like your coffee. I do about 5 minutes.
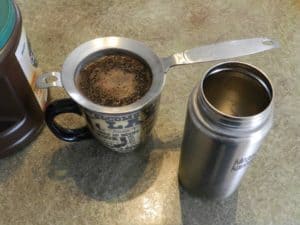
When that is done, I use the ladle to gently press the grounds against the mesh strainer to mimic a French press and release the last bit of oils from the coffee grounds.
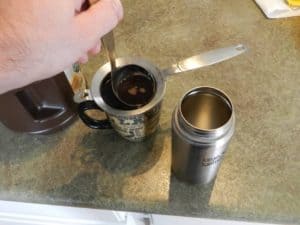
Remove the strainer and enjoy!
Why this method is great:
- You can heat water to a near boil (if you wish) without burning any fuels inside the home or having an open flame.
- The baby bottle warmer is easier on your inverter and car battery since it uses 300 watts (at least mine does), whereas a coffee maker uses 800-1000+.
Travel method: If you are looking to do the travel method for a quick cup, place your desired coffee grounds on a coffee filter and bring the edges up around the grounds. Twist-tie them together in order to make a “coffee tea bag”.
After you bring the water to the desired temperature, insert the “coffee tea bag” into the hot water and you can let it continue to heat in the bottle warmer for a few more minutes if you would like.
That’s it!
Keep in mind that your water bottle will now have a coffee aftertaste until you thoroughly wash it. You may prefer to mix and match the methods outlined in this article to get the coffee into a separate cup or container in order to preserve the taste of your water bottle.
2.) French Press
Personally, I love this method and I often make coffee this way even when times are good! It’s a little more intimate and you can really fine tune everything from the amount of coffee you use to the amount of time you let it steep and brew.
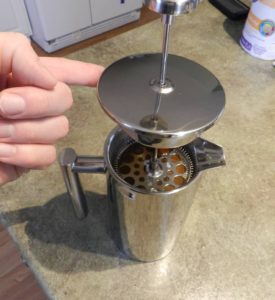
Just bring water up to about 205 degree Fahrenheit, and pour it into the French press with the desired amount of grounds on the bottom. Fill it to about an inch below the rim of the French press and let it steep.
When you have let it steep long enough, insert the filter with the rod, and gently press the coffee grounds to the bottom of the French press to release the last oils within the grounds.
Pour and enjoy!
3.) Paper towel or Cotton bandanna filter with a rubberband
With this method, take a paper towel or two and fold them a couple times. Pre-soak them and wring them out. Place over an empty mug and depress the center into the coffee mug a bit. Use a rubber band to hold the paper towel in place.
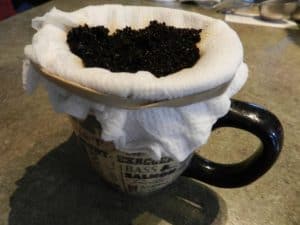
Add your coffee grounds into the paper towel, and slowly trickle in your hot water. When you have let it steep long enough, remove the rubber band, and envelop the coffee grounds with the paper towel. Gently but firmly squeeze the grounds to release any oils left in the coffee grounds into your cup.
Discard paper towel and enjoy!
4.) Tea kettle + existing coffee maker
This one is pretty straightforward. You are using your existing coffee maker except instead of the coffee maker trickling water on the coffee grounds, you will take over this job with hot water from a tea kettle. This method really saves on making a mess with anything since you’re using the items that you are normally used to.
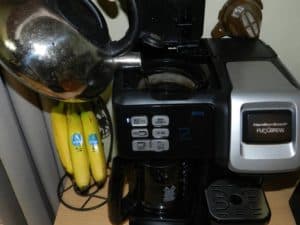
Just slowly pour the hot water over the grounds in the filter basin and the coffee will drain into the coffee pot below. The only issue with this method is that the unit will not keep the coffee pot hot. That’s why a carafe can be a great investment!
5.) Twist tie and a coffee filter or paper towel
I learned to do this method when traveling in Europe. It tends to make a weaker cup of coffee but is better than nothing when nothing is all you’ve got. Simply place some coffee grounds in a paper towel or coffee filter and use a twist tie to secure the grounds inside.
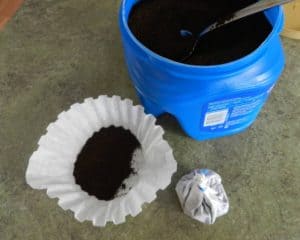
Basically you’re going to treat the coffee like a tea bag. You might be tempted to squeeze the coffee grounds when removing the filter, and I suppose you could if you pressed them against a fine-mesh strainer, but if you do it by hand you are likely to rupture the filter and the grounds will dump into your fresh java.
This method is great on the go and you can have lots of them pre-made and carry them in a small container. If you want a filter you can squeeze and that is reusable, just use a piece of cotton cloth.
I could have added an 8th method in this article by mentioning that you can just stock up on pre-made coffee packets that you can purchase from the store. It’s not a fun but it’s probably a lot easier for transport and convenience!
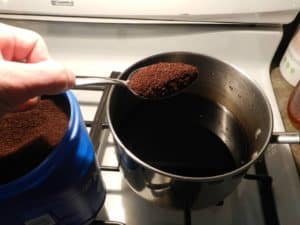
6.) Cowboy Coffee (Don’t tough it out. Use use a strainer! It’s your house, you’ve got nothing to prove!)
This method is simply getting water hot within a pot, and dumping the coffee grounds in the water. Fresh grounds will float, and after they have steeped they will sink. When they have all sunk and are to your liking, gently pour the water into a mug. If you do it properly you should avoid most of the coffee grounds. The last bit of coffee you’ll want to throw out since it will contain the bulk of the grounds.
7.) Suspend a reusable coffee maker filter in a pot of water
This method is a hybrid of the Cowboy Coffee method, in that it uses a part from an actual coffee maker of mine — the reusable filter! The filter has a bail on it which we use to suspend it in a pot of water.
Simply bring the water in the pot to the desired temperature, and lower the reusable filter in the pot of water and use a wooden spoon to run through the bail and rest on both sides of the pot.
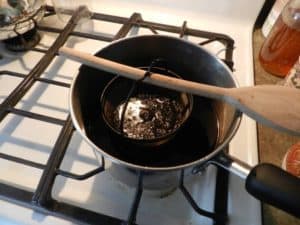
When it has steeped long enough, you can press the grounds gently against the filter to squeeze out the remaining oils in the grounds before you dispose of them.
There you go, 7 methods to make your daily cup of coffee when you don’t have an outlet to plug into. With a little imagination and a few tools in your toolbox, you can tackle this problem and turn it into a relaxing opportunity!
Mix and match the methods as well to make it work for you. Heat the water in the bottle warmer and then pour it into the french press, or just thrown a sealed filter of coffee grounds into the 18oz Klean Kanteen. Just don’t let something like a power outage or a long road trip in the middle of nowhere keep you from your java life-blood!
One last tip is to not worry too much about if you bring the water to a boil. Boiling water will not be good for a flavorful coffee, but if you remove the boiling water from the heat source for 30 seconds to a minute, it should be at the appropriate temperature.
Be sure to check out my resources pages up top where you can check out my water, cooking, and power inverters sections to see my tested recommendations that might help meet your needs too!
