If you have smelled an odor of gasoline in your garage and followed your nose to your generator, you’ll likely see that the source of the leak is around the carburetor.
The generator is a contraption that can be intimidating to anyone who hasn’t disassembled and reassembled one. When I got into small engine repair about 7 years ago as a side hobby, I was so confused by the carburetor and what everything did on it.
As a general rule, a generator’s carburetor will leak gas due to an improper seal between the float needle and the seat, damaged gaskets around or under the carburetor bowl, or the bolt at the bottom of the bowl is not tightened properly.
⬇⬇⬇ Here’s a list of symptoms, causes, and how to fix the top 6 most common reasons why your carburetor is leaking gas. ⬇⬇⬇
| Leaking Carburetor Symptom | Cause | How to Fix |
|---|---|---|
| Gas is leaking from the top of the bowl | Bolt at the bottom of the carburetor is not tightened properly, or bowl gasket is compromised | Ensure bottom bolt is tight; if leak continues turn off fuel valve, drain carburetor bowl from the angled drain bolt on the bowl, and remove bottom bolt to check and replace the bowl gasket if necessary |
| Gas is leaking from the bottom bolt | Bowl bolt gasket is damaged or not tightened properly | Tighten first; If leak continues turn off fuel valve, drain carburetor bowl, remove bowl bolt and replace gasket, tighten properly |
| Gas is leaking from drain bold (the angled one) on the bowl | Drain bolt gasket is damaged or not tightened properly | Tighten first; If leak continues turn off fuel valve, drain carburetor bowl, remove drain bolt and replace gasket, tighten properly |
| Gas is leaking from fuel line connections | Fuel lines are dry rotted and need to be replaced | Turn off fuel valve from gas tank, remove fuel lines, measure and replace with new ones |
| Gas is leaking from fuel shutoff solenoid | Not tightened properly | Tighten the solenoid connection to the bowl |
| Gas is leaking from the air filter, the throat of the carburetor, or there is gas in your oil | Float needle is not sealing properly with the seat | Shut off fuel valve, drain carburetor bowl, remove air filter assembly, take pictures of all linkages to the carburetor, remove the carburetor, remove bowl, remove float assembly, replace the rubber needle or seat, or clear debris from in between them |
The six primary reasons your generator is leaking gas are:
- Bowl Gasket is Cracked, Pinched, Split
- Drain Screw Gasket is Cracked, or Not Tightened Properly
- Bowl Bolt Gasket is Cracked, or Not Tightened Properly
- Fuel lines are Cracked
- Fuel shutoff solenoid is Leaking
- Float needle not seating properly (Fuel Leaking out of the Air Filter or Fuel in your Oil)
I will guide you through the 6 primary reasons that you might be finding fuel leaking around your generator and what you can do to fix them.
Before you focus all of your attention on the carburetor itself, dry everything with a rag first and verify that you do not have a leaky gas tank or a rotted fuel line at the gas tank. If this occurs, gas can run down the outside of the fuel line to the carburetor and throw you off course.
With that being said, let’s dive in!
⬇⬇⬇ Here’s a video I made to guide you through the common problem of why a carburetor leaks gas from the air filter (or throat of the carburetor) and how to fix it. I’ve had this happen to lots of small engines that I’ve repaired over the last 7 years. If your air filter smells of gas, or if your oil’s dipstick smells like gas, then this video is for you! ⬇⬇⬇
Bowl Gasket is Cracked, Pinched, or Split
Your carburetor is composed of an upper-half and lower-half. The lower-half is the bowl of your carburetor and between that and the upper-half is a thin rubber gasket that is supposed to create a leak-proof seal for the gasoline. Over time this gasket can become dried out, brittle and crack. Leaving ethanol-based fuel in your carburetor can also lead to the quicker deterioration of this gasket.
If you have disassembled and reassembled your carburetor, you may have pinched that gasket improperly at some point when joining the bowl back to the carburetor.
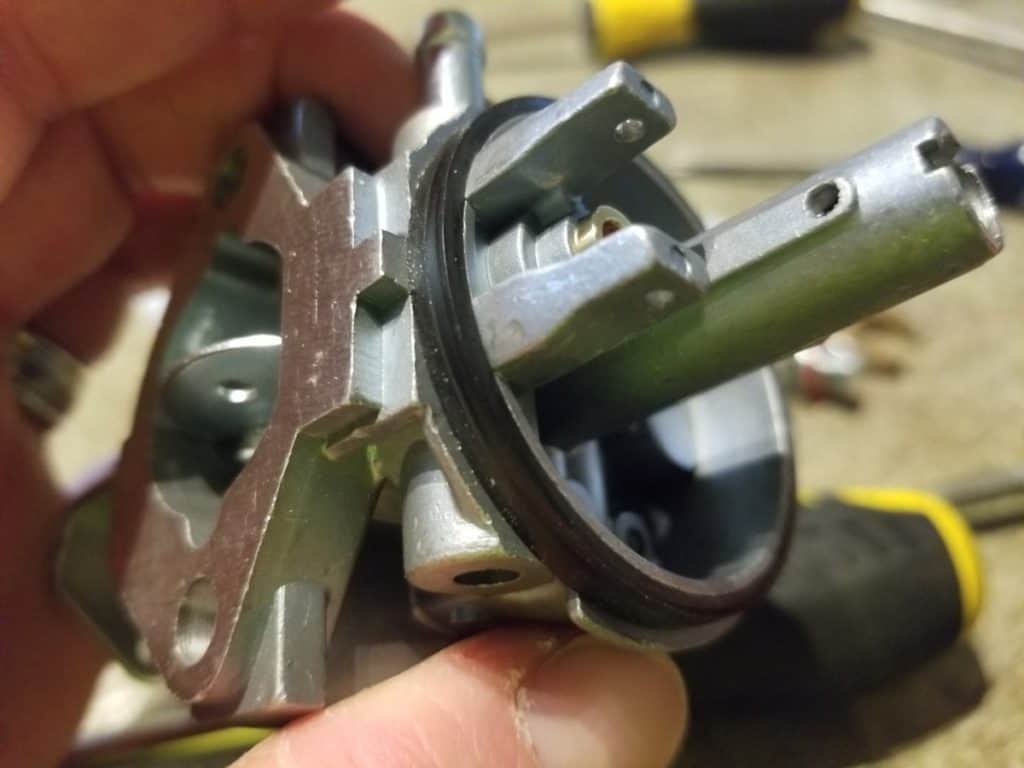
In either case, you will need to shut off the fuel shut off valve and find a suitable container to drain some fuel into. Grab a 10 mm wrench or socket and remove the main bolt which is located on the very bottom and center of the bowl.
With the bolt removed, gasoline will pour out until the bowl empties. It shouldn’t be much.
Once the gasoline is drained out, pull the bowl off and inspect the gasket. If it has any cracks, has dried out, is split, or has a permanent pinch in it then you will need to replace this gasket. Thankfully they’re not expensive. You might as well buy two while you’re at it and keep a spare one inside and out of the sun.
Drain Screw Gasket is Cracked, or Screw is Not Tightened Properly
If you see that there is a gas leak coming from the drain screw or bolt, the first thing you should do is take a 10 mm socket or wrench and verify that it is indeed tightened properly. Loosen it a turn and then tighten. It should not be over tightened as this will easily strip the threads (and cause a permanent leak) but it shouldn’t be loose either. Tighten it until it’s definitely snug and maybe go and 8th of a turn more.
The last time I repaired a snowblower at work, I left the drain bold about an 8th of a turn too loose and checked on it 2 days later to find a pool of gasoline underneath it. Take a lesson from me and always check your work after an hour for any leaks, no matter what repairs you’re making on the carburetor.
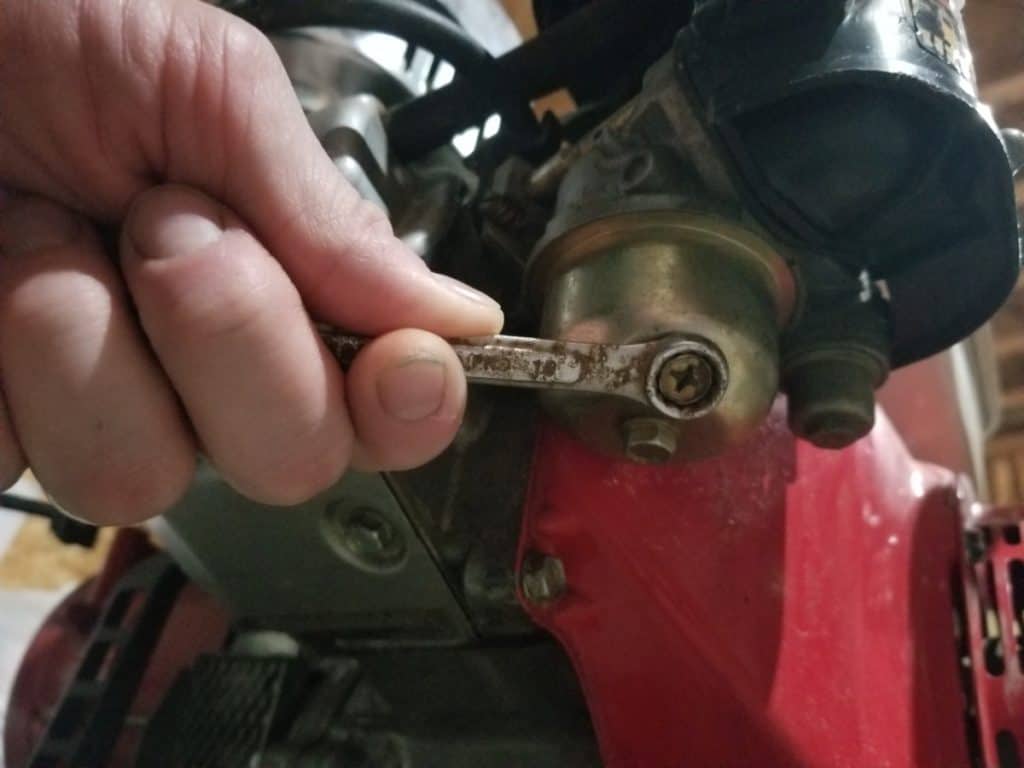
If you verified that the bolt is tightened properly, shut off the fuel valve, and place an appropriate container underneath the carburetor for catching gasoline. Use that 10 mm wrench or socket to remove the drain screw. Inspect the gasket which is usually made out of fibrous, cardboard-like material. Inspect it and make sure that it doesn’t have any tears. If it’s bad it will need to be replaced.
In a pinch, I’ve actually used a piece of a shoebox as a replacement on my snowblower (it happened to be the same relative thickness as the fiber washer/gasket. I just took the old one off, dried it, laid it on a shoebox lid, traced the outline and cut it out. This worked until I was able to get a replacement. Who knows how long it would have lasted.
You might also be able to use a plastic milk jug as your temporary replacement.
Bowl Bolt Gasket is Cracked or Not Tightened Properly
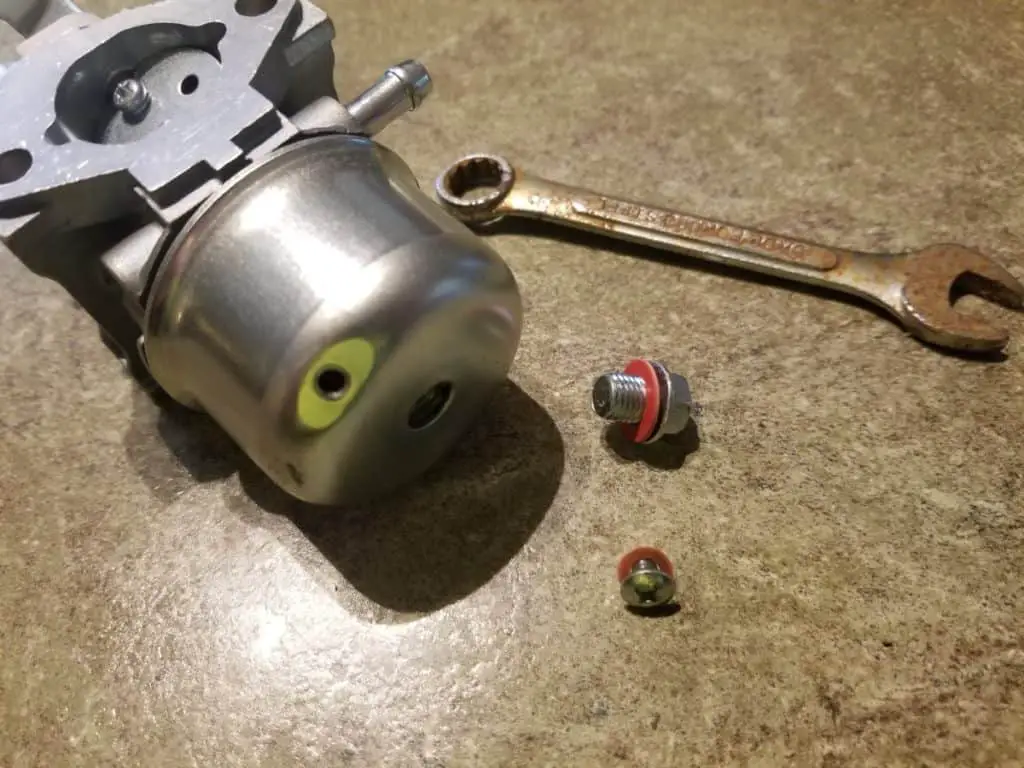
This one is similar to the one above. First, verify that the bolt is indeed tightened properly with a 10 mm wrench or socket. If it’s snug and then turned about and 8th of a turn more and still leaking then you need to drain out the gasoline in the bowl by shutting off the fuel valve and then use a 10 mm socket or wrench to remove the bolt at the bottom of the bowl.
Once the bolt is pulled out the gasoline will flow through the bottom and the bowl will likely stay in place if it had a good seal.
Check the integrity of a gasket which is often made of fibrous cardboard-like material. If it’s torn then replace it. And like I mentioned in the above step, you can dry off the damaged gasket, lay it on a piece of similar thickness cardboard (or milk jug), trace it, and cut it out as a replacement.
It’s still in your best interest to replace it with a proper gasket when you’re able to but don’t let a small leak like that stop you from having power in an emergency. Remember, the gasoline in the bowl is not pressurized.
Fuel Lines are Cracked
Fuel lines will become dry rot with time. This is especially true if you use ethanol-based fuel and let it sit in storage. They will often crack at the points where they join up to something as that is where the fuel lines are stretched slightly.
Investigate for any cracks and if you see them I recommend replacing all of your fuel lines at once if you have the time for it. With one cracked, the others are sure to follow.
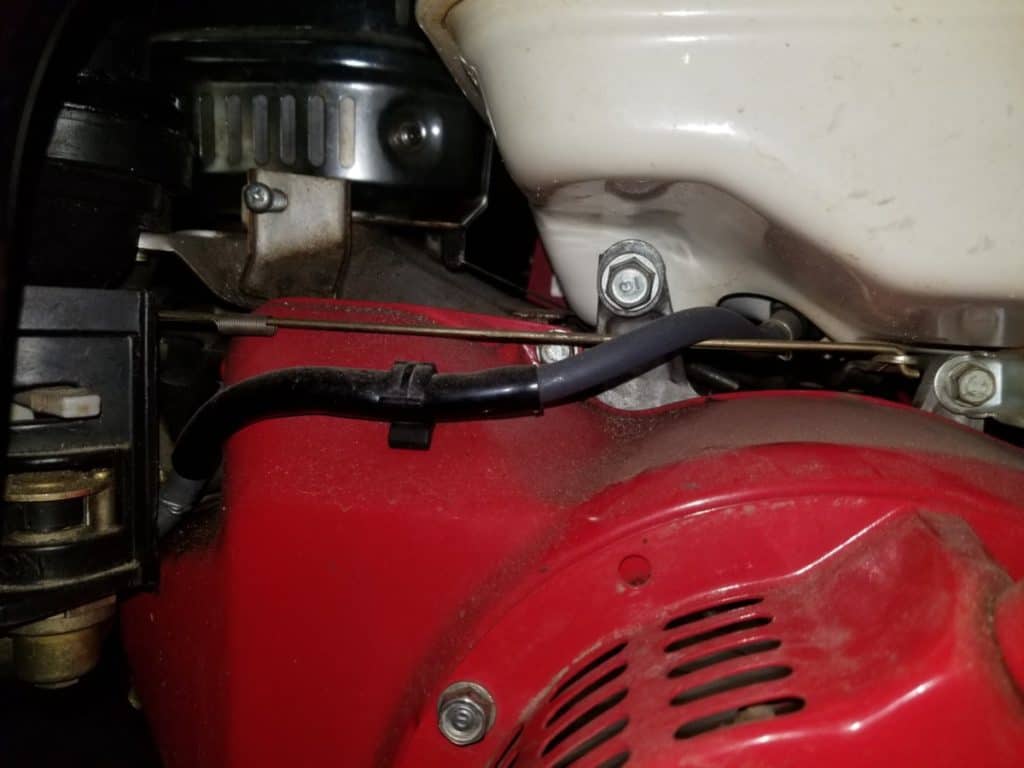
When doing this it’s probably easiest to drain out all of the fuel out of your tank if it hasn’t already leaked out already. You can use an inexpensive hand pump, like this one on Amazon, or simply open up the drain bolt on your carburetor and let the fuel run through the open fuel valve through the carburetor and into a container.
After that, remove the fuel lines from where they are connected with a flat head screwdriver and a pair of pliers if necessary. You can reuse all of the hose clamps that were on the fuel lines beforehand. Slide the hose clamp on the new fuel line first and move it up a few inches. Then press the fuel line onto the fuel stem, then use a pair of pliers to move the clamp back down and place it over where the fuel line connects to the stem to hold it in place.
Fuel Shut-off Solenoid is Leaking
If your generator is equipped with a carburetor that has a fuel shut-off solenoid, you might notice a gas leak at that location.
A fuel shutoff solenoid is attached to the bottom of the carburetor bowl and is activated by electricity passing through the wires which causes a magnet to retract a plug that blocks the fuel jet when the generator is running or go back in place with a spring when the engine is turned off.
This prevents after-firing if the generator were to be stopped abruptly under a heavy load. After-firing is caused when you abruptly stop an engine while under load and the crankshaft is still spinning (at 3,600 rpms and coasting to zero). This causes the combustion chamber to keep sucking in air and fuel at a rapid rate for a few seconds but doesn’t ignite it with the spark plug since the engine is off. The unburnt air and fuel mix is exhausted and combusts on the hot metal of your exhaust which creates a loud bang.
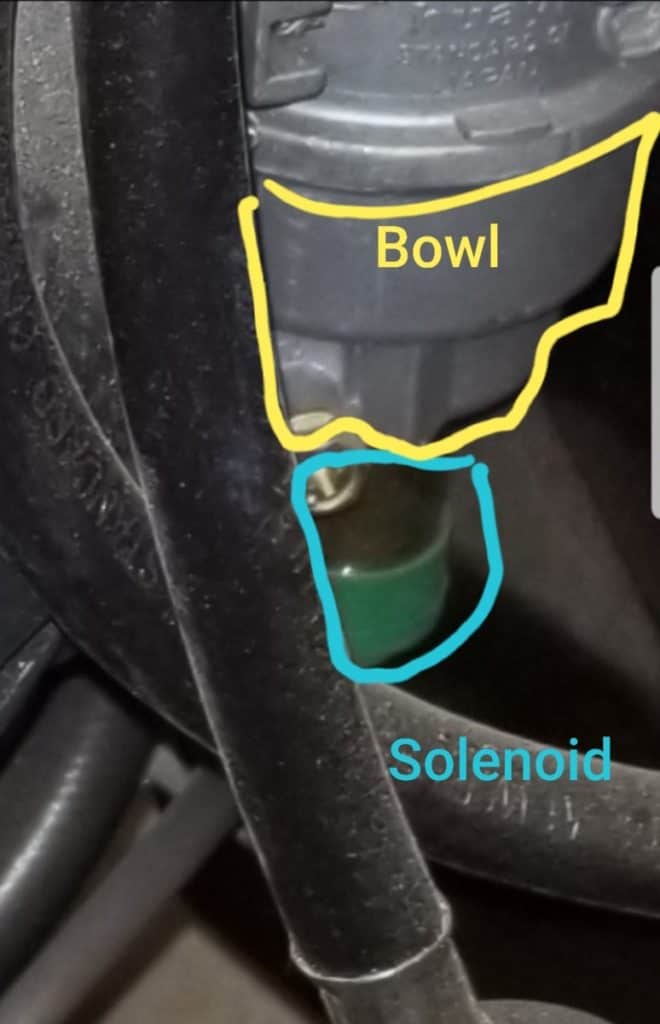
Typically, a fuel shutoff solenoid leaks at the gasket that is between the bottom of the bowl and the solenoid itself. In this case, you can replace it with a new gasket. Less common is a solenoid that is leaking from the bottom. If this is the case, you will need to have it replaced. It simply unscrews with an appropriately sized wrench and screws back in after detaching the wire connection above the carburetor.
Float Needle Not Seating Properly (Fuel Leaking Out of the Air Filter Assembly or Fuel Mixed in with Oil)
If you notice gasoline coming out of your air filter assembly or if you notice that when you check your oil it gushes out and/or smells like gasoline, then you have a float needle in your carburetor that is not seating properly to prevent unwanted gasoline from entering the carburetor.
Like water, or any other liquid for that matter, gasoline will try to seek its own level. When you have a fuel tank that is above the carburetor then the carburetor is gravity fed. The purpose of the float in the carburetor bowl is to raise up as the gasoline pours in and then close a needle valve when the float (level of gas) reaches a certain point.
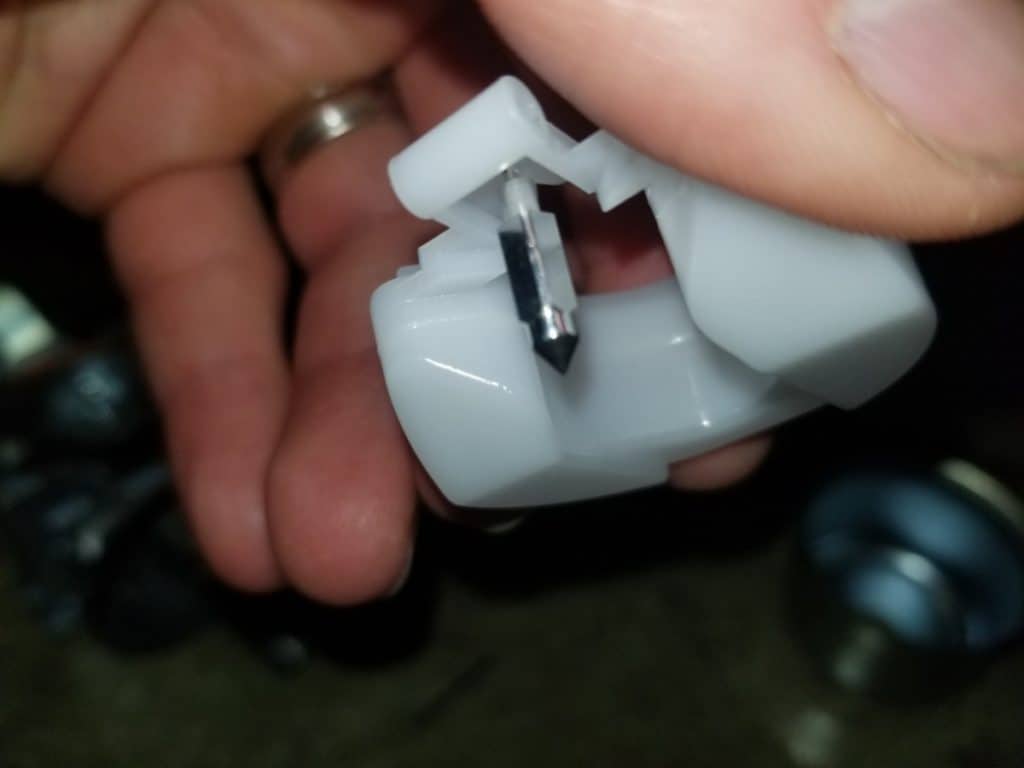
It’s the same concept as your toilet and is why the water tank above your toilet bowl doesn’t overflow as its being refilled after a flush.
If your float needle is not creating a perfect seal, then gasoline will continue to pour in. Since it will seek its own level (the level of the gas tank from which it came) it will fill the bowl of the carburetor completely. Then it will seep up the jets and orifices of the carburetor until it reaches the throat or venturi tube (where your choke and throttle butterfly valves are).
Once there, it will flow either out towards the air filter assembly or into your combustion chamber or both, depending on gravity and how level your generator is.
If gasoline enters the combustion chamber it will gradually seep past the rings on the piston and fall down into your crankcase where it will mix with your oil.
